How to convert text to speech in PowerPoint

How to convert text into speech in PowerPoint, Microsoft PowerPoint has integrated a text-to-speech feature called Speak. Here's how
Microsoft PowerPoint has a small feature in the Ribbon that you may not notice is called Set Transparent Color . This feature can erase a photo's background and turn it into a transparent photo. This tip is very useful if you want to create infographics in PowerPoint.
The Set Transparent Color feature in PowerPoint only works on inserted images, it does not work with images inside the shapes. If your image is inserted inside the Shape, the Set Transparent Color option will not light up to be selectable.
Note: The screenshot below is for Office for Mac , but you can do the same for theWindowsversion of Office .
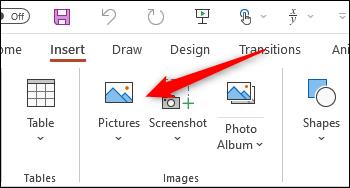
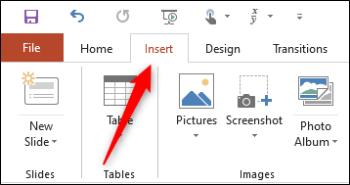
Select the image to edit, double click on it. The Picture Format property section will appear on the Ribbon.
Go to Picture Format > Color . Click the small arrow next to and select Set Transparent Color in the drop-down menu.
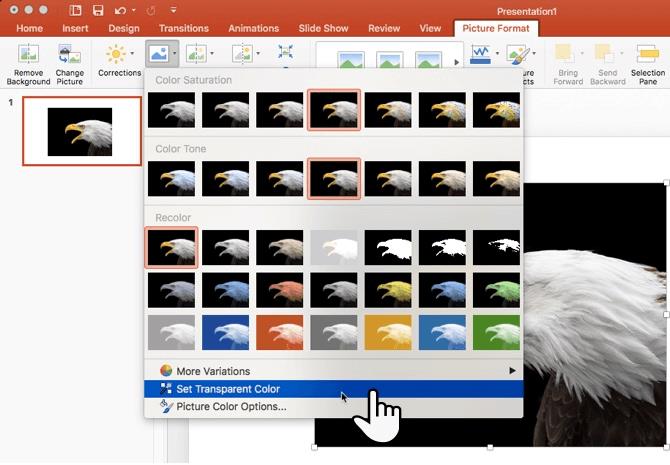
Create transparencies in PowerPoint 2016
At this point, the mouse cursor will change to another shape. Choose the color area in the image you want to turn transparent.
To restore the original image, simply click the Reset Picture icon in the same area.

The Set Transparent Color tool sometimes doesn't work perfectly. It is not exactly the same as the Eyedropper tool in Adobe Photoshop and you will encounter 2 problems as follows:
You will not be able to do anything if you encounter the first problem. But the second problem is a very straightforward solution - protect the area of the image that does not want to be transparent by drawing the shape area for it.
Use the Freeform tool to draw an image that masks the area of the image you want to keep transparent:
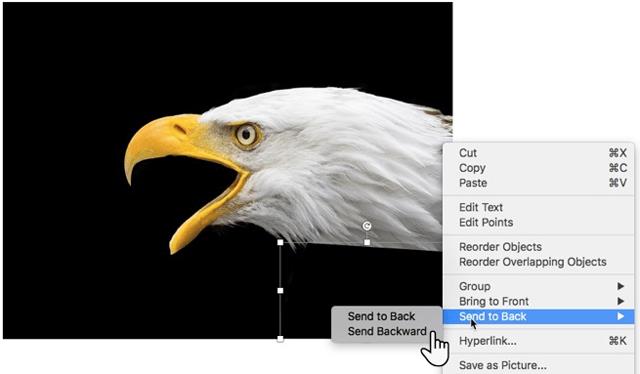
Fill this drawn Freeform area with the background color (black in this example) and move it to the back of the image but above the background. Right-click on this shape and choose Send to Back > Send Backward .
Then set the transparent color.
In older versions of PowerPoint, this Set Transparent Color feature only works on PNG and GIF images. However, you can now modify both PDF and JPEG files. And of course, the simpler the color, the better the results.
If in case you can not delete the background image in PowerPoint, then surely you need a more powerful tool, such as Photoshop for example. You can refer to the following articles to know how:
How to convert text into speech in PowerPoint, Microsoft PowerPoint has integrated a text-to-speech feature called Speak. Here's how
How to add or remove slide numbers in PowerPoint, PowerPoint slide numbering is useful in long presentations. Here's how to add and delete slide numbers in Microsoft
How to create a teaching module using Microsoft PowerPoint. You can absolutely create an online learning module easily using Microsoft PowerPoint. Below are step-by-step instructions
Learn PowerPoint - Lesson 21: How to use charts in PowerPoint, Do you know how to draw charts in PowerPoint? Let's learn everything with WebTech360
Learn PowerPoint - Lesson 11: How to create a list in Microsoft PowerPoint, Formatting PowerPoint content as a bulleted or numbered list will help the audience easily
Learn PowerPoint - Lesson 26: Editing the theme in Microsoft PowerPoint, Microsoft PowerPoint allows you to change the font as you like. If you don't know what to do,
Learn PowerPoint - Lesson 15: How to insert and edit shapes into Shapes in PowerPoint, Insert shapes - Shape is a great way to make presentations more interesting.
Learn PowerPoint - Lesson 12: Adjust margins and line spacing, Adjust margins and line spacing in PowerPoint are two important features that you can use to change the way you look.
How to add image captions in Microsoft PowerPoint, How to add captions to pictures in PowerPoint? The article will show you how to add image captions to PowerPoint
Learn PowerPoint - Lesson 28: How to insert links in Microsoft PowerPoint, You can insert links into PowerPoint easily. Here are instructions for inserting links in PowerPoint.
Learn PowerPoint - Lesson 23: Check spelling and grammar, PowerPoint also supports spelling and grammar checking similar to Word. Here's how to check
How to Create a Family Tree in Microsoft PowerPoint, You can create your own family tree in PowerPoint using one of several SmartArt graphic styles
Certainly PowerPoint has a lot of great features that many people have not been able to exploit.
You must have heard of the famous Microsoft PowerPoint presentation software list and used it before. But is the desktop version of PowerPoint 2016 worth using? Is there any difference compared to PowerPoint Online? Let's find hi with us
In the fast-moving digital landscape of the modern world, businesses can no longer afford to rely on systems that are only strong in one area.
Looking to create engaging product demos in minutes? Look no further! This guide will introduce you to the best tool for the job.
Discover the latest updates in Zooper Widget for Android. Zooper Widget is a compact, highly customizable, and battery-friendly widget with endless possibilities.
Lipp for iOS, alongside Dubsmash and Musical.ly, provides iPhone and iPad users with a new platform to create lip sync videos and dub videos readily.
Learn how to share audio using TeamViewer, including the latest updates for 2024 and 2025, making remote communication more effective.
Learn the latest tips on how to pet a cat in Adorable Home for optimal gameplay in 2024 and 2025. Discover what positions give you hearts.
Explore the latest features of OrangeHRM Open Source, a free HR management system tailored to meet evolving business needs in 2024 and 2025.
Fix IDM not catching file download links. Discover solutions for downloading videos, music, and more with the latest IDM updates in 2024 and 2025.
Discover the latest version of The File Converter for Android, an application that converts various file formats efficiently.
Explore the latest features of Zalo Web, allowing users to chat and connect seamlessly on various browsers without installation.
PDF Password Remover is a powerful tool for removing passwords and restrictions from PDF files. Download the latest version for 2024 to experience enhanced features.
Step-by-step instructions to completely remove Internet Download Manager (IDM) from your system in 2024 and 2025. Learn to uninstall IDM effectively and cleanly.
Discover Mindjet MindManager, an innovative software that helps individuals and teams streamline their work processes through effective mind mapping and project management.
Su DoKu 2.0.0 is an advanced Sudoku game design software that captivates enthusiasts with its simplicity and functionality. Download now and challenge yourself with Sudoku puzzles.
Discover the new features of Google Photos for Android in 2024 and 2025, including faster backup and advanced search capabilities.


