Don't like the blurry screen when logging in on Windows 10/11? Then the instructions below will be useful for turning off and changing the login screen for Windows 10/11.
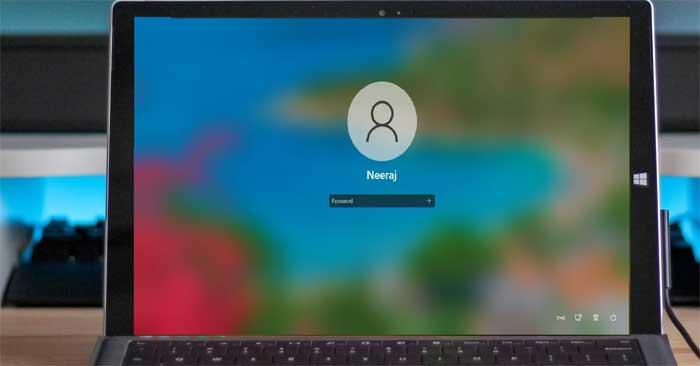
When logging into a Windows PC, the background of the login screen has a blurred effect, known as the Acrylic Blur effect, which is part of Microsoft's Fluent design system. This effect is enabled by default.
However, if you prefer a clear image on your login screen, you can easily turn off this effect. Furthermore, you can choose from various stunning default images provided by Windows Spotlight, or you can upload your own favorite picture.
How to Change the Windows 10/11 Login Screen
Methods to Modify the Login Screen
- Turn off Acrylic Blur effect in Settings
- Turn off the Acrylic Blur effect using Local Group Policy Editor
- Turn off dimming via Registry Editor
- Show favorite photos on the login screen
1. Turn off Acrylic Blur Effect in Settings
It's quite simple to turn off the login screen blur effect via Settings. Follow these steps:
- Press Win + I to open Settings and select Personalization.
- In the left panel of Windows 11 settings, click Personalization. Alternatively, you can right-click on the desktop and choose Personalize.
-
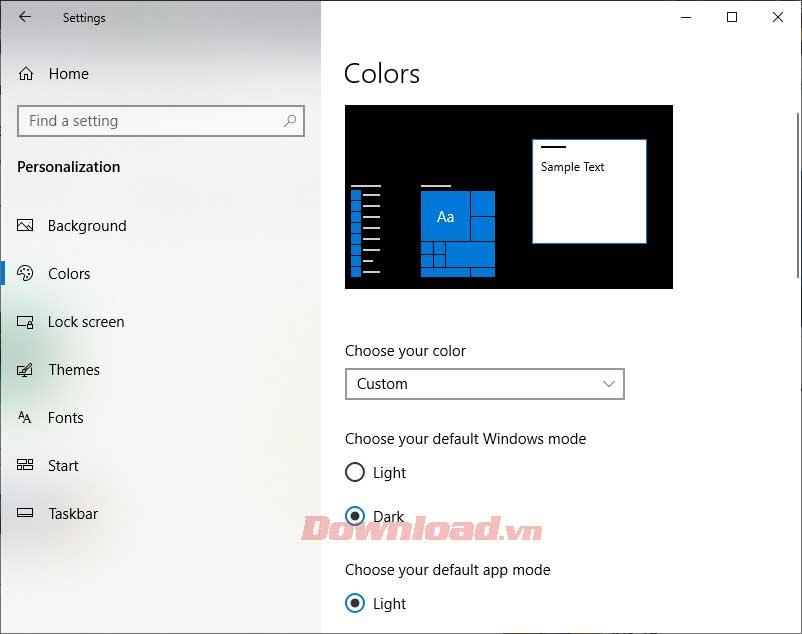
- Under Personalization, select Colors. In Windows 10, this can be found in the left panel, while in Windows 11, it is on the right.
- Disable Transparency effects in the Colors menu.
-
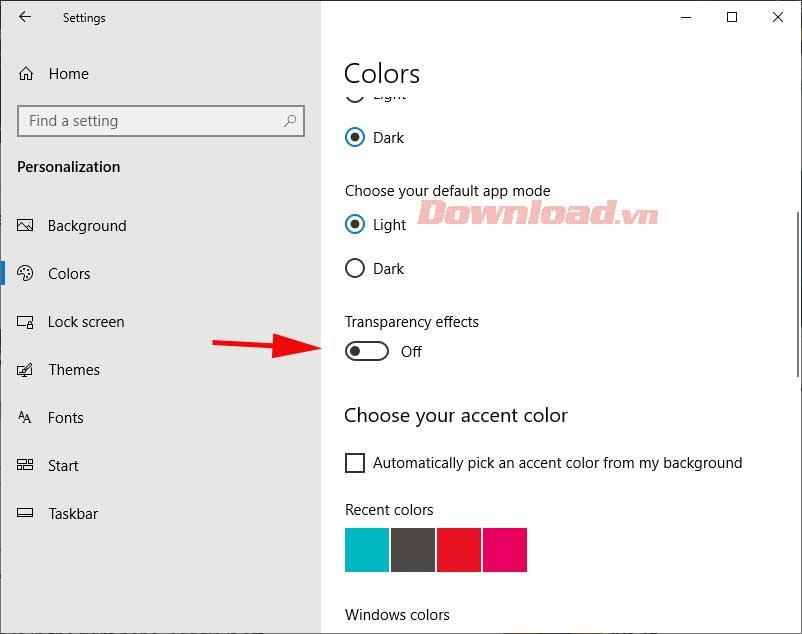
- Your login screen will now display without blur whenever you access it by pressing Win + L.
2. Turn off Acrylic Blur Effect Using Local Group Policy Editor
This option is available for Windows 10 Pro and Enterprise users only:
- Press Win + R, then type gpedit.msc and hit Enter.
-

- Navigate to Computer Configuration > Administrative Templates > System > Logon.
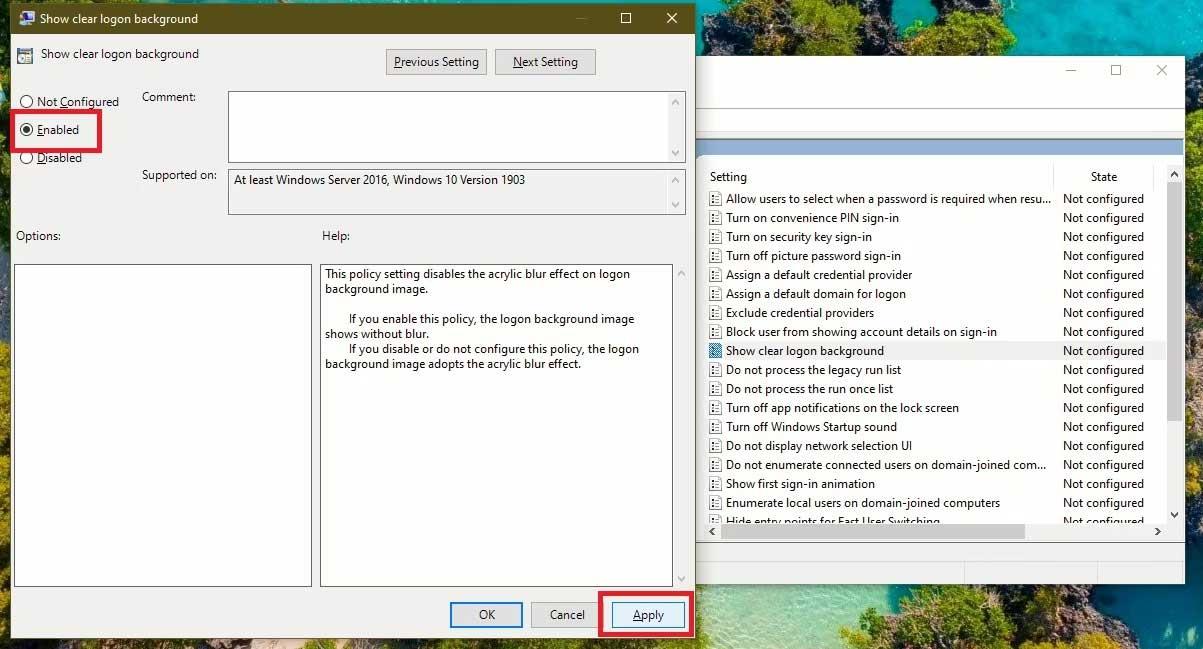
- In the right panel, find Show clear logon background and double-click it.
- Select Enabled and then click Apply followed by OK.
-
3. Turn Off Dimming via Registry Editor
Note: It's recommended to backup your registry before making changes.
- Open Run by pressing Win + R, type regedit, and press Enter.
- In the Registry Editor, navigate to HKEY_LOCAL_MACHINE > SOFTWARE > Policies > Microsoft > Windows.
- If the System key does not exist, create it.
- Right-click on the System key, select New > DWORD (32-bit) Value and name it DisableAcrylicBackgroundOnLogon.
- Set its Value data to 1 to disable the blur effect.
4. Show Favorite Photos on the Login Screen
To customize the images on your login screen, set a photo for the lock screen as follows:
- Right-click on your desktop and choose Personalize.
- Select Lock Screen.
- Choose your background from Windows Spotlight, Picture, or Slideshow.
-
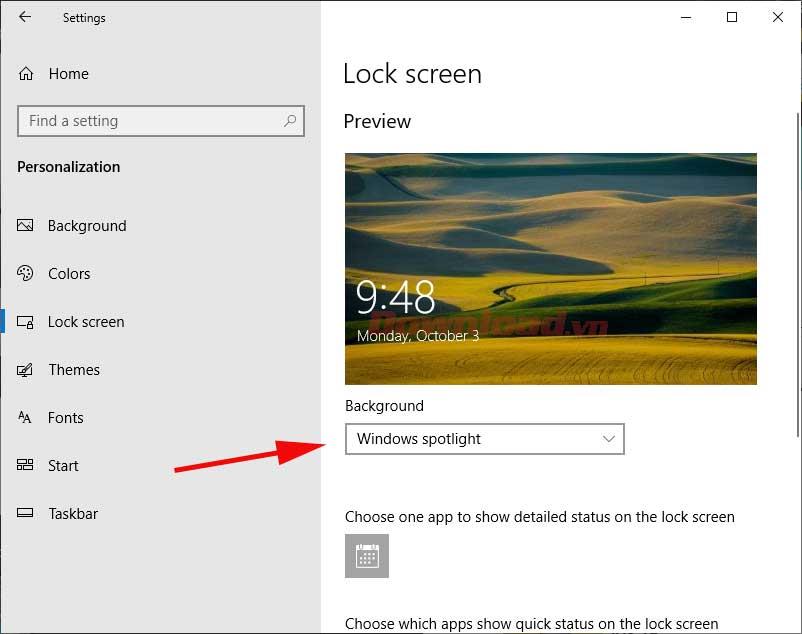
- Ensure that Show lock screen background picture on the sign-in screen is enabled.
Now you're all set to enjoy a personalized login experience on your Windows 10/11 PC! For additional resources and similar guides, visit our internal link example.





![4 Ways to Fix Mouse Cursor Disappears [GUIDE] 4 Ways to Fix Mouse Cursor Disappears [GUIDE]](https://img.webtech360.com/imagesupdate14/image-8497-1125143849716.png)




Emma W. -
Awesome tips! Just did it and now my login screen feels like home.
Grace S. -
Thanks for the guide! Changed it this morning and looks awesome! Keep the tips coming!
Robert Wilson -
I followed the steps to change the login screen, and it’s worked great. My kids love the new look too
Ryan D.123 -
Is there a way to change the login sound as well? That would be the cherry on top
Sara Lee -
Thanks for the tips! I just updated to Windows 11 and this is exactly what I needed.
Tom Harris -
Anyone else having trouble accessing the settings? Is it because of my user permissions
Kimberly King -
I’d love to see some examples of custom backgrounds! Any recommendations for good sites
Nina Lee -
This customization adds a personal touch to my work computer. Love it