How to change the language Geogebra into Vietnamese

Geogebra is completely free Math software and can help users not only save time but also quickly solve troublesome exercises more gently.
GeoGebra software is heavily used to serve the purpose of their study and work. It is a great companion if you often work with graphs of functions, geometry, arithmetic ... So you know how to draw simple squares with GeoGebra?
Creating a square with GeoGebra is not difficult, you just need to follow the instructions of the following article to completely draw successfully. Let's get started!
To draw a square in GeoGebra, follow these steps:
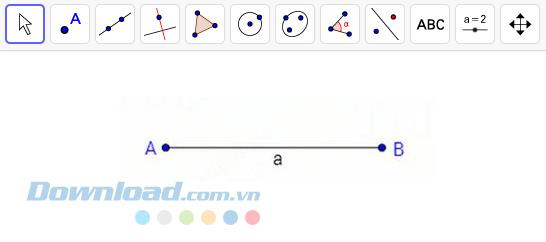
Step 1 : Select the Segment tool . Click twice on Graphics View to create two points A and B, and a line between them.
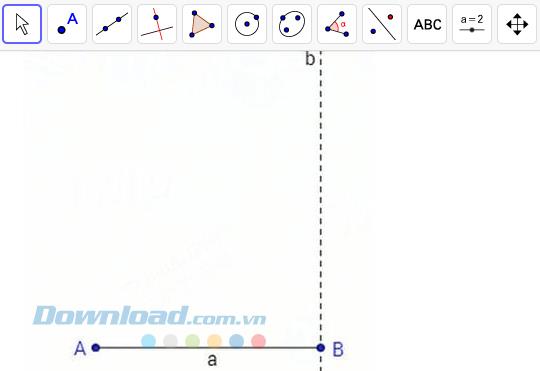
Step 2: Activate Perpendicular Line tool . Create a line b perpendicular to segment AB and pass through point B.
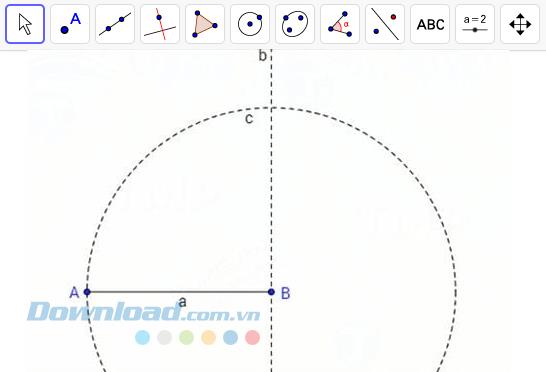
Step 3: Select the Circle with Center through Point tool and draw a circle c with center B passing through point A.
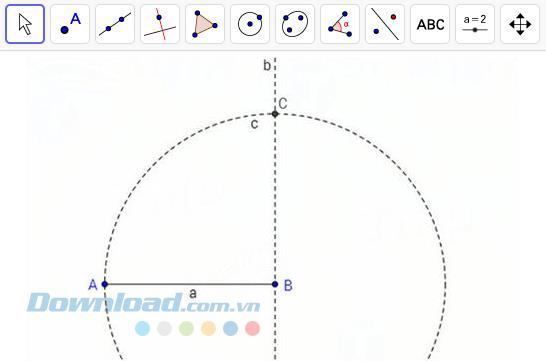
Step 4: Select the Intersect tool . Cut perpendicular b with circle c to create intersection C.
Step 5 : Create a perpendicular line d with segment AB that passes through point A with the Perpendicular Line tool .
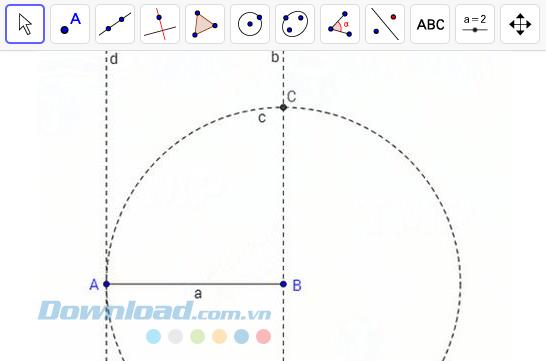
Step 6: With the Circle with Center through Point tool , create a circle e with center A and go through point B.
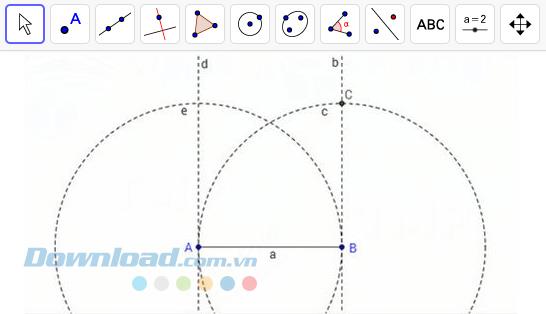
Step 7: Create intersection D between line d and circle e.
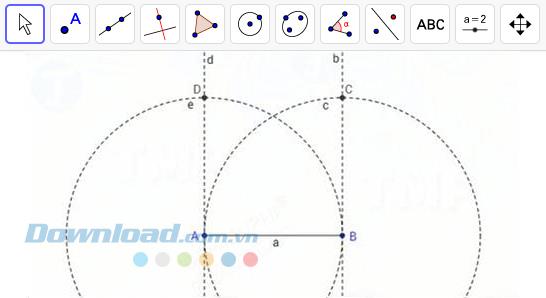
Step 8: Select the Polygon tool . c by selecting all 4 vertices.
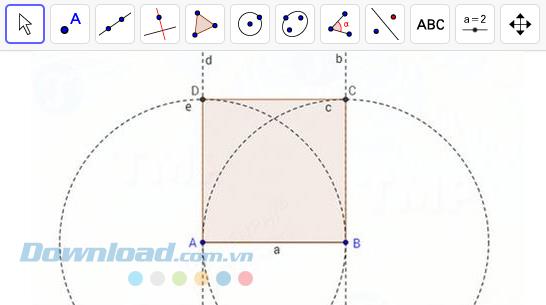
Step 9: Use the Move tool to drag the vertices of the square and edit as you like.
Drawing a square with GeoGebra is not too difficult, is it? With this educational software, you can do more operations. Please install and use GeoGebra to discover more features to it.
Geogebra is completely free Math software and can help users not only save time but also quickly solve troublesome exercises more gently.
You can draw a parallelogram quickly with only 7 simple steps in GeoGebra. Give it a try!
GeoGebra is a rare mobile application that helps you learn math for free - specifically here is learning to graph function on an intuitive interface. GeoGebra is a rare mobile application that helps you learn math for free - specifically here is learning to graph function on assignment
GeoGebra provides tools that allow you to draw graphs, functions and tables on an easy-to-use interface and many powerful features. So, do you know anything about them?
Geogebra is a completely free tool and extremely useful in supporting users to learn and work with Mathematics or tasks requiring manipulation on spreadsheets, graphics, statistics .... The following will be broken
Explore the top classic tank shooting games that offer immersive gameplay and stunning graphics. Dive into the tank battle world with these must-try games.
Discover how to earn free spins in Coin Master every day. Learn the most effective tricks to gather spins effortlessly.
Discover everything about Gacha Club OC, from creation to customization, and tips to enhance your gaming experience.
Learn how to create a room and play with friends in Mini World: Block Art, including multiplayer options and map sharing. Perfect for gamers looking to enhance their experience.
Learn the efficient ways to tame various mounts in Mini World Block Art, speeding up your travel and enhancing your gameplay experience.
Discover the best MP40 skins in Free Fire and find out how they enhance gameplay. Learn more from WebTech360 about the top choices for Free Fire players.
A detailed guide on how to install the racing game ZingSpeed (ZingSpeed Mobile) on your computer using various methods.
Discover effective methods to delete all of your friends in Roblox effortlessly while maintaining your favorite connections!
Discover how to easily check how many hours you’ve spent playing Minecraft, along with detailed statistics of your gameplay for a comprehensive gaming experience.
Learn how to play PES 2019 (Pro Evolution Soccer 2019) with our comprehensive setup guide, ensuring a smooth gaming experience. Ideal for newcomers to Pro Evolution Soccer games.
Learn how to easily switch between Survival and Creative modes in Mini World: Block Art and enhance your gaming experience effortlessly.
Discover the best lightweight games for PC that are perfect for young gamers. Enjoy these popular titles without heavy system requirements!
Searching for a captivating gacha game to immerse yourself in? Check out our top 10 gacha games that are worth playing in 2023.
Learn how to connect a controller to Parsec for a seamless gaming experience. Perfect for multiplayer sessions and enhanced gameplay.
Learn how to install Discord on your Amazon Fire Stick using alternative app stores. This guide provides a step-by-step process to access Google Play Store apps.
