Microsoft explains the benefits of TPM and why Windows 11 is superior to Windows 10
It's no surprise that Microsoft wants Windows 10 users to upgrade to Windows 11.
Putting your PC to sleep is a great way to save power and still be able to continue using your computer when you want. But what do you do if your PC randomly wakes up or goes to sleep? This can be a difficult problem to diagnose and can be a real pain in the ass.
The troubleshooting process can be quite complex, depending on the different PC manufacturers. The best way to solve this problem is to try different solutions. This article will list the steps to fix problems related to Sleep mode in Windows 10 .
Find out what causes problems with Sleep mode
1. Search for CMD in Windows 10 search box. Right-click on the Command Prompt icon and select Run As Administrator to open CMD with admin rights .
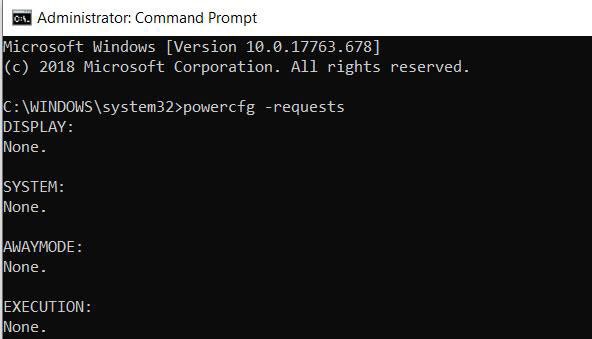
2. Run the command below to know which applications are interfering with Sleep mode other than the basic necessary applications.
To see which apps are always interfering with Sleep mode, run:
powercfg -requestsNote : The results will show all the applications that are interfering with Sleep mode. Try to find the culprit from the results and uninstall it. If the cause seems to be a software program you installed, uninstall it from the Control Panel.
If you want to disable this process directly from Command Prompt, run the command below.
powercfg -requestsoverride “”For example, the yc.exe process seems to be the culprit that is preventing Windows 10 from entering Sleep mode, so we will run the following command.
powercfg -requestsoverride PROCESS “yc.exe” SYSTEMTo find out what's been preventing your laptop from going to Sleep recently, run:
powercfg -lastwakeTo see all the devices that wake your computer, run:
powercfg -devicequery wake_armedAssuming, the problem seems to be originating from the network adapter, just follow the steps below.
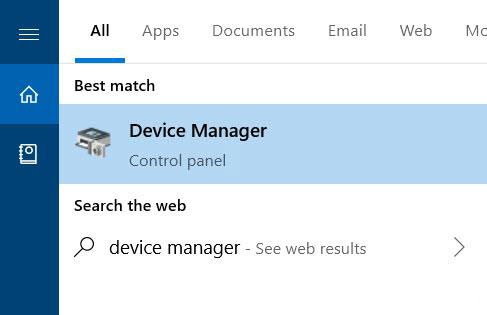
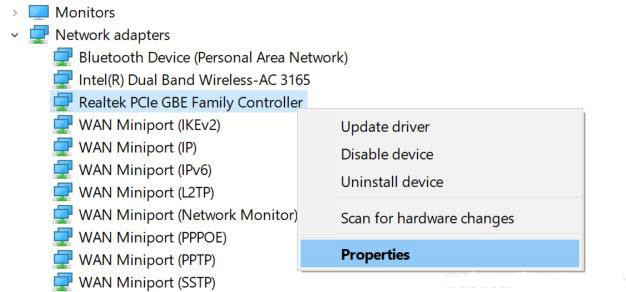
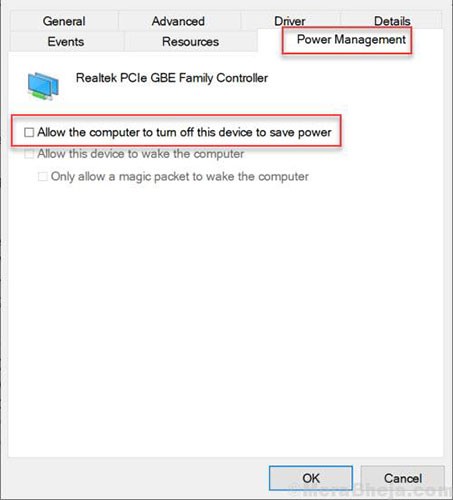
When your computer won't go to Sleep, check all the settings and factors that prevent Sleep from happening. Hardware, power options, and configurations can affect how the power and Sleep buttons work. If your PC has installed updates or an application that requires a restart, your PC may not be able to go to Sleep at all.
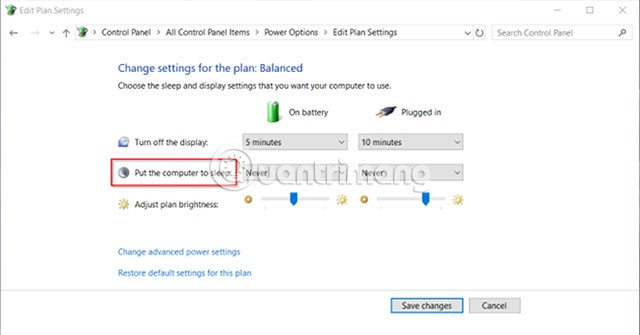
If you share a computer with someone else or work on someone else's PC, it's likely that someone else has adjusted the power options. To access these settings, navigate to Control Panel > Power Options and click Choose when to turn off the display .
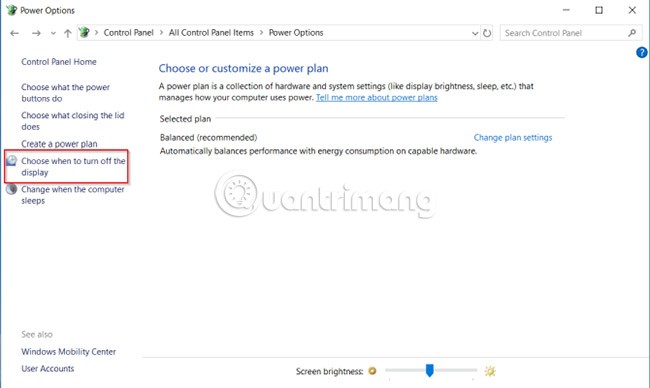
Just to the right of the Put the computer to sleep option , check the values and make sure they are set correctly. If your PC is going to Sleep too soon or taking too long to get to this state, this should be the first thing to look at.
The Fast Startup feature in Windows 10 is a setting that helps your PC start up faster after shutting down. Fast Startup saves the kernel image and loaded drivers to C:\hiberfil.sys when you shut down your PC. When you shut down and restart your PC, Windows loads the hibernation file into memory so your PC can resume operation.
If you're using an older device and find that your PC isn't going to sleep, you can disable Fast Startup. Open Control Panel > Power Options and click Choose what the power buttons do .
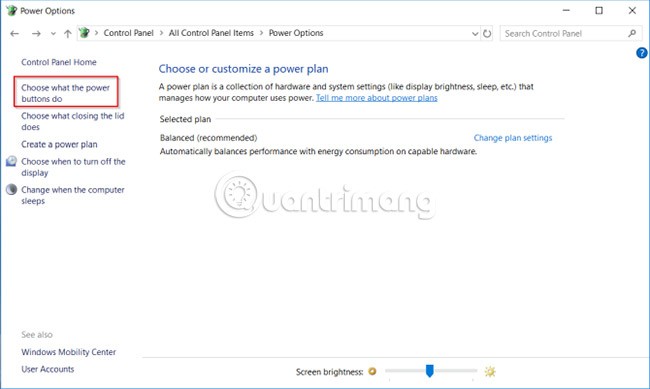
Click Change settings that are currently unavailable and uncheck Turn on Fast Startup to disable this feature.
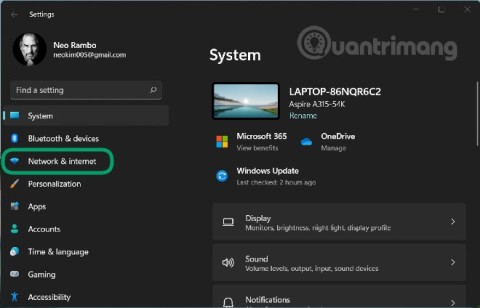
Please refer to the article: Windows 10 cannot sleep error, here is how to fix it for more details.
If your PC goes to sleep after a short period of inactivity, you risk losing the data you're working on. This can be even scarier than a PC that won't go to sleep. But rest assured, this error is easy to fix.
When your PC randomly “sleeps,” make sure it actually went into Sleep mode. Sometimes hibernation or random shutdowns are caused by overheating .
If the temperature inside the PC exceeds the allowable threshold, the PC will automatically enter hibernation mode or shut down completely to protect the hardware components. Refer to the article: How to check the CPU temperature of the computer? for more details.
If you recently upgraded your PC to Windows 10 or performed a major update from Windows 10 1803 to 1809, specific power-related settings may have become problematic. To fix this, open Settings > System and under Power & sleep settings , click Additional power settings .
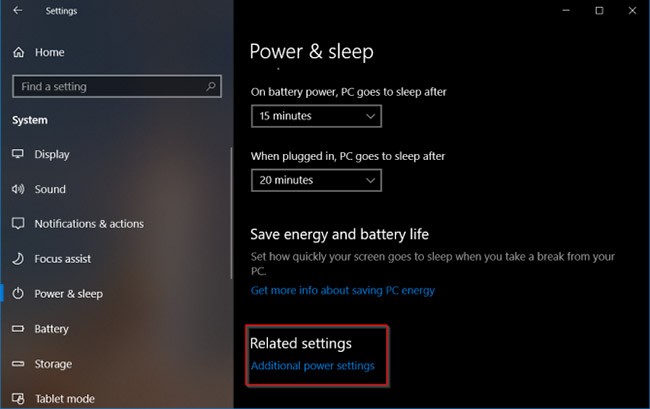
From here, select Choose when to turn off the display . Select Restore default settings for this plan .
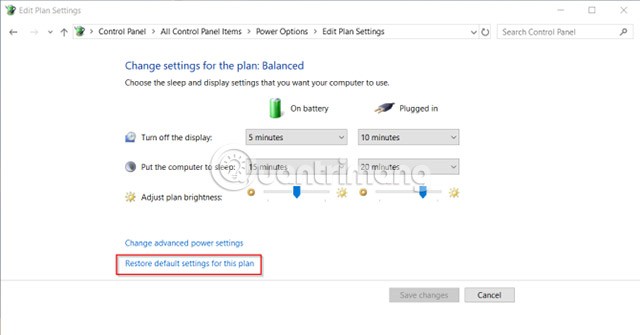
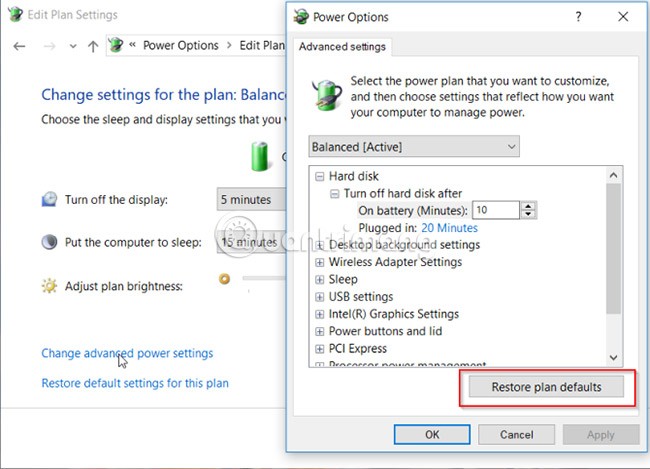
If this option is not available or does not work, click Change advanced power settings . From the new window that appears, click Restore plan defaults . Repeat this step for each custom power plan.
The screensaver utility allows your PC to go into Sleep mode to conserve power. The screen is turned off and if you have incorrect settings configured, your PC may go into Sleep mode randomly.
Go to Settings > Personalization and type “screen saver” into the search bar.
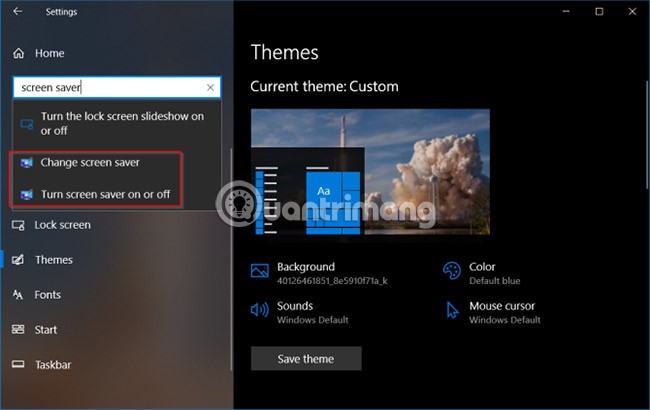
From the pop-up window that appears, select None from the Screen saver drop-down menu.

There are many third-party themes available from the Microsoft Store. It’s possible that a theme is causing your PC to “sleep” at random times. You can disable that theme and switch back to the default theme.
Go to Settings > Personalization and click on Themes. Now click on the default Windows 10 theme and restart your PC.

If all of the above methods fail and you are dealing with a laptop, the culprit may be the battery. Turn off your PC and remove the battery. Wait a moment and reinsert the battery.
Peripherals attached to your computer can be the reason why your system wakes up from Sleep mode. Your printer, scanner, webcam, or game console, any of these could be the reason why your system’s Sleep mode isn’t working as intended. All you need to do is unplug any of these devices and then check if the problem persists. If it does, you can visit the online manual for the device to check for any updates. Some of the manuals may not work well with the latest versions of Windows 10.
You may want to update your system to make Sleep mode work properly. This is important because sometimes you delay updates and end up compromising the functionality of your system.
If your PC fails or goes to Sleep randomly, use the troubleshooting steps above to resolve the issue.
If you’re still not sure what’s causing the problem after trying all of the above methods, it’s time to run a full system scan for any hardware issues. The cause could be anything from your system overheating and going into sleep mode to a drained battery. You can always have a technician check your system to keep things under control.
Also, you must remember that every PC manufacturer has its own applications and drivers. And they are known to cause problems related to Sleep mode in Windows 10 PC.
In addition to these troubleshooting tips, you can periodically check your PC's health to keep it in top shape.
Hope you get the problem resolved soon!
It's no surprise that Microsoft wants Windows 10 users to upgrade to Windows 11.
It's easy to preview files without opening them in Windows 10 thanks to the Preview Pane feature in File Explorer. You can see thumbnails of most images, videos, audio files, and some text-based documents.
Microsoft is currently having difficulty converting users to new products and services.
For many people, the autocorrect feature on Windows 10 is annoying and unnecessary. So how to remove this feature?
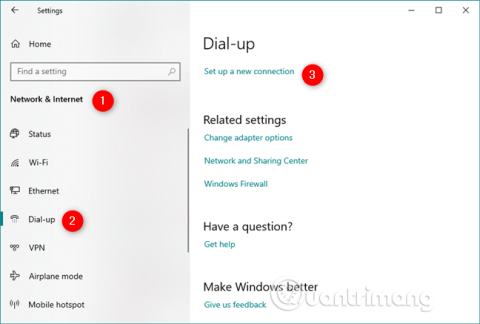
Many Internet service providers provide their customers with a Point-to-Point Protocol over Ethernet (PPPoE) connection. This article will show you how to configure Windows to connect to the Internet via PPPoE.
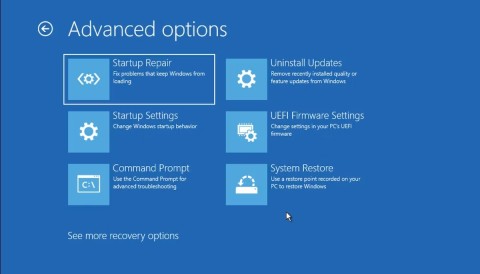
Startup Repair is a Windows recovery tool that can fix some system problems that prevent Windows from starting. Startup Repair scans your PC for problems and then attempts to fix them so your PC can start correctly.
Modern versions of Windows still contain a lot of old code, and Microsoft generally tries to hide outdated parts, like the Control Panel, in favor of more modern components. However, there are some interesting exceptions.
Setting up multiple monitors on Windows is quite simple and only takes a few minutes to do. After setting up multi-monitor mode (multiple screens), you can set up separate wallpapers for each screen. To do this, please refer to the article below from WebTech360.
With less than two weeks to go until 2025, it's time to look back at the list of features that Microsoft has stopped supporting or removed from Windows 10 and 11 in 2024.
Sleep mode on Windows will put the computer into the lowest power consumption mode, extending the battery life of the computer when not using the device.
Recently, Microsoft has been continuously posting articles on the company's official blog urging users to upgrade to Windows 11 as the end of support for Windows 10 is approaching.
Virtual desktops are a handy way to combine multiple workspaces in Windows 10. There are a number of ways to quickly switch between virtual desktops, including some lesser-known keyboard shortcuts. Quantrimang.com will cover them all in the following article.
Windows Defender is built into Windows 10 to find malware. To improve performance for tasks like compiling code or running virtual machines, you can add exceptions so Windows Defender will never scan those files.
As the Windows 11 end-of-life deadline approaches, Windows 10 end-of-life (EOL) warning banners are popping up everywhere.
The Start Menu is probably the most popular feature of Windows 10. However, for some PC versions, this feature may be faulty. In this article, WebTech360 will guide readers on how to fix Start Menu errors on Windows 10.
A series of reward chests, currencies, items and attractive gifts are waiting for you in the latest CMN Tay Du Truyen Ky game code.
In the process of processing and entering Excel data tables, there will be data that you need to convert from numbers to words. To do this quickly, instead of having to type manually, you can use some tools in the article below.
Instagram now lets you create your own Instagram message stickers from photos or videos already in your phone's album.
With iCloud Photos, you can view your entire photo library from any device. But you need to download photos from iCloud if you want to edit or do anything else. There are several ways to download photos from iCloud to devices like iPhone, Mac, and even Windows PC.
iPhone lists the full battery usage of applications, helping you know which applications use a lot of battery on your iPhone.
How to calculate the diagonal of a rhombus? Please find the calculation method and examples below to understand the formula for calculating the diagonal of a rhombus.
Kill Monsters to Save Princess, one of the longest named games in Roblox or shortened to Save Your Princess.
The latest Go Back to the West code will come with attractive items for you to exchange for rewards.
Download Blockman Go on PC to entertain you when your phone capacity is limited and the battery is low while playing.
Your PC ran into a problem and needs to restart and won't start? Here's how to fix it!
Even though the product has only been released for a short time, Nvidia RTX 5080 and RTX 5090 graphics card owners are complaining about a series of problems.
As a long-term support release, Ubuntu 20.04 LTS (Long-Term Support) will be supported with continuous updates for a total of 5 years, meaning it will reach end-of-life around April 2025.
Meow: Sen Oi Dung So gives gamers a series of codes with events for players to participate and receive rewards.
Code Super Snail gives players a series of attractive rewards, we still recommend players to receive rewards from the beginning of the game to make the time when starting the game easier.
Generative Workspace is one of the top AI features announced at Adobe Max 2024. It will be the new home for your Generative AI images and files.


