How to see yourself like any celebrity with B612

Discover how to find out which celebrities you resemble using the new Familiar Faces feature in B612.
Limiting the number of incorrect password login attempts in Windows 10 helps increase computer security. Here's how to limit the number of failed login attempts on Windows 10 .
How to limit the number of failed login attempts on Windows 10
If someone wants to access your computer, they can guess the device login password. This is really a threat to your data security "fence", especially when they break the password. To protect yourself against this threat, you can limit the number of times you log in with the wrong password to your PC. You can configure this setting via Local Group Policy Editor or Control Panel.
If your PC runs Windows 10 Home Edition, first you need to learn how to access Group Policy Editor in Windows Home. On the other hand, for all Windows 10 versions, here's how to limit the number of incorrect PC login password attempts using Local Group Policy Editor:
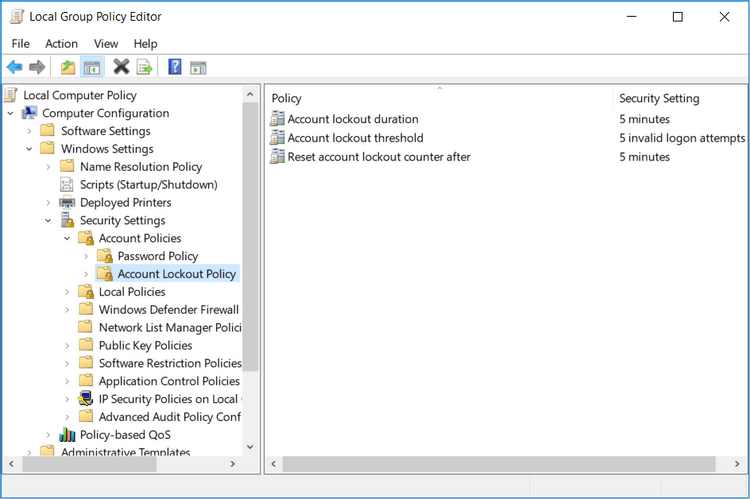
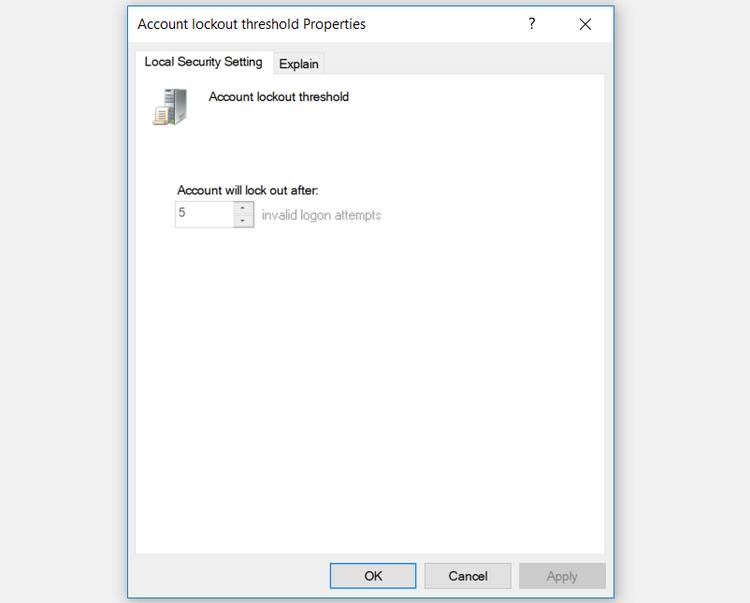
Setting the Account lockout threshold policy allows you to limit the number of failed computer logon attempts. That person will not have access to the locked account until you reset it or the account lock period expires.
To configure Account lockout threshold , you need to set a value from 1-999. This number will determine the number of incorrect password attempts allowed on the PC before locking the account. Setting the value to 0 will not lock the account no matter how many times someone enters the wrong PC login password.
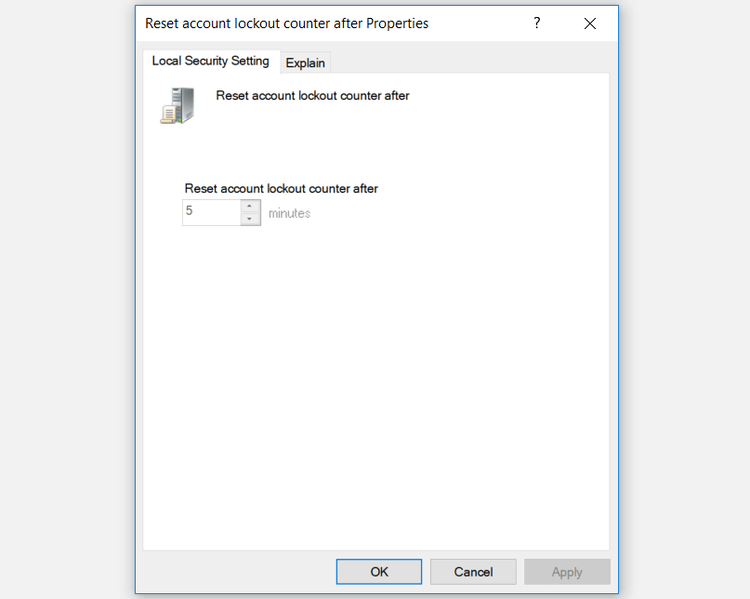
The Reset account lockout counter after policy setting helps you decide the number of minutes that pass before locking your account. However, you need to determine the threshold or number of failed login attempts to be locked first.
For example, you can set Account lockout threshold to 5 and Reset account lockout counter after to 5 minutes. Thus, the user has 5 attempts to log in with the wrong password within 5 minutes before the account is locked. You can choose between 1 and 99,999 minutes when configuring the Reset account lockout counter after policy setting .
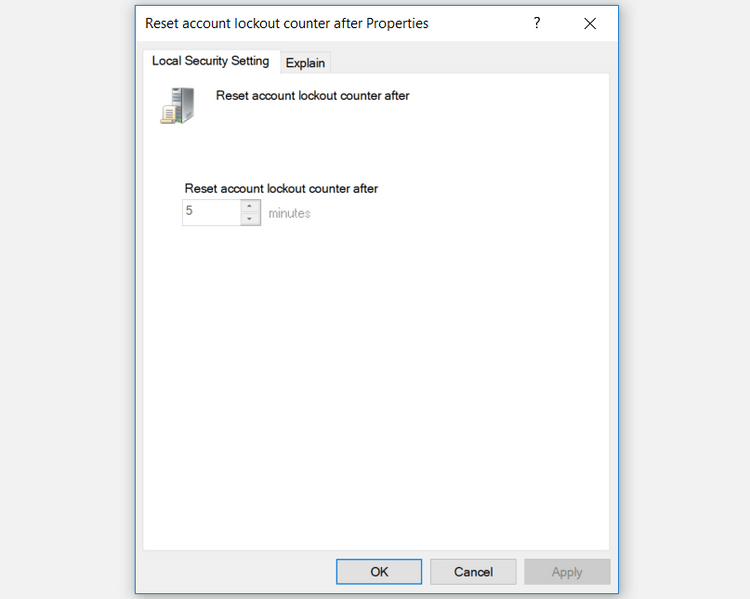
The Account lockout duration policy setting determines how long an account lockout remains before it is automatically unlocked. Similar to Reset account lockout counter , this setting requires you to select the Account lockout threshold value first.
For example, you can set Account lockout threshold to 5 and Account lockout duration to 5 minutes.
If someone enters the wrong password 5 times, your account will be locked for 5 minutes before it is automatically unlocked by the system. Depending on how long you want to lock your account, you can choose a value from 1 to 99,999 minutes. Additionally, you can select 0 if you want to lock your account until you unlock it yourself.
Once completed, close Local Group Policy Editor and restart your PC to save the changes.
Open Command Prompt as follows:
To configure Account lockout threshold , enter the following command into Command Prompt:
net accounts /lockoutthreshold:5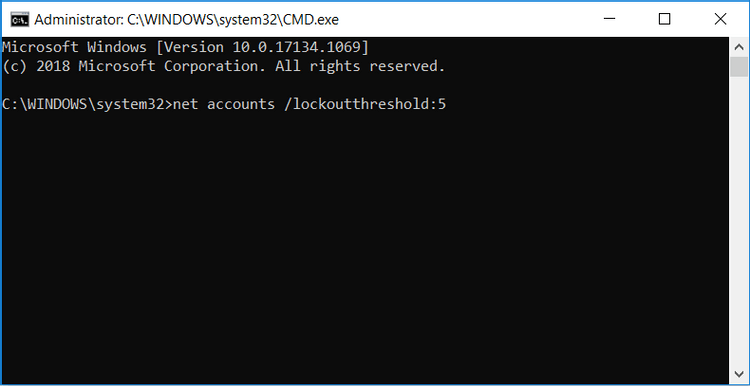
You can replace the value 5 in Command Prompt with any value from 1 to 999. This number will determine the number of failed PC login attempts allowed.
The account will automatically be locked if the user enters the wrong password and the number of times exceeds the allowed threshold. Alternatively, you can select 0 if you do not want to set an account lockout limit. Click Enter after selecting the value.
To configure Reset account lockout counter , type the following command into Command Prompt:
net accounts /lockoutwindow:5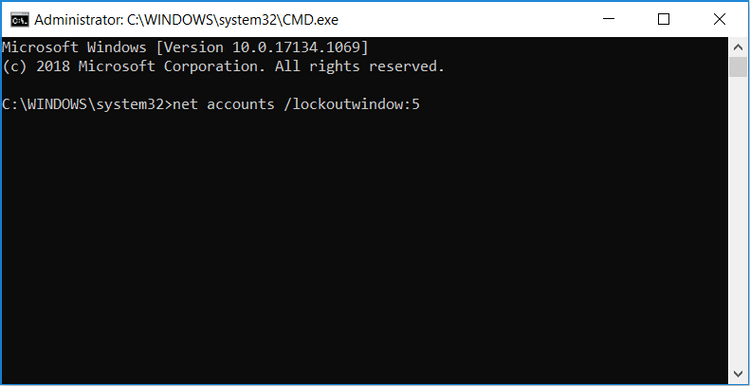
You can replace the value 5 with another number (from 1 to 99,999). This will determine the number of minutes before account lockout. Click Enter after selecting the value.
To configure Account lockout duration , enter the following command into Command Prompt:
net accounts /lockoutduration:5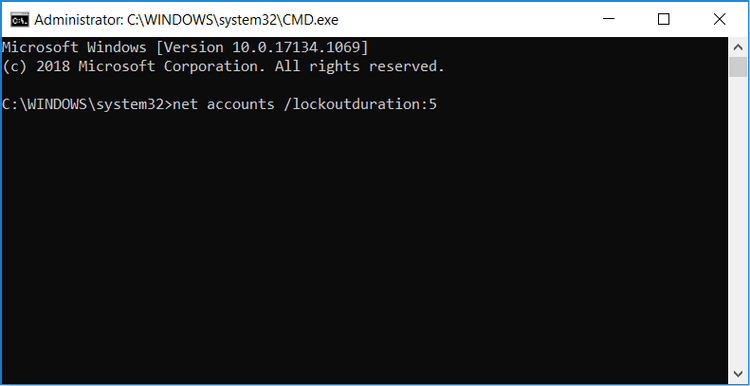
You can also replace 5 with another number, corresponding to the time the account is locked before being automatically reopened. If you select 0 , the account will only open when you manually unlock it. Click Enter after selecting a value.
Once completed, close Command Prompt and restart your PC to save changes.
Above is how to limit the number of times you log in with an incorrect password to your PC to increase computer security. Hope the article is useful to you.
Discover how to find out which celebrities you resemble using the new Familiar Faces feature in B612.
Learn how to disable the background mode of BlueStacks to enhance your computer’s performance while saving resources.
Learn how to effectively remove old boot menu options on Windows 10. Keep your boot menu clean and optimized for efficiency with these easy steps.
Discover the essential CROSH commands for your Chromebook. Get troubleshooting tips and system configurations to enhance your Chrome OS experience. Learn more!
Zoom is a top video conferencing service for connecting with friends, family, business associates, and classmates on various devices including Amazon Fire tablets.
Discover the advantages of the AccuType Keyboard in Lenovo laptops. Learn why this keyboard enhances productivity and provides a superior typing experience.
Learn how to utilize the SkyShare feature on Skyworth Smart TV for easy connection with your phone or tablet, enhancing your viewing experience.
Learn how to limit your download speed in Google Chrome to manage bandwidth and improve overall performance during downloads.
Discover how to fix the error of not being able to install software on Windows 10/11. Learn essential steps and troubleshooting techniques.
Learn how to create an Instagram account without a phone number. This step-by-step guide will help you sign up using an email address instead, making it quick and easy.
Step-by-step guide to change the location of the data sharing folder between the NoxPlayer Android emulator and your computer for enhanced file management.
Learn how to efficiently delete data (photos, videos, music, etc.) on the Android NoxPlayer emulator.
Learn how to remove fonts easily with PicsArt, one of the leading photo editing applications that enhances your photography experience.
Discover the 11 best Virtual Router Software for Windows that allows you to convert your PC into a virtual Wi-Fi router, enhancing your internet sharing capabilities.
Learn the comprehensive steps to reset your Smart TV Skyworth effectively with WebTech360. Optimize performance and settings!

