How to see yourself like any celebrity with B612

Discover how to find out which celebrities you resemble using the new Familiar Faces feature in B612.
While using Windows 11 , there are times when users will need to leave the computer for a period of time. And screen lock (lockscreen) is a great feature for security as well as avoiding the prying eyes of people around you. The article below will guide you to change the screen lock timeout on Windows 11.

Instructions for changing the screen lock timeout on Windows 11
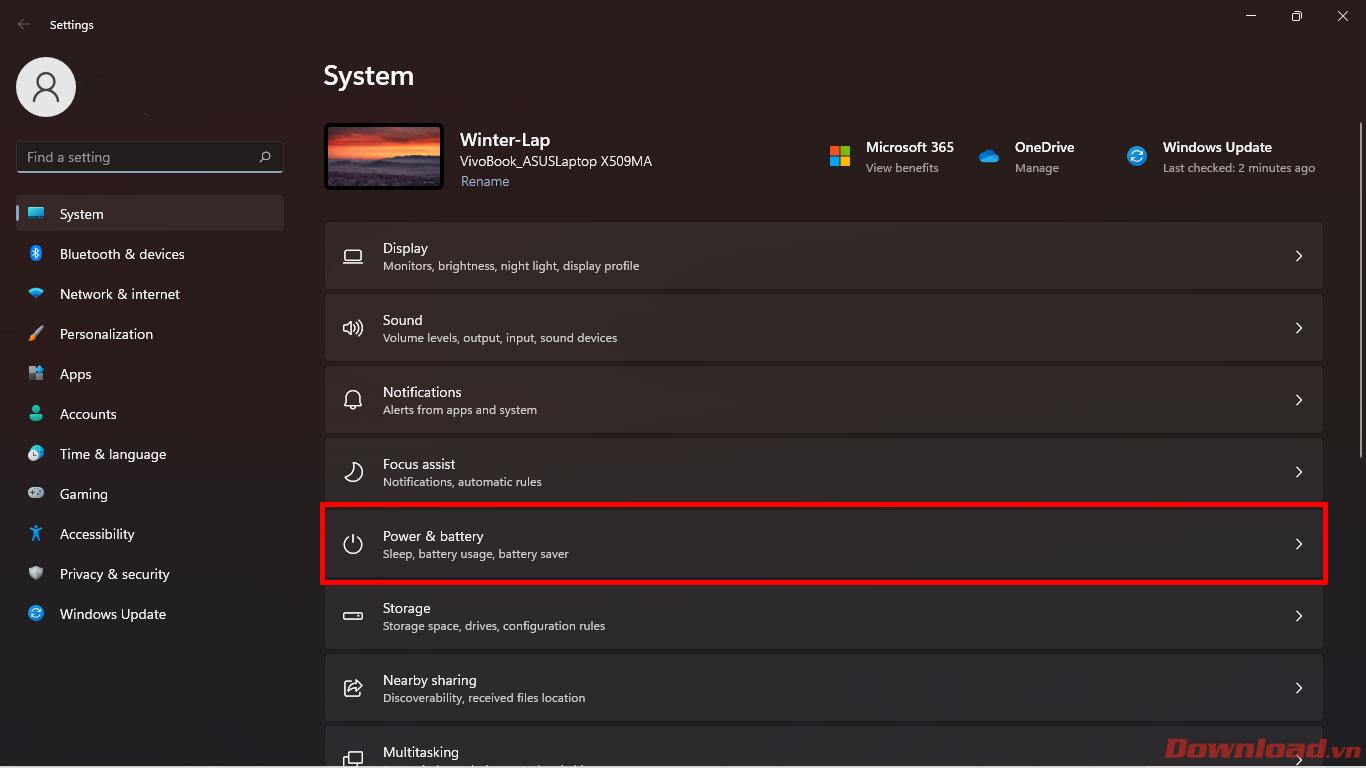
First, go to the Settings section of Windows 11 by right-clicking the Start button -> selecting Settings or pressing the Windows + I key combination to quickly open it. On the Settings - System screen, click on the Power & Battery section .

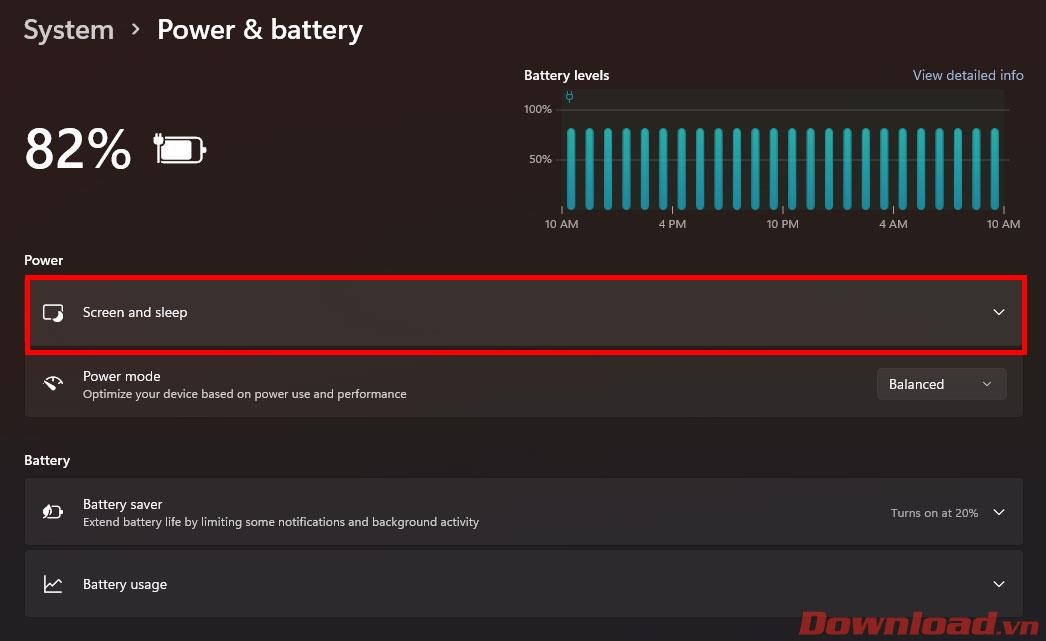
In the Power & battery screen, click on Screen and sleep .

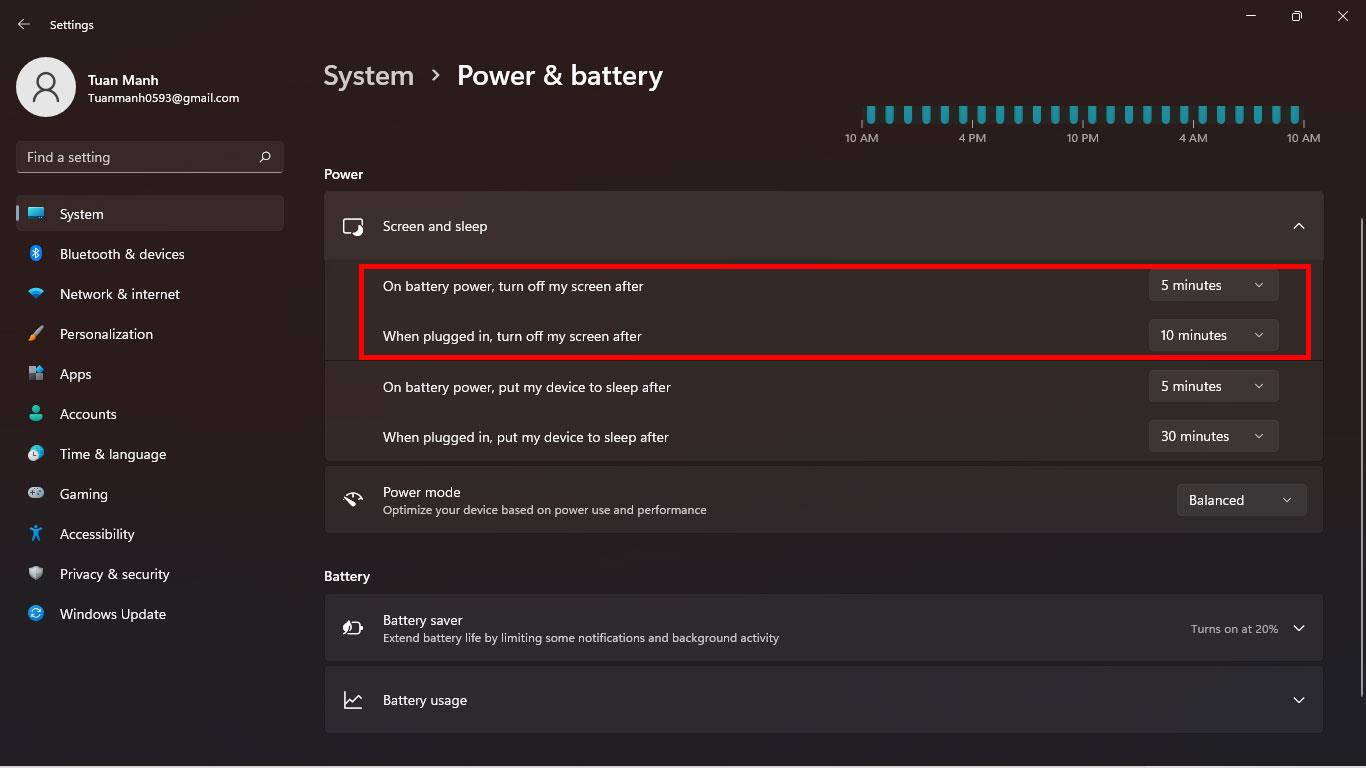
In the list that appears, pay attention to two lines:
Note that the time to automatically turn off the screen when using battery should be set shorter when charging because it will save battery life.

That's it, now you can comfortably leave the device without worrying about the screen being open for too long, wasting battery power or revealing security information.
Wishing you success!
Discover how to find out which celebrities you resemble using the new Familiar Faces feature in B612.
Learn how to disable the background mode of BlueStacks to enhance your computer’s performance while saving resources.
Learn how to effectively remove old boot menu options on Windows 10. Keep your boot menu clean and optimized for efficiency with these easy steps.
Discover the essential CROSH commands for your Chromebook. Get troubleshooting tips and system configurations to enhance your Chrome OS experience. Learn more!
Zoom is a top video conferencing service for connecting with friends, family, business associates, and classmates on various devices including Amazon Fire tablets.
Discover the advantages of the AccuType Keyboard in Lenovo laptops. Learn why this keyboard enhances productivity and provides a superior typing experience.
Learn how to utilize the SkyShare feature on Skyworth Smart TV for easy connection with your phone or tablet, enhancing your viewing experience.
Learn how to limit your download speed in Google Chrome to manage bandwidth and improve overall performance during downloads.
Discover how to fix the error of not being able to install software on Windows 10/11. Learn essential steps and troubleshooting techniques.
Learn how to create an Instagram account without a phone number. This step-by-step guide will help you sign up using an email address instead, making it quick and easy.
Step-by-step guide to change the location of the data sharing folder between the NoxPlayer Android emulator and your computer for enhanced file management.
Learn how to efficiently delete data (photos, videos, music, etc.) on the Android NoxPlayer emulator.
Learn how to remove fonts easily with PicsArt, one of the leading photo editing applications that enhances your photography experience.
Discover the 11 best Virtual Router Software for Windows that allows you to convert your PC into a virtual Wi-Fi router, enhancing your internet sharing capabilities.
Learn the comprehensive steps to reset your Smart TV Skyworth effectively with WebTech360. Optimize performance and settings!


