MS Excel and MS Word both come with tables. Depending on the color you choose for your document or spreadsheet, the types of tables that appear in their respective colors.
You may have noticed that some table styles allow you to split a cell diagonally. That is usually the first cell of the first row. MS Word gives you the freedom to create your own table styles and if you want, you can also create diagonal lines in an MS Word cell and the following article will guide you to do that.
Create slashes in a cell
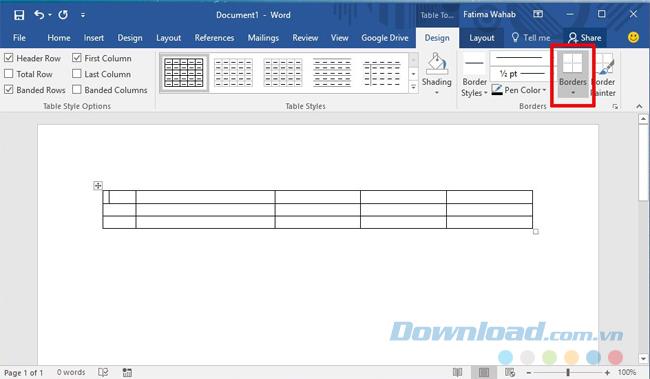
You open the MS Word file and insert a table. Click on the cell you want to create diagonal lines. Go to the Design tab in Table Tools and click on the Borders option .

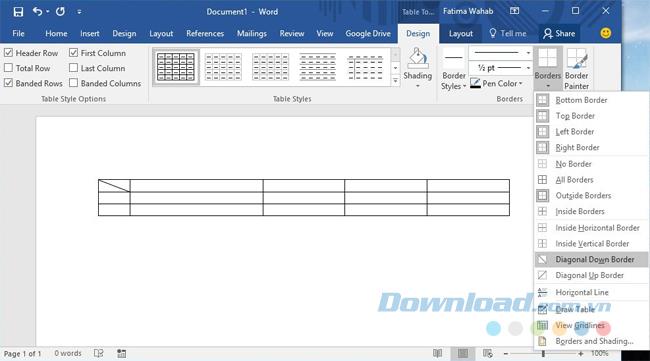
Here you have two options for creating diagonal lines in a cell: Diagonal Down Border and Diagonal Up Border . The small icon next to each option illustrates how the cell will be divided with each style. Choose the option you want.

More data
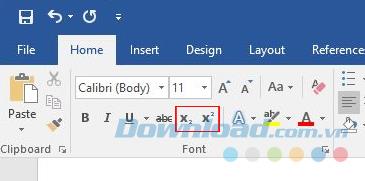
You don't really have two different cells but it's still a cell with a diagonal line inside it. To add data to a cell, click that cell and go to the Home tab on the ribbon. In the Font toolbox , you will see two Superscript buttons (X icon with exponent 2 used to create small text above the line of text) and Subscript (X icon with small number 2 at the bottom to create small text below. text line).

Click on the Subscript button and enter the text in the lower corner of the cell and click on the Superscript button and enter the text you want it to appear at the top of the cell.
Both Superscript and Subscript have smaller fonts than usual, so you need to adjust the size accordingly. If the text alignment is broken, reduce the space between Superscript and Subscript .

This is not the same as dividing cells or columns. It is a limited tip, especially in the aspect of formatting. The amount of text you can add in this column is very limited. If you want to add more text, you might have to use a text box and insert it into the cell, but this makes managing the table even more difficult.


