Device Links
Visual data graphics are a great way to get your message across without words. And it doesn’t take a rocket scientist to add one to a Microsoft Word document.

Microsoft makes it simple to import data from Excel to create visually stimulating graphs. You can even customize them to make them as aesthetically pleasing or complex as you want.
Continue reading to find out how to add a graph to different MS Word versions for both Windows and Mac.
How to Create a Graph in Word
One of the easiest ways to add a graph to Word is to import data from an existing Excel file. Follow these simple steps to get started:
- Open a document.
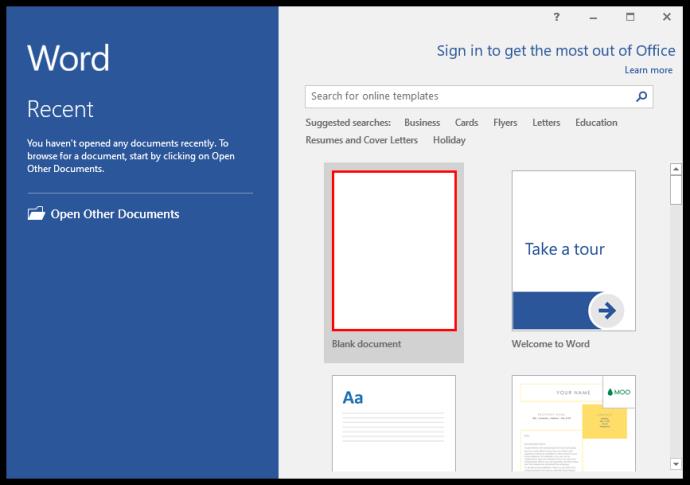
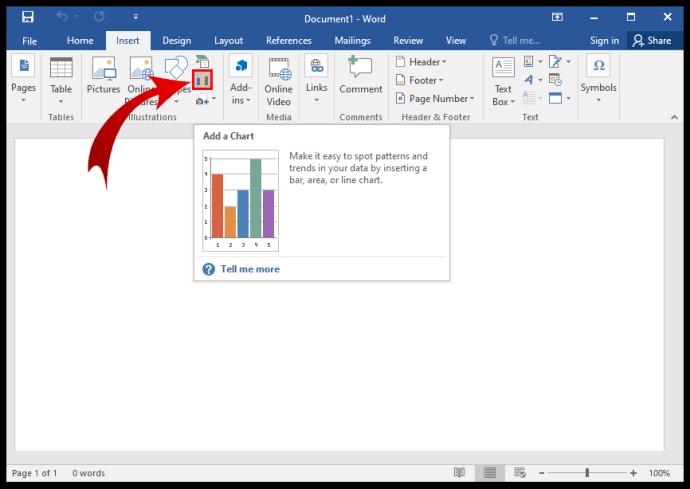
- Go to the “Insert” tab and click on “Chart.”
- Select the chart type and double-click on the chart you want to use.
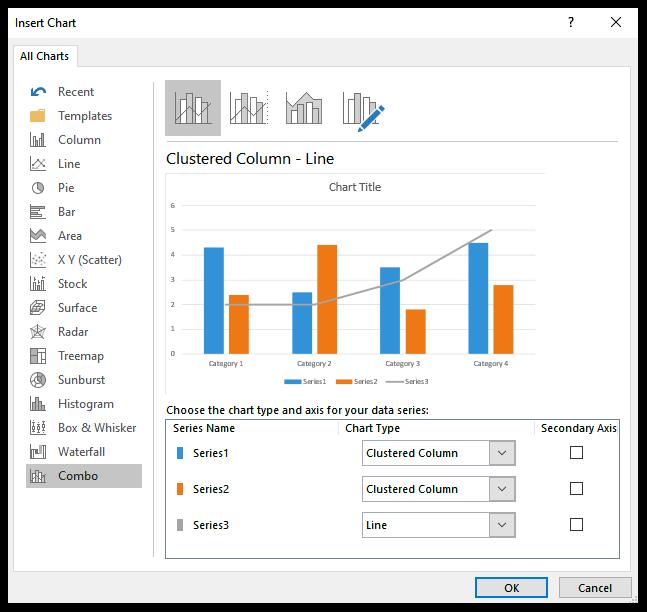
- Insert your data over the default data in the spreadsheet.
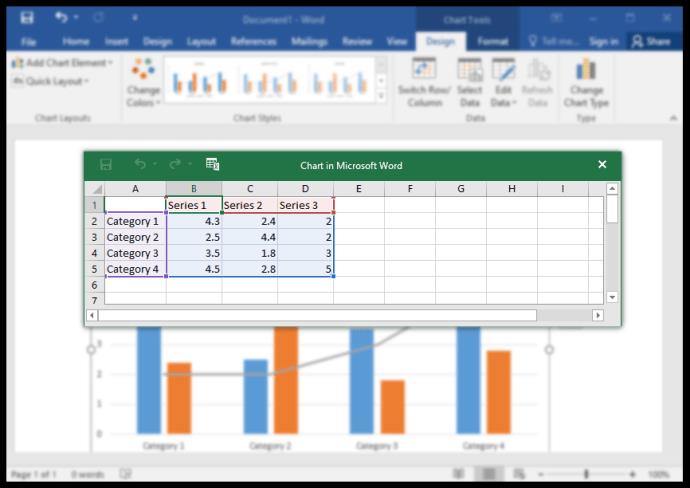
- Click on the “X” in the upper right corner of the spreadsheet if you’re finished.
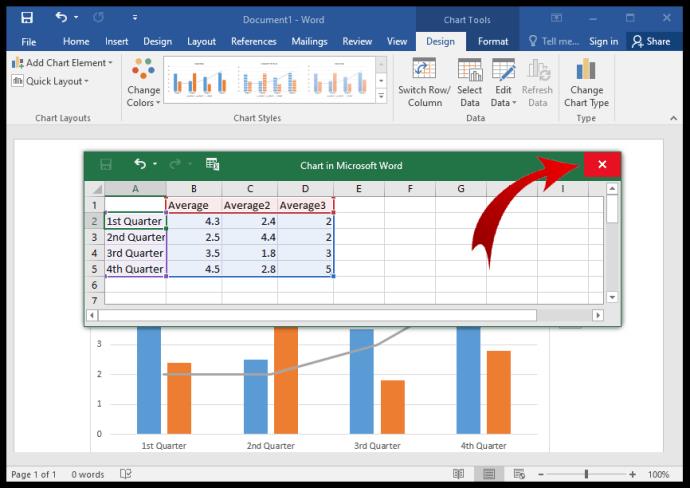
This method works for newer versions of MS Word as well as Office 2013-2016.
When you insert a chart, you’ll see new icons show up next to it in the upper right-hand corner. These buttons can help you further customize the look and style of your chart.
Use the “Chart Elements” button to format, show, or even hide things like data labels and axis titles. The “Chart Styles” button allows you to change styles if you get second thoughts. You can also change colors using the “Chart Styles” button.
If you’re looking for more advanced options, try the “Chart Filters” button. You can use this option to hide or change data depending on your audience without having to create separate charts.
Also, if you don’t like the way the chart looks with the rest of your text, you can use the “Layout Options” button. This button allows you to choose how your chart interacts with the text in your document.
How to Create a Graph in Word for Windows
Create a graph in Word for Windows in four easy steps:
- Click on the “Insert” tab in an open document and choose “Chart.”
- Click on the chart type and double-click on your desired chart style.
- In the spreadsheet that appears, enter your data over the default data.
- Close the spreadsheet when you’re finished entering data and naming categories.
Each change you make in the spreadsheet instantly reflects in your graph so that you can gauge the finished product while typing.
How to Create a Graph in Word on Mac
If you know how to create a graph in Windows, then you already how to do it on a Mac. It’s essentially the same process:
- Open a new or saved document to create the graph.
- Go to the “Insert” tab located near the top of the screen.
- Click on “Illustrations,” and then choose “Chart.”
Note: Some versions of Word on Mac don’t have the “Illustrations” button. That’s okay. You can still go to the “Insert Chart” dialog window by clicking directly to the “Chart” button in the “Insert” tab.
- Choose your graph type from the “Insert Chart” dialog window.
- Click “OK” when you’re ready to insert a graph.
- Enter your data in the new spreadsheet window that appears with the graph.
- Click out of the spreadsheet when data entry is complete.
If you don’t see the spreadsheet window automatically, don’t worry. It’s still there. Just right-click over the chart and select “Edit Data.” This brings up the spreadsheet to which you can add, change, or delete graph data.
How to Create a Graph in Word Online
Using the free web version of MS Word is a great way to review and collaborate using basic edits. So it’s great for existing documents. However, if you’re trying to create a new document, Word online does have its drawbacks. Most notably, you can’t create a graph in Word online.
However, you can see existing graphs if you open them using Word online. But if you go into “Editing” view, you can’t edit, move, or resize them.
How to Create a Graph in Microsoft 365 for Mac
Creating a graph using Microsoft 365 follows the same process as other versions of Word. This is how you do it:
- Open your saved document or start a new one.
- Go to the “Insert” tab and click on the “Chart” button.
- From the drop-down menu, hover over the type of graph you want to access the “Style” menu
- Choose the graph style that you want to insert into the document.
- Enter your data for the graph in the Excel spreadsheet window that opens.
- Close the Excel window when you’re finished entering data to see the graph.
How to Create a Graph in Microsoft 365 for Windows
Creating a graph in Microsoft 365 for Windows follows the same steps as Word 2013 – 2019:
- Open a Word document.
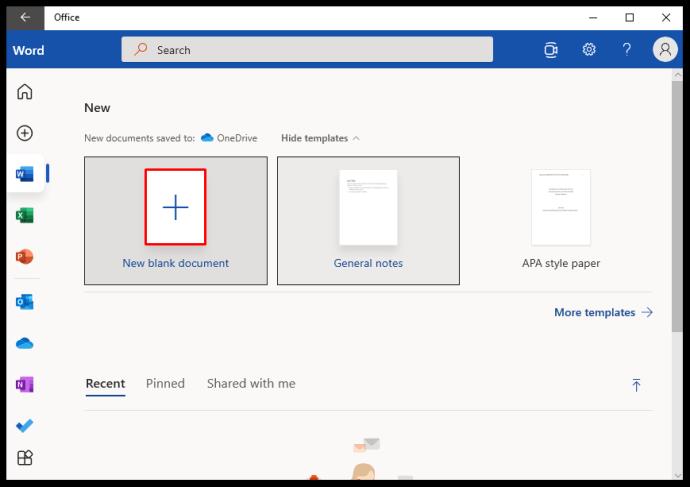
- Click on the “Insert’ tab and choose the “Chart” button.

- In the “Chart” drop-down menu, hover or click on your preferred graph type.
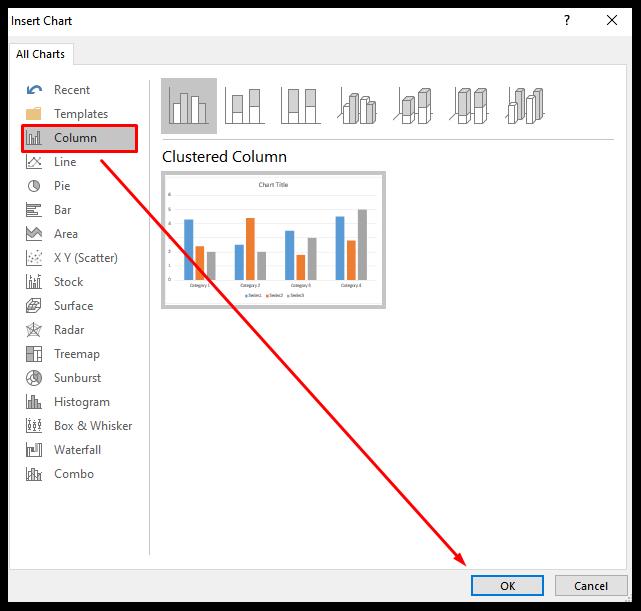
- Choose from one of the different graph styles in that category.
- Replace the default data with your own in the new spreadsheet window.

- Close the spreadsheet window when finished editing the data.

How to Create a Graph in WordPad
MS Word isn’t the only word processing app on your computer. Buried somewhere in your app folder may be an app called WordPad. You can use WordPad for basic processes including creating a graph, but it’s a little different than using MS Word.
Check out how to get started:
- Open WordPad app.

- Click on “Insert Object.”
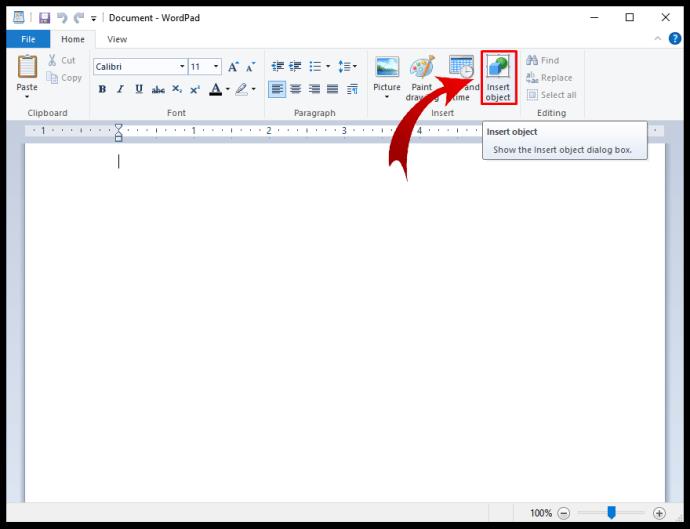
- Choose “Microsoft Graph Chart.”
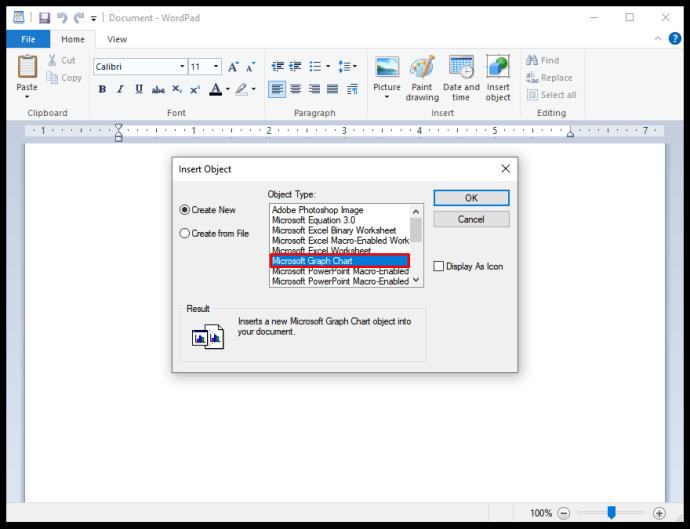
- Click on “Create New File” or “Create From File” and enter the location for graph data
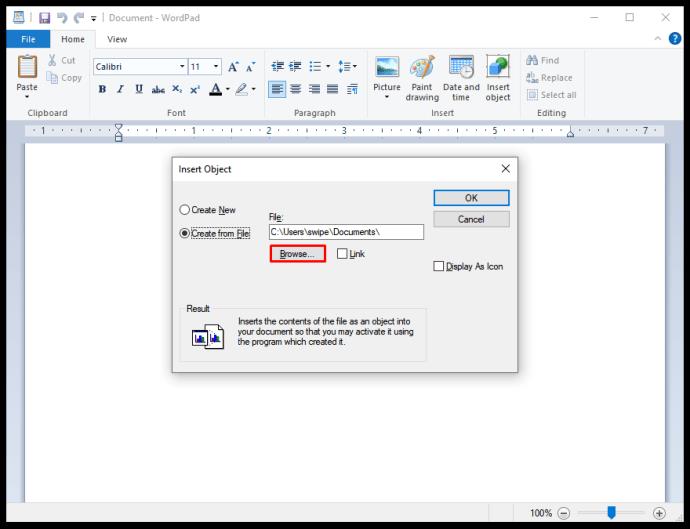
- Select “OK.”

- In the new spreadsheet window, replace the default data with your graph data.
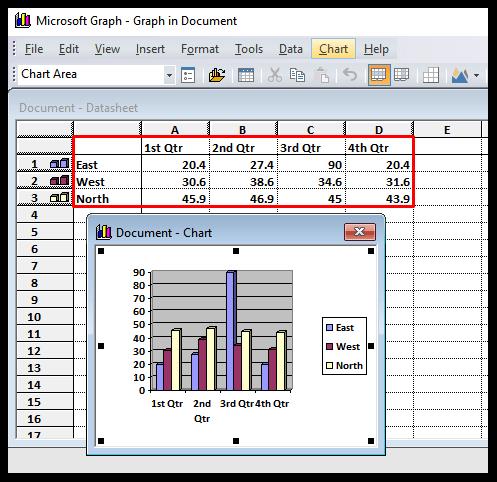
- Exit out of the spreadsheet window.
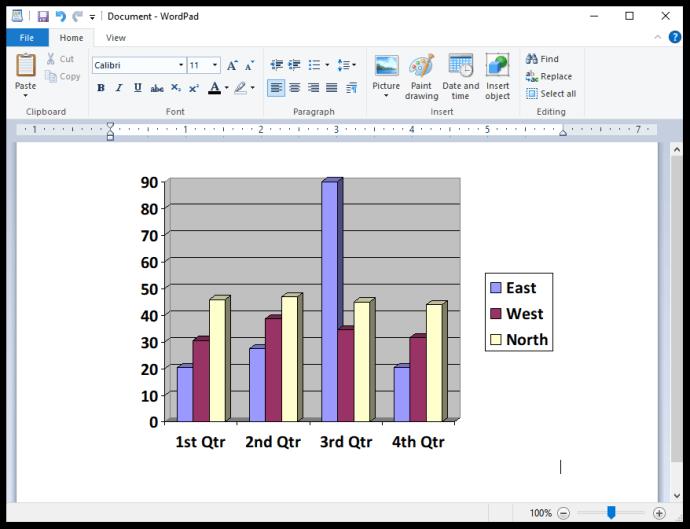
There are different style and format options for your graph data available in the spreadsheet window. If you want to go back into the spreadsheet window after closing it, right-click on the WordPad chart. Click on “Chart Object” to open the spreadsheet window again to make changes to the graph and data.
How to Make a Graph in Word on iPhone
You can’t create a chart or graph using the Word for iPhone app, but you can select one created in Excel and copy/paste it to a Word document. Follow these simple steps to copy an existing graph from the Excel app on your iPhone:
- Open the Excel app.

- Select the workbook that has your chart or graph.

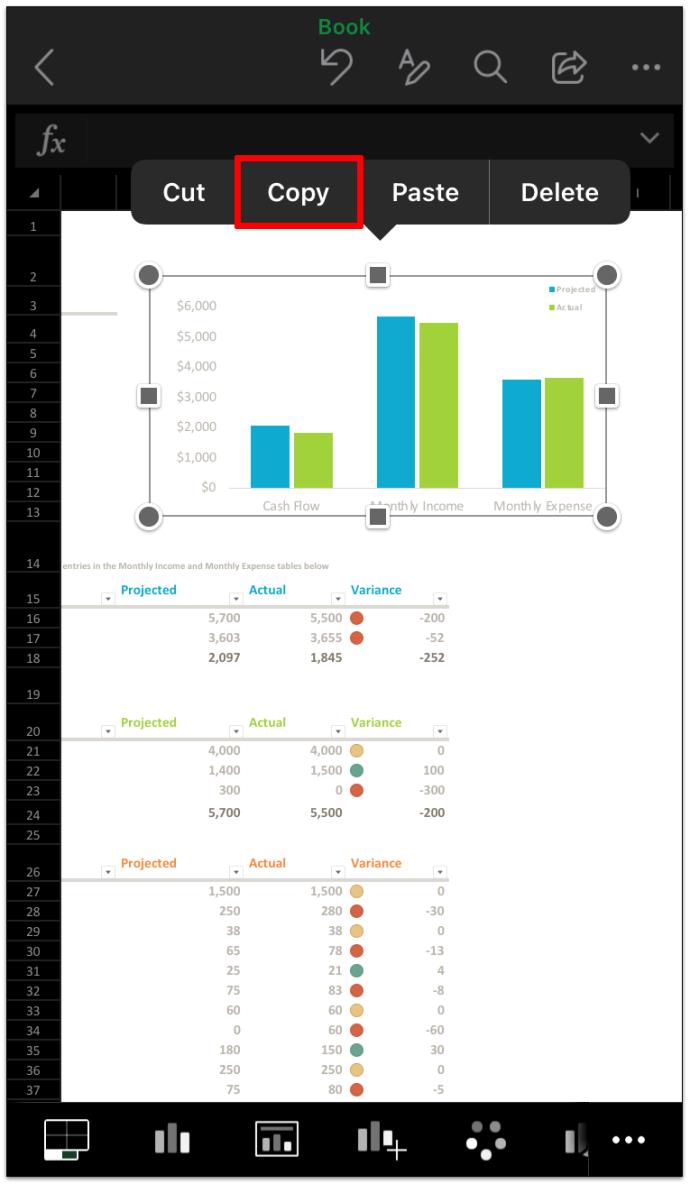
- Tap anywhere on the graph to highlight it.
- Tap “Copy.”
- Switch to the Word app.

- Tap on a document and select “Paste.”

How to Make a Graph in Word on Android
Just as with the iPhone, you can’t create a graph using the Word app on Android devices. However, you can create a workaround with the Excel app to copy/paste an existing graph to a new document. This is how to copy/paste a graph from Excel to Word on Android devices:
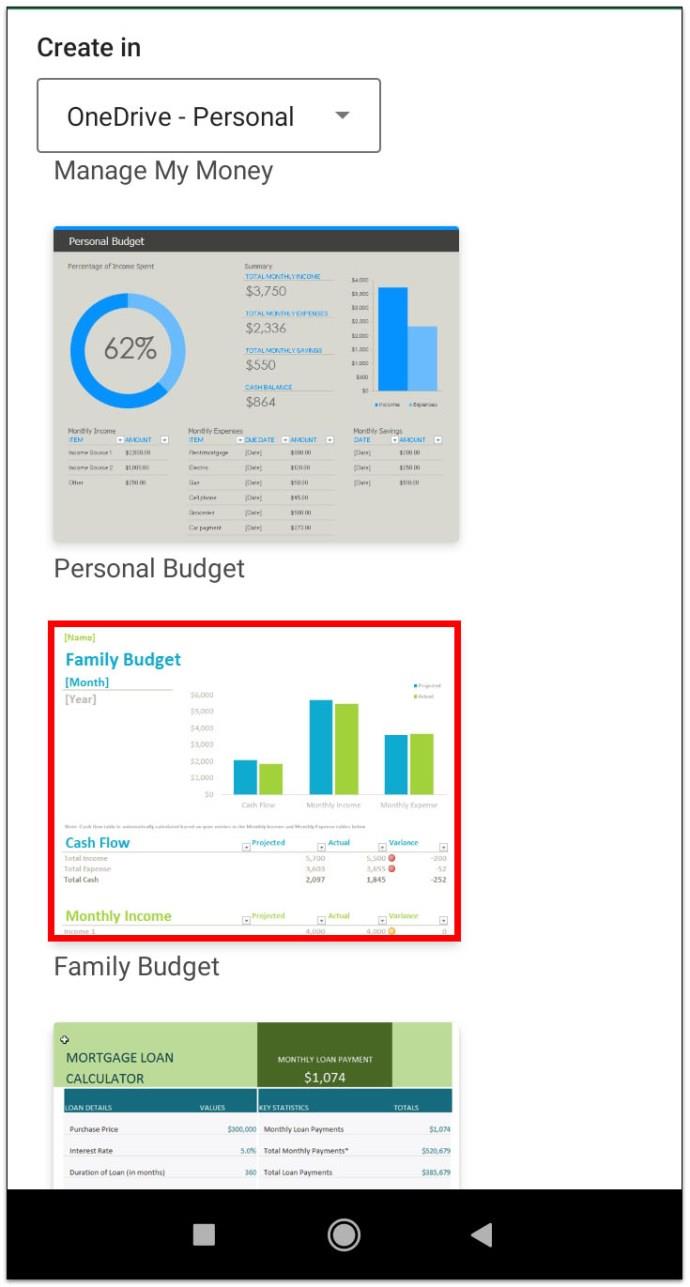
- Open the Excel app and go to the workbook that contains the graph.
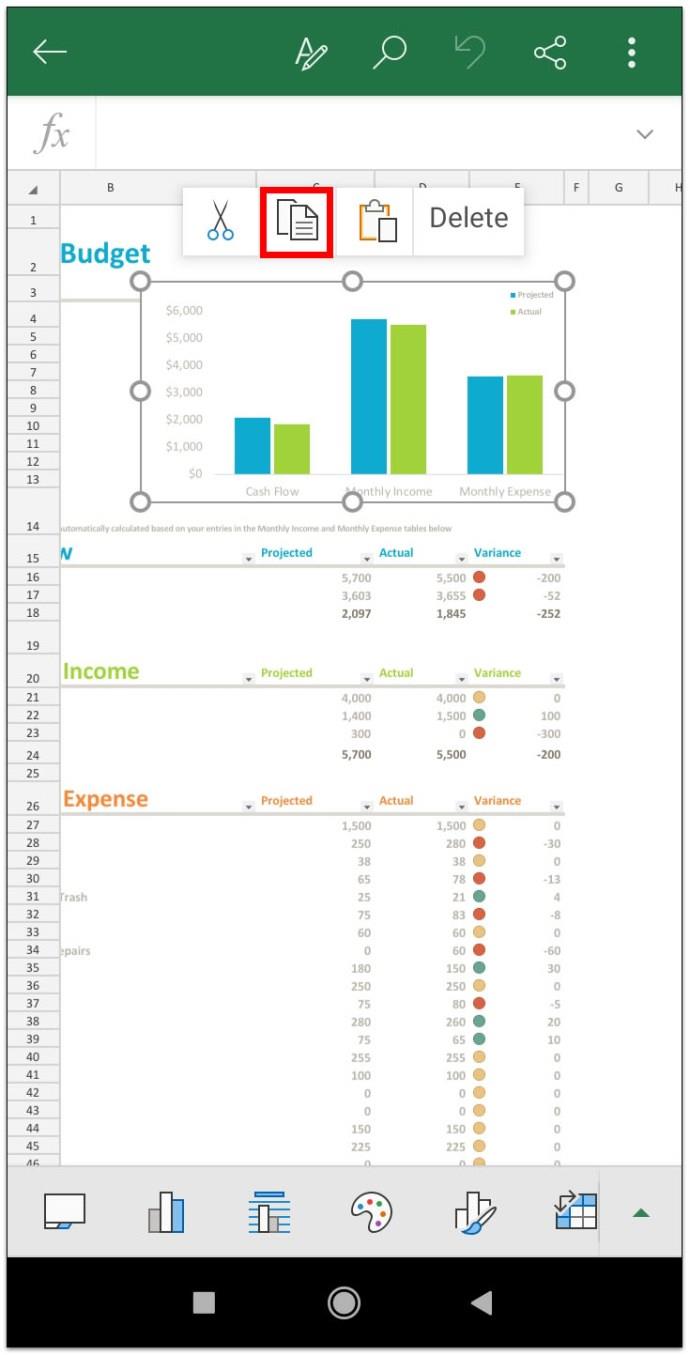
- Tap on the graph to select it.
- Tap “Copy” and switch applications.
- Open the Word app (if it isn’t open already).

- Open a new or existing document for the graph.

- Tap on the document and tap on “Paste” to insert it into the Word document.

How to Change the Graph Format and Edit Data
Most of the buttons used to change a graph format are right next to the graph in the Word document. They’re located in the right-hand corner of the graph and becomes visible if you hover your cursor over it. These buttons include the:
- “Chart Elements” button – hides, shows, or formats data labels and axis titles.
- “Chart Styles” button – changes chart style or color scheme.
- “Chart Filters” button – hides or shows data, advanced features.
- “Layout Options” button – changes the way that your chart interacts with the document text.
Additionally, right-clicking on the graph and selecting “Edit Data” allows you to change the data that appears.
Additional FAQs
What Is the Easiest Way to Make a Graph?
The easiest way to make a graph is to create one in Excel and copy it to a Word document. It’s especially helpful if you have lots of data or data that changes regularly.
How Do You Embed a Graph into a Word Document?
Embedding a graph created in Excel is a simple process:
• Select the chart in your Excel spreadsheet.
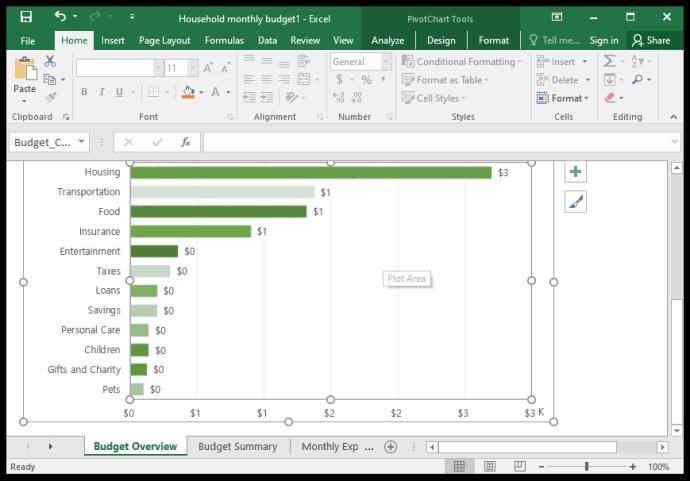
• Press Ctrl+C to copy the graph.
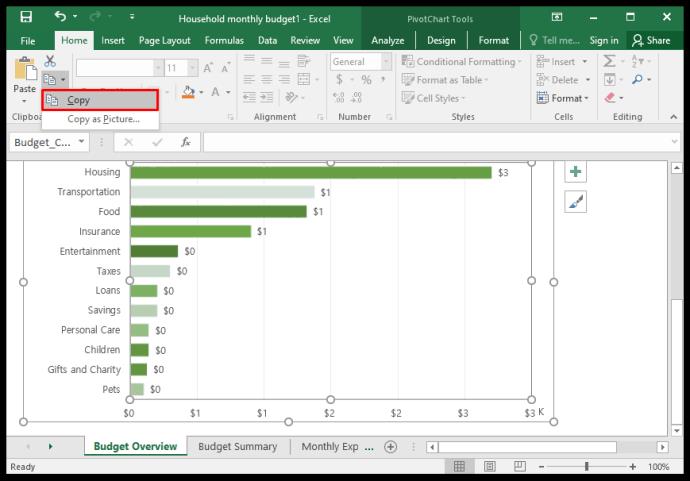
• Switch to your Word document.
• Position the cursor where you’d like to place the chart.
• Go to the “Home” tab.
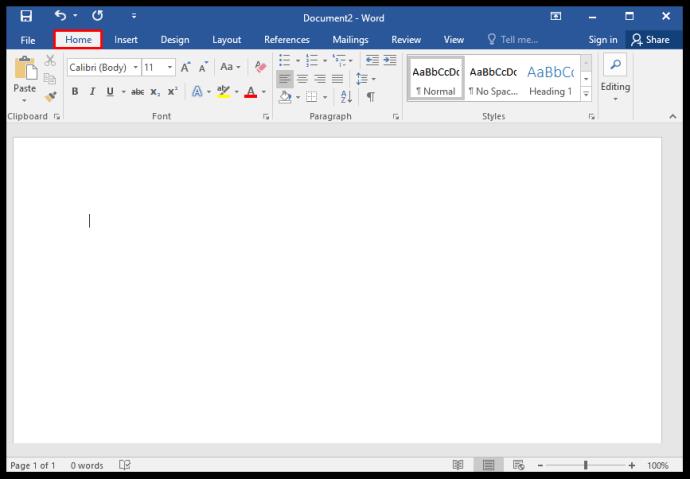
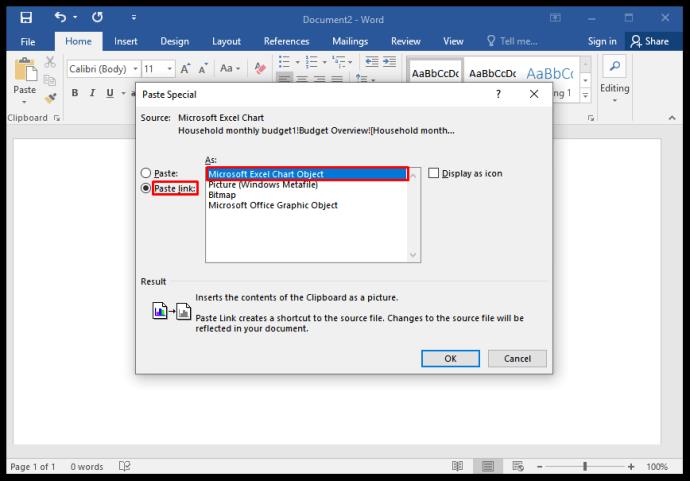
• Click on the down arrow under “Paste” and select “Paste Special.”
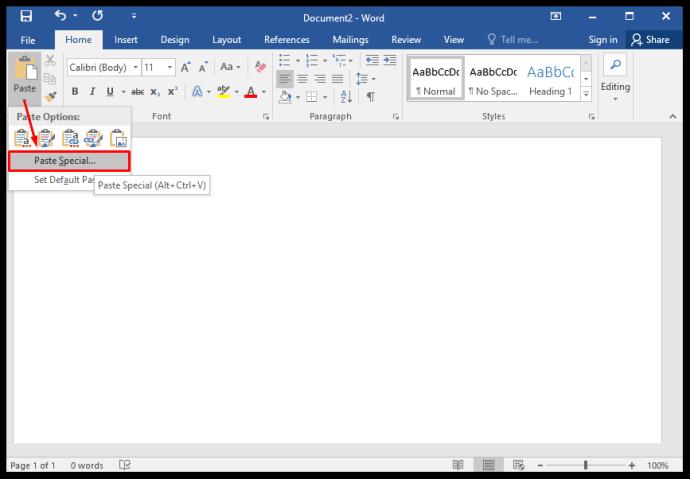
• Click on the Microsoft Excel chart and select “Paste Link.”
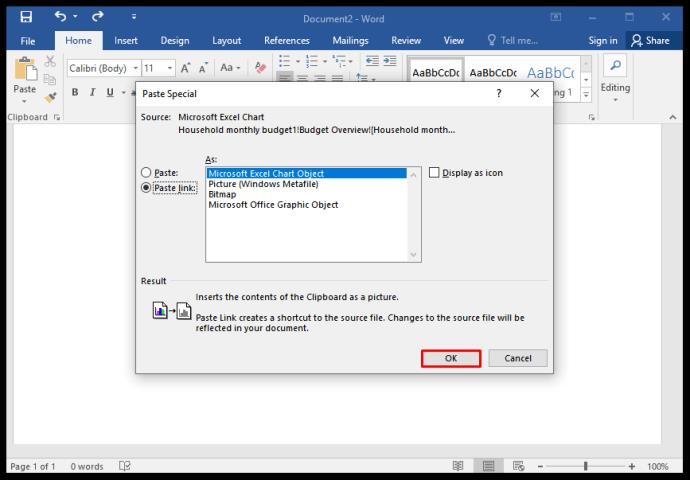
• Click on “OK.”
How Do I Make a Graph Using Microsoft Word?
The simplest way to insert a graph using MS Word is to go to the “Insert” tab and choose your chart. From there, you can replace the default data with your graph data. You can always go back and edit the data and format if the resulting chart isn’t to your liking.
How Do I Create a Line Graph in Word?
A line graph is one of many graph types that you can select in Word. When you insert a graph, select “Line” from the style pane options.
How Do I Make an XY Graph in Word?
And XY graph or scatter graph is another type of graph found in MS Word. You can select this type of graph when you insert a graph into your Word document. Just scroll down and select “XY (Scatter)” from the graph options.
What Are the Steps to Make a Graph?
Making a graph involves these simple steps:
• Choosing and inserting a graph style.
• Entering graph data into a spreadsheet.
• Formatting and editing graph.
That’s really all it takes to make a graph, but you may find yourself going back to the last step again and again for aesthetic reasons.
Say It with Graphs
Looking at column after column of data can lead to data overload for anyone. And many people may overlook important data completely if data is presented like that. But using a graph is a great way to grab people’s attention and deliver important data in a way that’s informative and aesthetically pleasing.
Best of all, though, is that they’re easy to create.
Which graph styles do you find invaluable for your Word documents? Let us know in the comments section below.
