How to see yourself like any celebrity with B612

Discover how to find out which celebrities you resemble using the new Familiar Faces feature in B612.
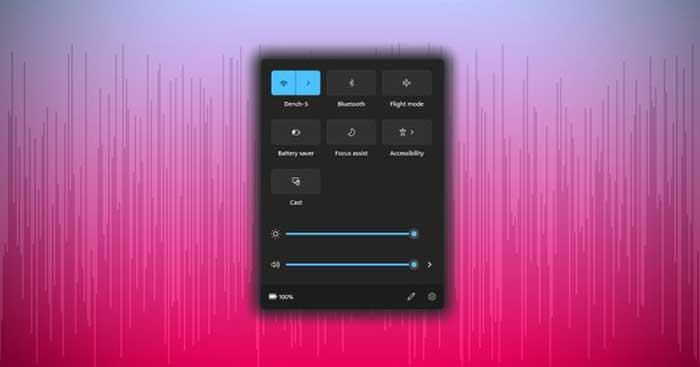
Windows 11 brings some great new features, and the Quick Settings menu is no exception. Below is the most optimal way to use Quick Settings on Windows 11 .

What is the Quick Settings menu on Windows 11?
On Windows 10, when you click on the notification icon in the lower right corner, it opens Action Center. Here, you will see useful quick access icons to commonly used settings such as Bluetooth, airplane mode...
However, Windows 10 Action Center is not really smart. So Microsoft swapped it out on Windows 11, turning the Action Center into a Quick Settings menu.
How to use Quick Settings on Windows 11
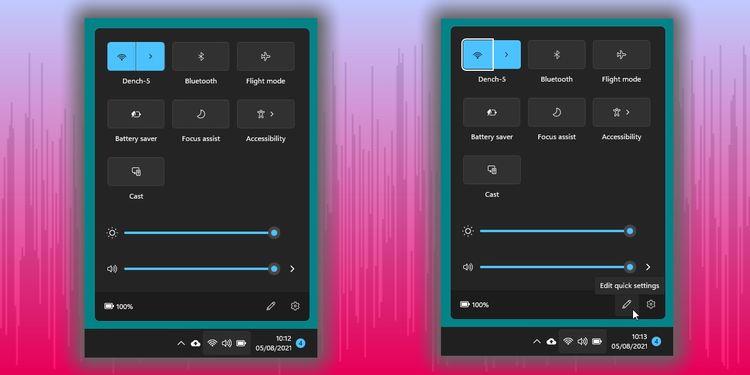
Quick Settings is similar to Action Center. You still access settings via the taskbar, but now you'll click on the status icons (Wi-Fi, battery, speaker...) instead of the notification center icon. Furthermore, the Action Center shortcut Win+A will now open this quick settings menu.
Default options in the Win 11 Quick Settings menu include Wi-Fi, Bluetooth, Focus Assist, Flight Mode, Accessibility and Cast connectivity. Touch and toggle the option you want.
Below the Quick Menu, you'll also find volume and brightness sliders.

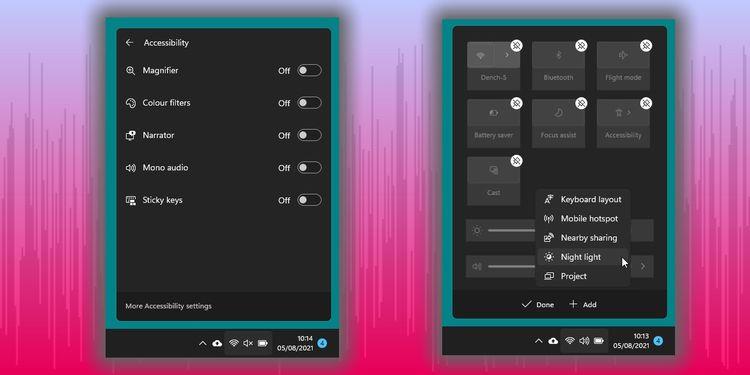
Some menus also open to submenus. For example, clicking Accessibility opens up more options like Magnifier, Narrator...
How to customize the Quick Settings menu on Windows 11

The menu will automatically expand when you click on an option. Additionally, you can use the pencil icon to remove settings from the quick settings menu.
Above is how to use and customize the Quick Settings menu on Windows 11 . Hope the article is useful to you.
Discover how to find out which celebrities you resemble using the new Familiar Faces feature in B612.
Learn how to disable the background mode of BlueStacks to enhance your computer’s performance while saving resources.
Learn how to effectively remove old boot menu options on Windows 10. Keep your boot menu clean and optimized for efficiency with these easy steps.
Discover the essential CROSH commands for your Chromebook. Get troubleshooting tips and system configurations to enhance your Chrome OS experience. Learn more!
Zoom is a top video conferencing service for connecting with friends, family, business associates, and classmates on various devices including Amazon Fire tablets.
Discover the advantages of the AccuType Keyboard in Lenovo laptops. Learn why this keyboard enhances productivity and provides a superior typing experience.
Learn how to utilize the SkyShare feature on Skyworth Smart TV for easy connection with your phone or tablet, enhancing your viewing experience.
Learn how to limit your download speed in Google Chrome to manage bandwidth and improve overall performance during downloads.
Discover how to fix the error of not being able to install software on Windows 10/11. Learn essential steps and troubleshooting techniques.
Learn how to create an Instagram account without a phone number. This step-by-step guide will help you sign up using an email address instead, making it quick and easy.
Step-by-step guide to change the location of the data sharing folder between the NoxPlayer Android emulator and your computer for enhanced file management.
Learn how to efficiently delete data (photos, videos, music, etc.) on the Android NoxPlayer emulator.
Learn how to remove fonts easily with PicsArt, one of the leading photo editing applications that enhances your photography experience.
Discover the 11 best Virtual Router Software for Windows that allows you to convert your PC into a virtual Wi-Fi router, enhancing your internet sharing capabilities.
Learn the comprehensive steps to reset your Smart TV Skyworth effectively with WebTech360. Optimize performance and settings!


