If you want to edit in CapCut like a pro, keyframes are one thing you need to know about. They’re an essential part of every animation. They show the starting and ending point of a particular feature in your video and ensure smooth transitions.
This article will explain how to add keyframes in CapCut and take your videos to the next level.
Adding Keyframes in the CapCut App
You can create astonishing videos by adding keyframes in CapCut’s app for Android and iPhone devices. While the process might seem complex at first, it doesn’t really require expert editing skills.
You can add keyframes to anything: the video itself, text, sticker, transition, audio, overlaid video, etc. And since CapCut has so many elements to which you can add keyframes, this section will only focus on one aspect to help you better understand this feature.
Here’s how to add keyframes to stickers in your CapCut app:
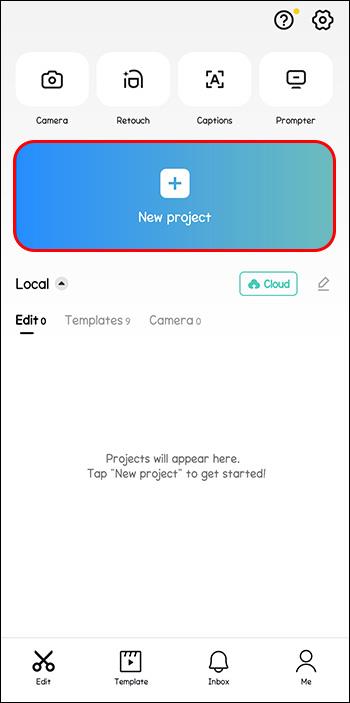
- Tap the plus (+) icon to start a new project.
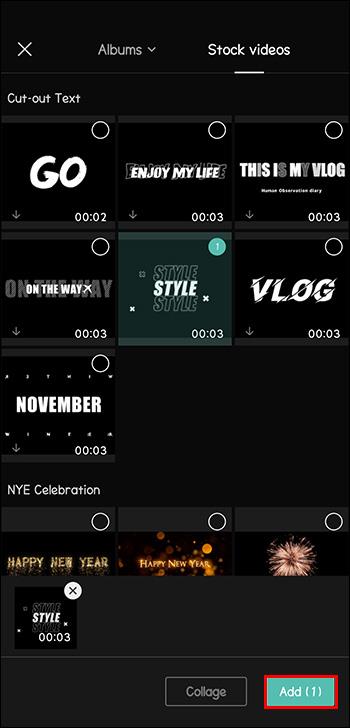
- Select a video from your library or use available CapCut stock videos and tap “Add.” To add multiple videos, click on the empty circle in the top right corner and select more clips from your library.
- Choose “Stickers” from the toolbar at the bottom and pick a sticker or multiple stickers.
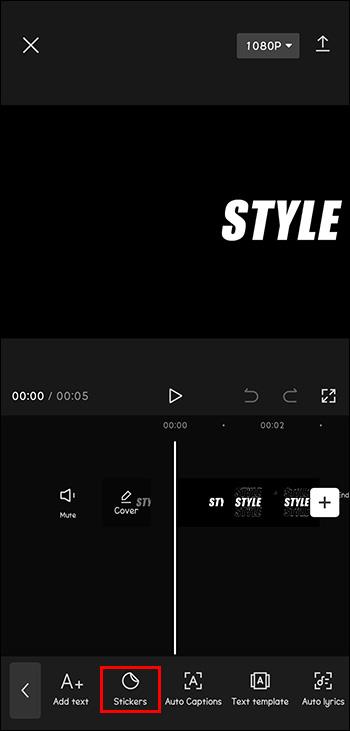
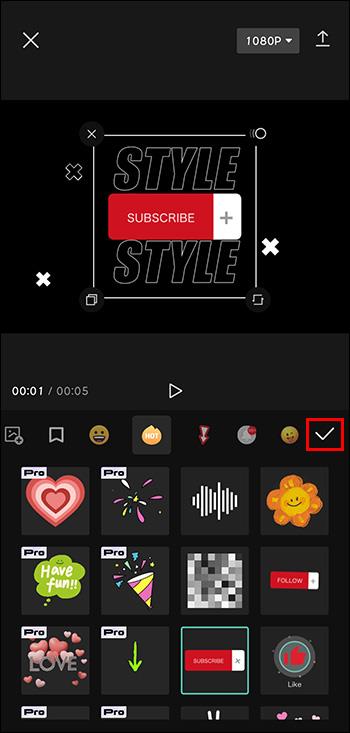
- Tap the white checkmark. Position your sticker to where you want it to appear first. You can rotate the sticker, add static animations, or decide its duration by elongating or shortening its timeline.
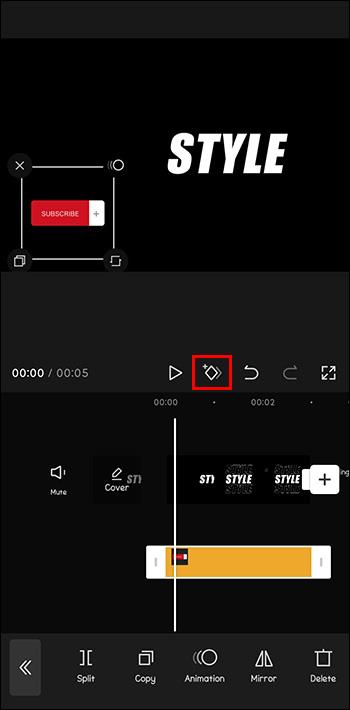
- Tap on two little diamonds with a plus next to the play button. A red diamond on the timeline represents your first keyframe.
- Move the playhead bar to where you want your animation to start next.
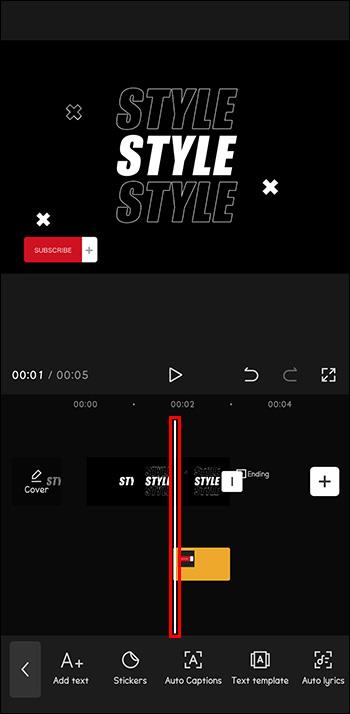
- Adjust your sticker’s new position and add other features. Another red diamond will automatically appear.
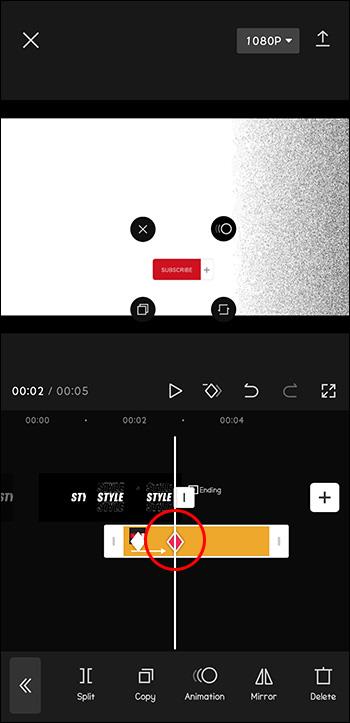
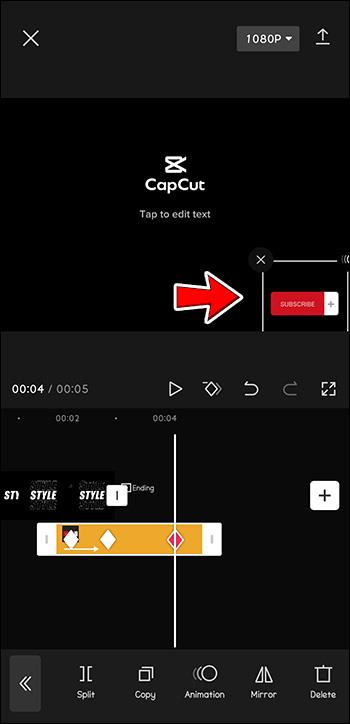
- As you gradually drag the playhead to the end of the video, move the sticker to various positions on the video display.
Exporting the Video
When you’re done adding keyframes, it’s time to export the video.
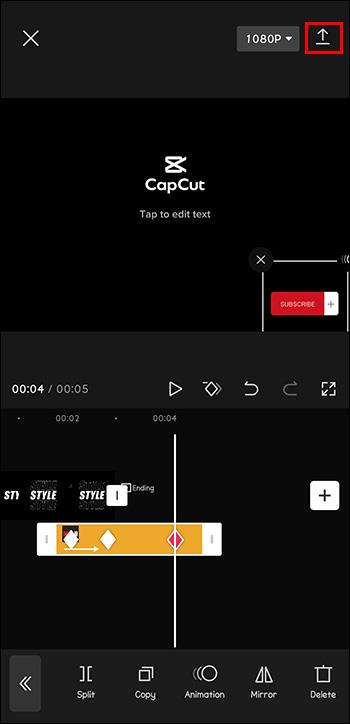
- Click the arrow in the top right corner.
- Tap “Done” in the top right corner.
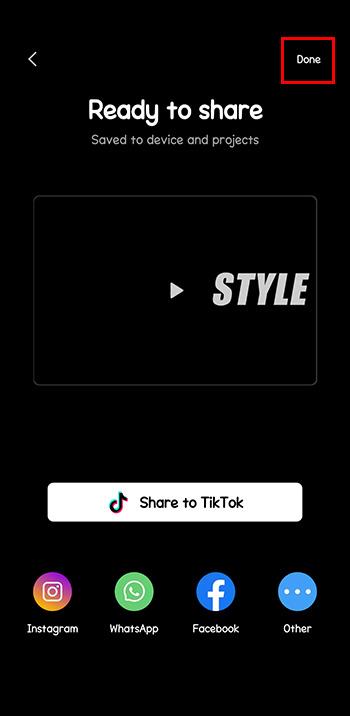
You can export it directly to your social media accounts or share it with your friends through the messaging apps like WhatsApp.
Removing Keyframes
To remove a specific keyframe:
- Move the playhead back to the position of the red diamond on your video’s timeline.
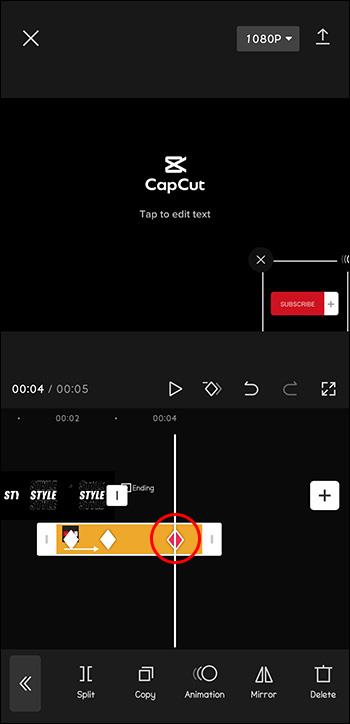
- Click on those two diamonds next to the play button once again.
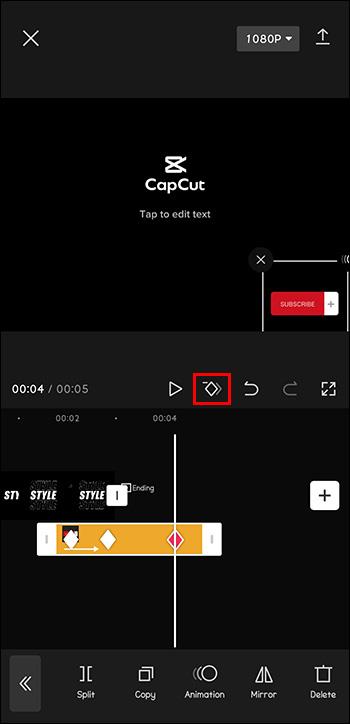
What was a plus sign should now be a small minus sign. Tapping the diamonds will turn it into a plus sign again, meaning the keyframe was removed.
Add Keyframes in CapCut PC
If you prefer working on your PC, CapCut enables you to add keyframes to your videos through its app for Windows.
Like in the app, the CapCut PC version has many elements to which you can add keyframes. Thus, to make this feature less confusing to a new editor, this section will focus on changing a video’s opacity by adding keyframes. The app’s default “Normal” mode only changes the opaqueness of the video. You can access other blend modes in the drop-down menu, making your video brighter, darker, softer, and much more.
Here’s how to add keyframes in the PC version of your CapCut app:
Getting Started
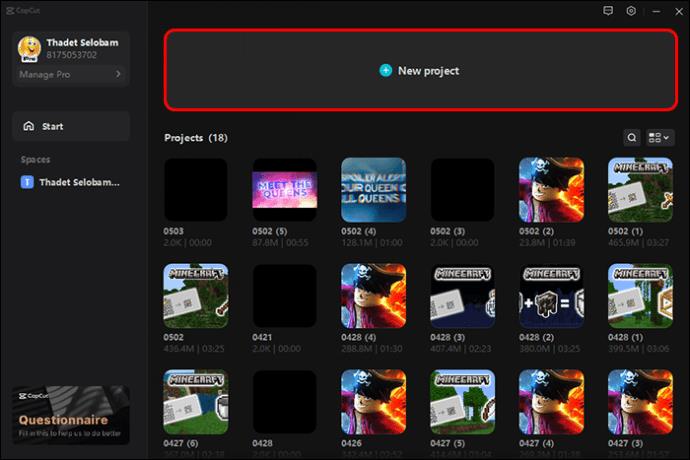
- Click on “New project.”
- Select “Import” on the left side of your screen or add videos from CapCut’s Library.
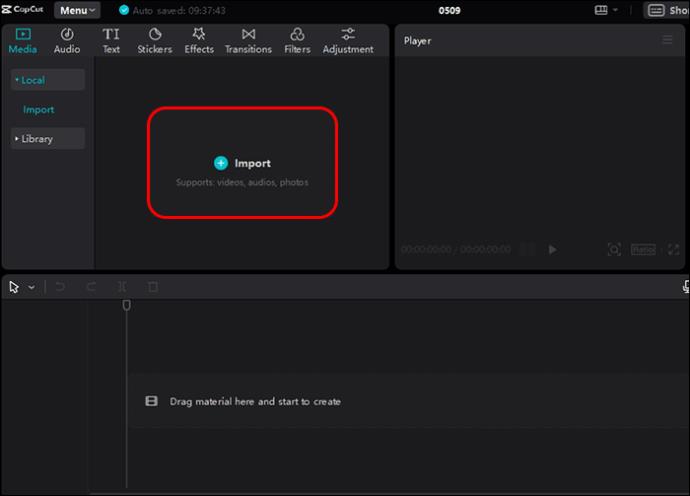
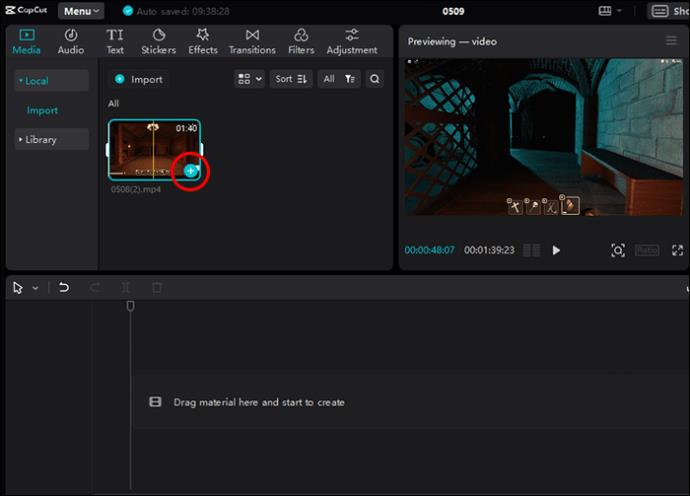
- Press the little blue plus (+) in the bottom right corner to add it to your editing space, or drag it to the timeline.
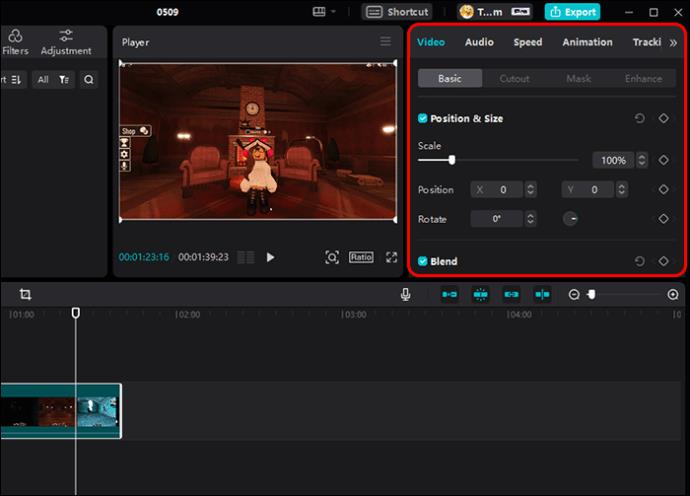
- Click on the video timeline to access a menu on the right side.
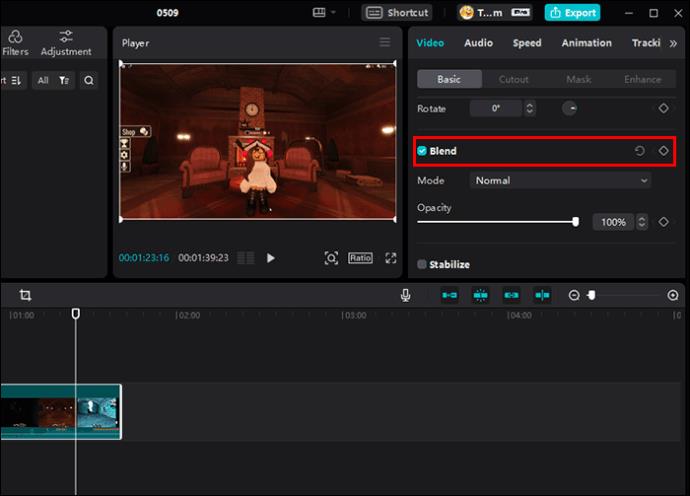
- Go to the “Basic” tab, and access the “Blend” section to select a mode.
Creating Keyframes
- Adjust the starting opacity and position the playhead where you want the animation to start.
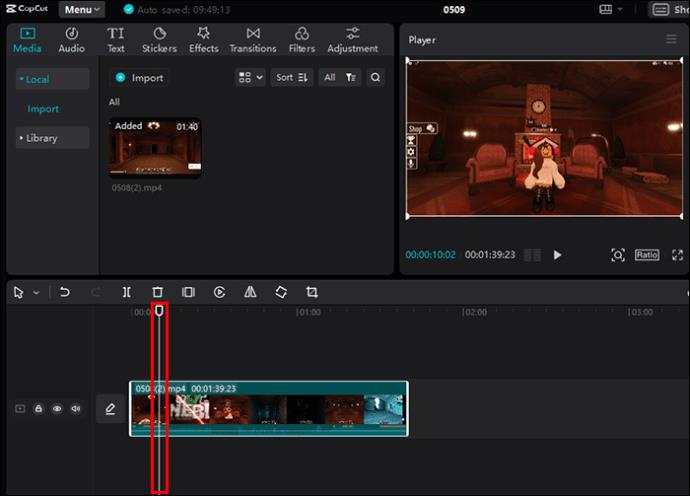
- Tap on the symbol representing a diamond. It will turn blue and mark your first keyframe. A white diamond will also appear on your timeline to indicate the first keyframe.
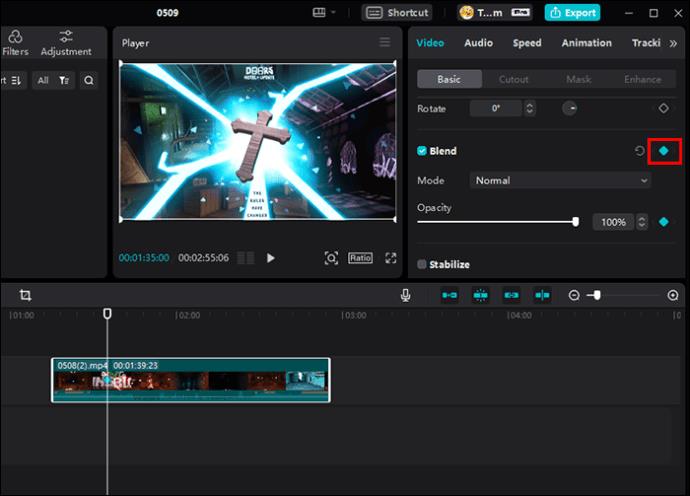
- Position the playhead to where you want the following animation to start.
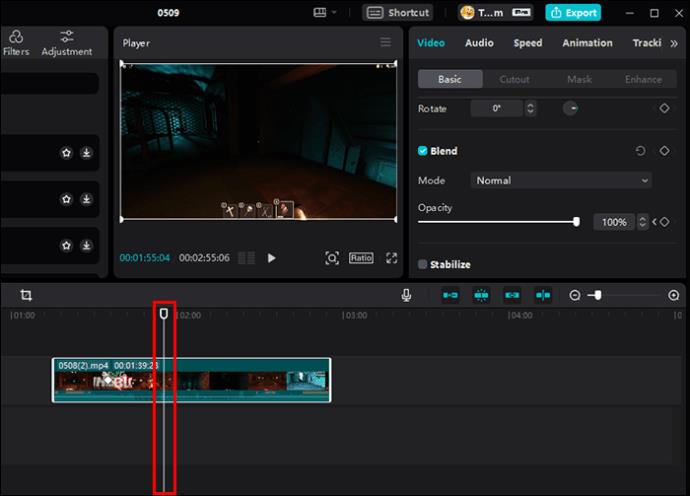
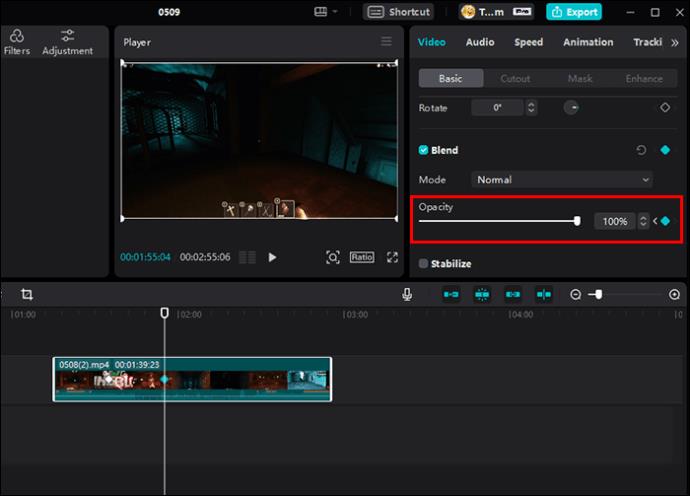
- Adjust the opacity in the side menu. The diamond will turn blue again automatically.
- Change the playhead’s position and adjust the opacity interchangeably to match your preferences until you reach the end of the video.
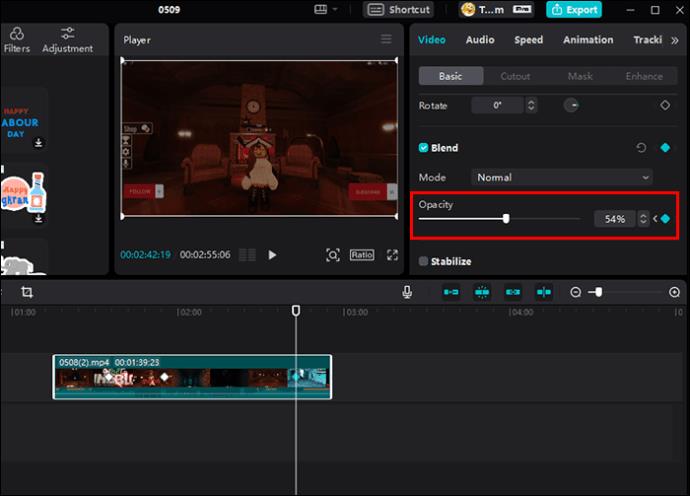
Exporting the Video
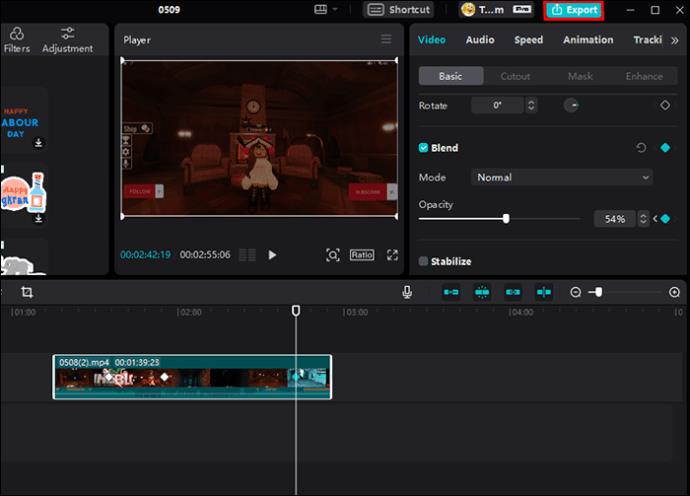
- Tap the “Export” button when you reach the desired look for your new video.
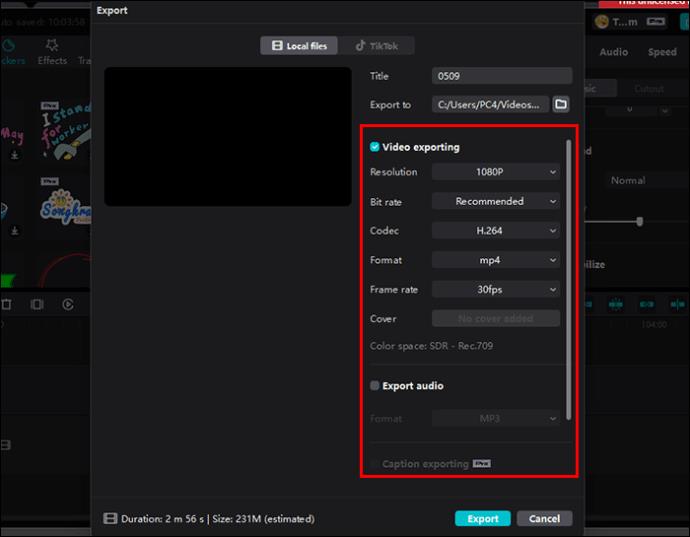
- Before saving your new edit to your local files, you can adjust the video’s resolution, bit rate, codec, format, and frame rate.
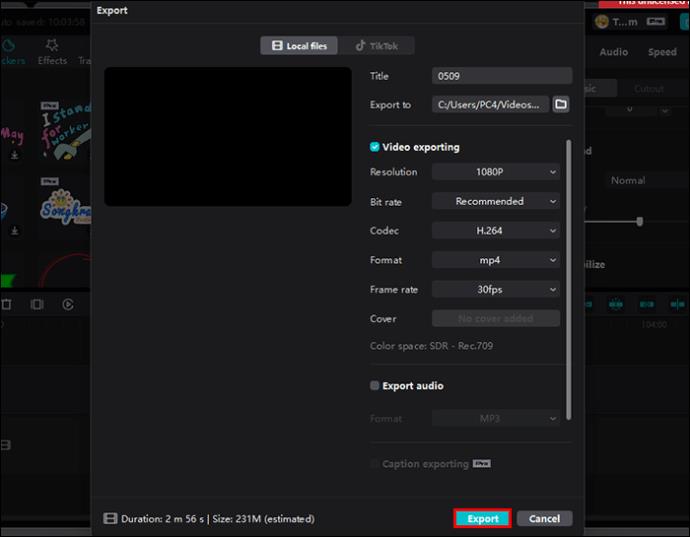
- Click “Export” again to confirm the action.
Those who can’t wait to share new videos to their TikTok accounts can do it immediately by switching to the “TikTok” tab at the top of the pop-up and then clicking “Export.”
Removing Keyframes
Removing keyframes is the same as in the CapCut app. You’ll just need to position the playhead to the specific diamond on the timeline and click on the blue diamond in the side menu. To start over and remove all the keyframes at once, you can click on the circular arrow next to the feature you used.
Additional FAQs
Can you add keyframes in CapCut online editor?
Unfortunately, it seems that CapCut’s Online Editor doesn’t allow you to add keyframes as of now.
Can you add multiple keyframes to a single video?
In CapCut, you can add as many keyframes as you want. You can simultaneously add keyframes to the main video, a sticker over the video, audio, etc. However, you can’t attach keyframes to all timelines at the same time. You’ll need to edit each timeline and add keyframes separately.
Is CapCut for Windows free?
CapCut for Windows is available in both free and paid versions. Keyframe animation and many other CapCut features that can make your videos share-worthy are available in the free version. In contrast, additional features such as watermark removal require upgrading to the pro version.
Professional Videos With Minimum Effort
With its user-friendly, easy-to-use interface and many cool features, CapCut could become your go-to video editor to create stunning and professional-looking videos to share online quickly.
Have you already tried adding keyframes to your videos in CapCut? Let us know about your experience in the comments section below.
