How to see yourself like any celebrity with B612

Discover how to find out which celebrities you resemble using the new Familiar Faces feature in B612.
If Hyper-V is hindering your work, get rid of it on Windows 11 with these simple tips.
Hyper-V comes pre-installed on Windows 11 computers . Although the virtualization tool is not available in the Home edition, you can install it using a batch script.
Unfortunately, Hyper-V can conflict with 3rd party applications on your PC. As a result, you may encounter a Hyper-V detection error when trying to open an application, game, or hardware tuning tool.
Luckily, you can disable or remove Hyper-V in Windows 11 with the help of Windows Features, Command Prompt, and PowerShell.
How to check if Hyper-V is running on Windows 11
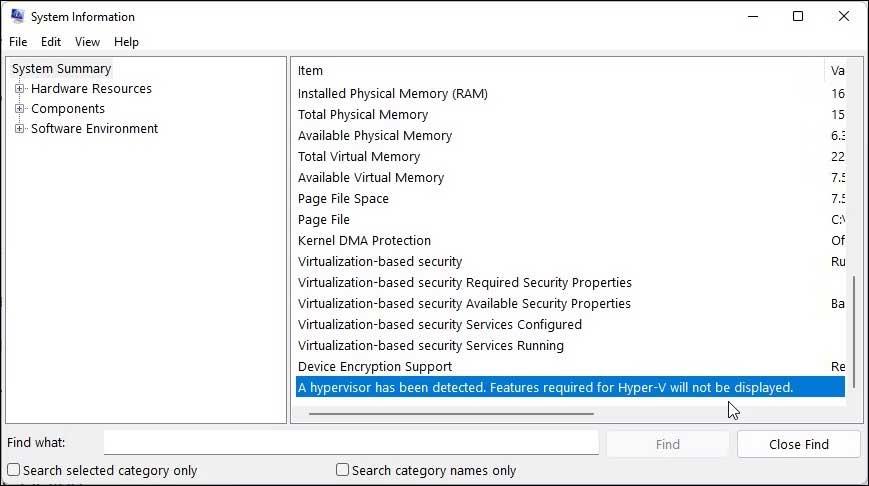
You can access the System Information app to determine if Hyper-V virtualization is running on the system. This is useful if you need to verify the status of Hyper-V after shutting it down.
To check the current Hyper-V status on the computer:
1. Press Win + R to open Run.
2. Type msinfo32.exe and click OK to open the application.
3. Next check if the following is available at the bottom of the details tab:
A hypervisor has been detected. Features required for Hyper-V will not be displayed.If so, you will need to disable Hyper-V, Memory Integrity, and Credential Guard.
How to disable Hyper-V via Windows Features
Windows Features allows you to add additional features that are disabled by default in Windows 11. You can also use it to disable some advanced features, including Hyper-V.
Note that to fix Hyper-V detection, you need to disable the virtual machine platform and Windows Hypervisor Platform.
To disable Hyper-V using Windows Features :
1. Press Win + R to open the Run dialog box .
2. Type control and click OK to open Control Panel .
3. In Control Panel , click Programs .
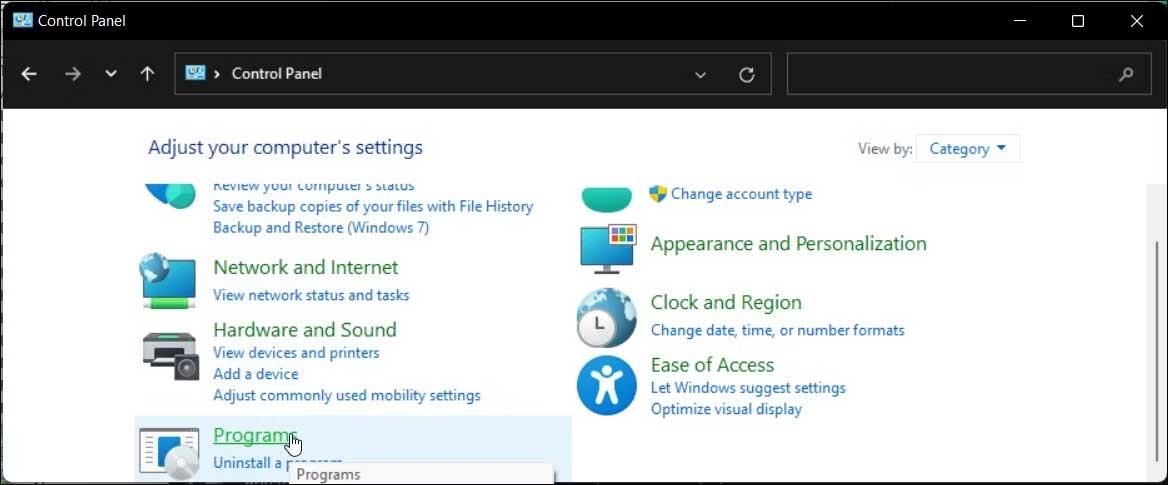
4. Next, click Programs and Features .
5. In the left panel, click Turn Windows features on or off .
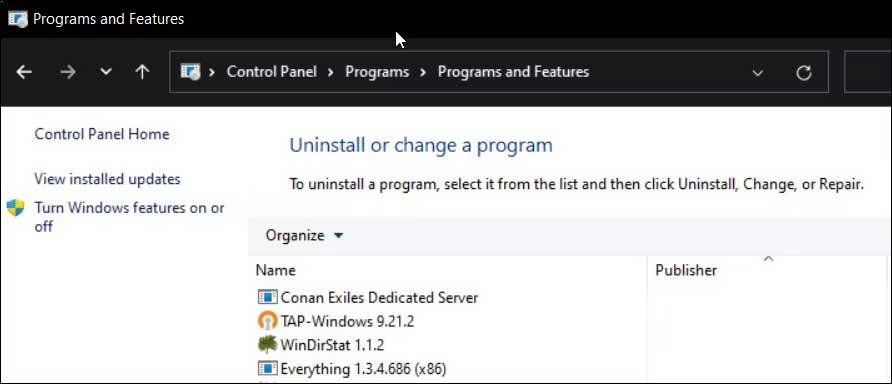
6. In the Windows Features dialog box , find Hyper-V .
7. Uncheck Hyper-V to turn off this feature.
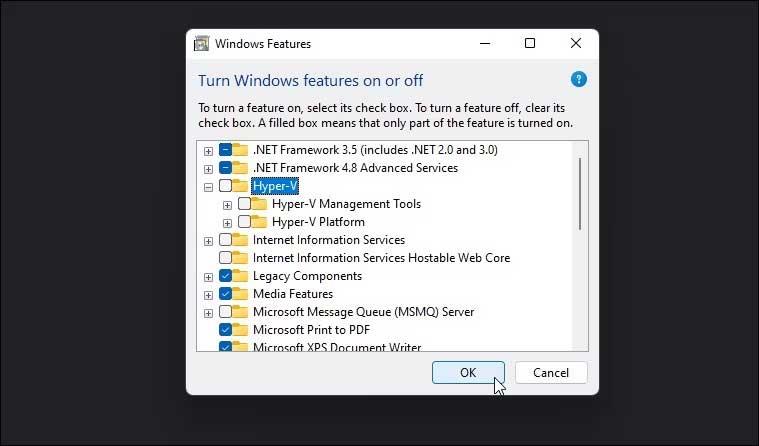
8. Next, scroll down and find Virtual Machine Platform and Windows Hypervisor Platform options .
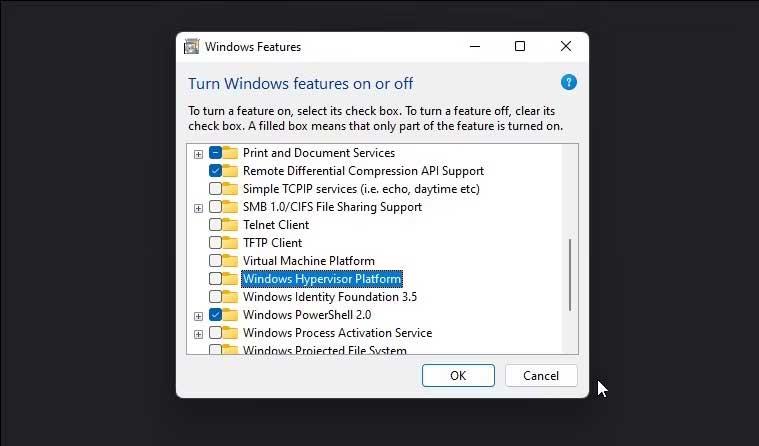
9. Uncheck both options and click OK .
10. Windows will uninstall Hyper-V and other features from your system.
11. Then, restart your PC to apply the changes.
How to disable Hyper-V using BCDEDIT

You can disable Hyper-V in the boot configuration using the BCDEdit tool. It's useful when you just want to deactivate Hyper-V and not completely uninstall it.
To disable Hyper-V using BCDEdit:
1. Press the Win key and type cmd .
2. Right-click on Command Prompt and select Run as administrator .
3. In the Command Prompt window, enter the following command and press Enter:
bcdedit /set hypervisorlaunchtype off4. When the success message appears, close Command Prompt and restart your PC to apply the changes.
5. If you need to re-enable Hyper-V, use the following command:
bcdedit /set hypervisorlaunchtype auto6. Restart your PC to apply these changes.
How to uninstall Hyper-V using Command Prompt
If Windows Features fails to remove Hyper-V, you can use Command Prompt to disable it. Proceed as follows:
1. Open Command Prompt with admin rights.
2. In the Command Prompt window , enter the following command and press Enter :
dism /online /disable-feature /featurename:Microsoft-hyper-v-all3. The DISM tool will shut down Hyper-V and notify you that the operation completed successfully.
4. Type exit to close Command Prompt and restart your PC.
After rebooting, you can run games and other hypervisors without errors.
If not, open Windows Features, turn off Virtual Machine Platform and Windows Hypervisor Platform, and then restart your PC.
How to disable Hyper-V using PowerShell
If you like PowerShell, you can use WindowsOptionalFeature to disable Hyper-V in Windows 11. To do this, you need to open PowerShell with admin rights and execute the command. Here's how this works:
1. Press the Win key and type powershell .
2. Right-click PowerShell and select Run as administrator .
3. Click Yes when prompted by User Account Control .
4. In the PowerShell window, copy and paste the command below and press Enter :
Disable-WindowsOptionalFeature -Online -FeatureName Microsoft-Hyper-V-AllWait for this process to complete. Then, close PowerShell and restart your PC to apply the changes.
How to uninstall Hyper-Virtual Network Adapter
Usually during reboot, after uninstalling Hyper-V, you may encounter the message "We couldn't complete the updates, undoing changes".
To resolve this issue, ensure the Hyper-V virtual network regulator has been removed from the PC. Follow these steps:
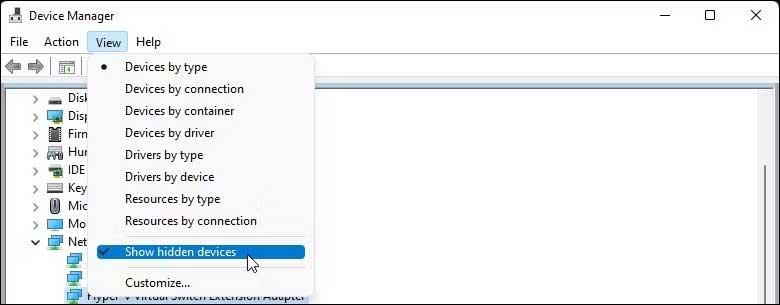
Once completed, close Device Manager and restart your PC. Next, uninstall Hyper-V and check for any changes on the system.
Above is how to turn off Hyper-V on Windows 11 . Hope the article is useful to you.
Discover how to find out which celebrities you resemble using the new Familiar Faces feature in B612.
Learn how to disable the background mode of BlueStacks to enhance your computer’s performance while saving resources.
Learn how to effectively remove old boot menu options on Windows 10. Keep your boot menu clean and optimized for efficiency with these easy steps.
Discover the essential CROSH commands for your Chromebook. Get troubleshooting tips and system configurations to enhance your Chrome OS experience. Learn more!
Zoom is a top video conferencing service for connecting with friends, family, business associates, and classmates on various devices including Amazon Fire tablets.
Discover the advantages of the AccuType Keyboard in Lenovo laptops. Learn why this keyboard enhances productivity and provides a superior typing experience.
Learn how to utilize the SkyShare feature on Skyworth Smart TV for easy connection with your phone or tablet, enhancing your viewing experience.
Learn how to limit your download speed in Google Chrome to manage bandwidth and improve overall performance during downloads.
Discover how to fix the error of not being able to install software on Windows 10/11. Learn essential steps and troubleshooting techniques.
Learn how to create an Instagram account without a phone number. This step-by-step guide will help you sign up using an email address instead, making it quick and easy.
Step-by-step guide to change the location of the data sharing folder between the NoxPlayer Android emulator and your computer for enhanced file management.
Learn how to efficiently delete data (photos, videos, music, etc.) on the Android NoxPlayer emulator.
Learn how to remove fonts easily with PicsArt, one of the leading photo editing applications that enhances your photography experience.
Discover the 11 best Virtual Router Software for Windows that allows you to convert your PC into a virtual Wi-Fi router, enhancing your internet sharing capabilities.
Learn the comprehensive steps to reset your Smart TV Skyworth effectively with WebTech360. Optimize performance and settings!

