How to fix #SPILL! error in Microsoft Excel
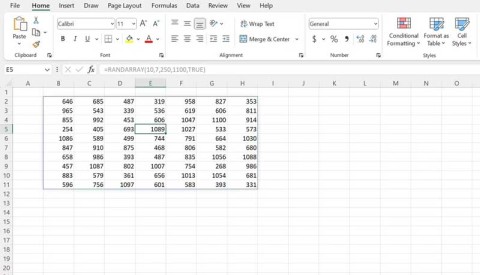
The #SPILL! error in Excel is quite common and it is quite simple to fix. Here is how to fix the #SPILL! error easily in Excel.
There are two ways to import data from a text file (.txt or .csv) into Excel. You can open the file in Excel or import it as an external data range. To export data from Excel to text file, use the Save As command and change the file type from the drop-down menu.
Microsoft Excel Microsoft Excel for Android Microsoft Excel for iOS Microsoft Excel Online
Two commonly used text file formats include:
Simple text file (.txt), in which TAB characters (ASCII code characters 009) usually separate each text field.
A text file (.csv) is a file in which text values are usually separated by commas.
You can change the delimiters used in .txt or .csv files. This is necessary to ensure the import or export operation works as you wish.
Note: You can import or export up to 1,048,576 rows and 16,384 columns.
Enter the text file by opening it in Excel
Import & export text files in Office versions 2017 and above
Enter the text file by connecting it (Power Query)
Export data to text file by saving it
Import & export text files in Office 2016-2010 version
Enter the text file by connecting it
Export data to text file by saving it
Tips to know when importing or exporting text files in Excel
Change the separator used when importing text files
Change list separator for new text file (file you can create when exporting using Save As)

You can open text files created in other programs as Excel workbooks with the Open command . Opening the text file in Excel does not change the file format. You can see it in the Excel title bar, where the file name contains the text file name extension. (e.g. .txt. .csv).
Go to File> Open and navigate to the location where that text file is located.
Select Text Files in the type of file drop-down list in the Open box .
Locate and double click the text file you want to open.
If it is a .txt file, Excel starts the Import Text Wizard process. When you have completed these steps, click Finish to complete the data entry process.
If it's a .csv file, Excel automatically opens the text file and displays the data in a new workbook.
Note : When opening a .csv file, it uses the current default data format setting to explain how to import each column of data. If you want to convert the column more flexibly to other data formats, you can use the Import Text Wizard. For example, the column data format in the .csv file is MDY, but Excel's default data format is YMD or you want to convert a column of numbers with the first zero leading to text so you can keep the same. this form. To force Excel to run the Import Text Wizard, you can change the file name extension from .csv to .txt before opening it. Alternatively, you can enter the text file by connecting it.
You can import data from a text file into the current worksheet.
Open the Data tab , in the Get & Transform Data group> click From Text / CSV .
In the Import Data box , locate and double-click the text file you want to import> Click Import .
In the preview dialog, you have a few options:
Select Load , if you want to load the data directly into the new worksheet.
Alternatively, select Load to if you want to load data into a table, a PivotTable / PivotChart , an existing / new Excel worksheet, or just make a connection. You also have the option of adding data to the Data Model .
Select Transform Data if you want to upload this data to Power Query and edit it before putting it into Excel.
If Excel doesn't convert a column of data to the desired format, you can convert that data after importing it.
You can convert Excel worksheet to text file by using the Save As command .
Go to File> Save As .
Click Browse .
Go to Save As> Save as type , choose the text file format for the worksheet. For example, click Text (Tab delimited) or CSV (Comma delimited). Note: The feature set is supported depending on the format.
Browse to the location where you want to save the new text file, then click Save .
A dialog box appears, reminding you that only the current worksheet is saved to the new file. If you are sure the current worksheet is the only thing you want to save as a text file, click OK . You can save other spreadsheets as separate text files by repeating the above process.
You may also see a message below the ribbon that some features may be lost if you save the workbook in CSV format.
You can import data from the text file into the current worksheet.
Click the cell you want to put data for that text file.
On the Data tab , in the Get External Data group group> click From Text .
In the Import Data box , locate and double-click the text file you want to import, click Import . Follow the instructions in the Text Import Wizard . Click Help on any page of the Text Import Wizard to learn more information about using this wizard. After completing the steps, click Finish to finish the import process.
In the Import Data box , follow these instructions:
In Where do you want to put the data? , do the following:
To return the data to the position you selected, click Existing worksheet .
Return the data to the upper left corner of the worksheet, click New worksheet .
Optionally, click Properties to set the refreshing, formatting and layout options for the imported data.
Click OK .
Excel places the external data range in the position you select.
If Excel does not convert the data column to the format you want, you can convert the data after importing it.
You can convert Excel worksheet to text file by using the Save As command .
Go to File> Save As .
The Save As box is displayed.
In the Save as type box , select the text file format for that worksheet. For example, click Text (Tab delimited) or CSV (Comma delimited).
Go to the location where you want to save the new text file, then click Save .
A box appears, reminding you to save the current worksheet only to a new file. If you are sure about this action, click OK .
A second dialog box appears, reminding you that the worksheet may contain features that are not supported by the text file format. If you just want to save the data in the worksheet as a new text file, click Yes . If you are unsure and want to know more about unsupported Excel features, click Help to learn more.
The way you change the separator when importing depends on how you import the file.
If using Get & Transform Data> From Text / CSV , after selecting the text file and clicking Import , select the characters used from the list in Delimiter . You can see the effect of the new option immediately in the data preview window. This way you can be sure of your decision before continuing.
If using the Text Import Wizard to import text files, you can change the separator used for import operation in step 2 of the Text Import Wizard. In this step, you can also change the way you handle consecutive delimiters.
When saving the workbook as a .csv file, the default list separator is a comma. You can change it via Windows Region settings.
In Microsoft Windows 10 , right-click the Start button > click Settings .
Click Time & Language> Region in the left panel.
In the main control panel, go to Regional settings> click Additional date, time, and regional settings .
In Region , click Change date, time, or number formats .
In Region , on the Format tab , click Additional settings .
In the Customize Format dialog box , on the Numbers tab , type the character that uses the delimiter in the List separator box .
Click OK twice.
Note : After changing the delimiter character for a computer, the entire program uses this character as a delimiter. You can change this character back to the default by repeating the above process.
In Microsoft Windows, click the Start button > click Control Panel .
In Clock, Language, and Region , click Change date, time, or number formats .
In Region , on the Format tab , click Additional settings .
In the Customize Format dialog box , on the Numbers tab , type the character that serves as the new delimiter in the List separator box .
Click OK twice.
Hopefully after this Excel lesson, you will be proficient in importing and exporting text files in Microsoft Excel.
The #SPILL! error in Excel is quite common and it is quite simple to fix. Here is how to fix the #SPILL! error easily in Excel.
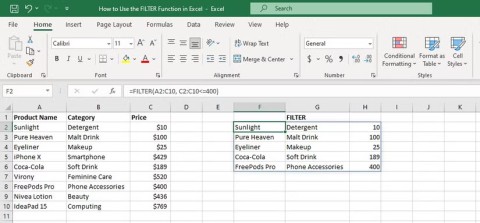
If you regularly work with data sets in Excel, you know how important it is to be able to quickly find the information you need.
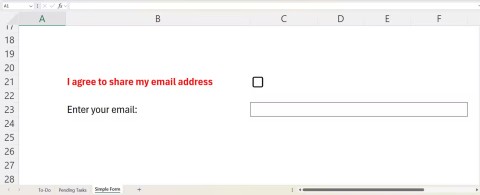
On the surface, Excel Checkboxes seem like a very simple feature - which is probably why they are often overlooked.
Many people have tried many project management tools, but still come back to Excel for project management. While it may not be perfect for everyone, it is a simple, yet effective solution that you already know how to use.
Microsoft recently raised the price of its Microsoft 365 subscription, justifying the change by adding more AI experiences to the service.
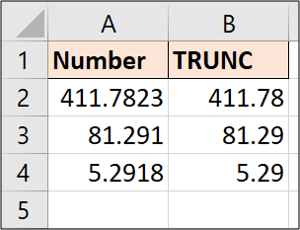
There are different ways in Excel to remove decimals and shorten numeric values. In this article, Quantrimang.com will explain how to use the TRUNC function and point out what makes it different from other techniques.
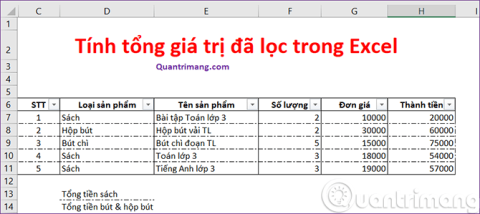
The sum function when filtering data is very important for Microsoft Excel users. This article will summarize for you how to filter and calculate sum in Excel using Subtotal.
Airtable lets you create and share relational databases easily. Export your Airtable data to Google Sheets or Excel to enjoy the benefits of advanced charts and data visualization.
Curious about how ChatGPT can enhance your Excel experience? Here are some tips for using ChatGPT in Excel.
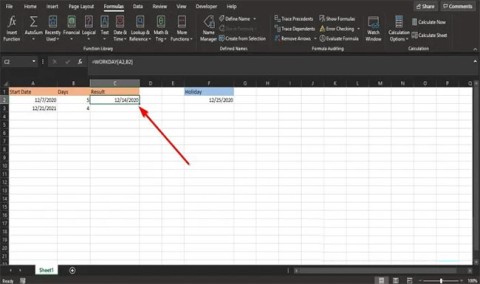
In Microsoft Excel, the WORKDAY function is a date and time function and its purpose is to return the date before and after the specified number of working days. Working days do not include weekends or any days defined as holidays.
For a while, Google Sheets lured people away from Excel. But many people came back after realizing that Google Sheets is far from beating Excel.
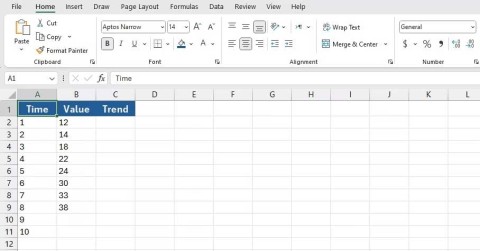
You can calculate and visualize trends in Excel using the TREND function. Here's how to use the TREND function in Microsoft Excel.
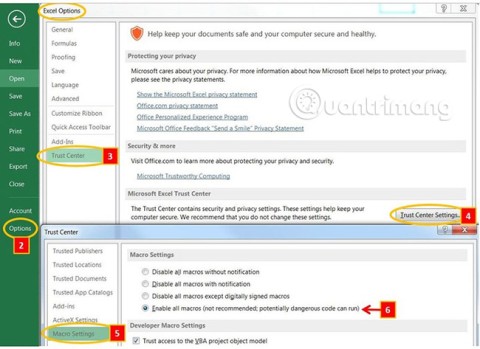
The following article will guide readers how to enable and disable macros in Excel 2007, 2010, 2013 and 2016.
How to fix the error of printing blank pages in Microsoft Excel. Why do some Excel documents not display data or contain blank pages when printed? Below are the reasons
How to pin Word, Excel and PowerPoint files to the corresponding app icon on the Windows 11 taskbar, How to pin Office files to the taskbar icon on Windows 11? Invite
Struggling with Microsoft Teams Error AADSTS70008: Expired Security Token? Discover step-by-step fixes, from quick sign-outs to advanced cache clears, to get back to seamless collaboration instantly. Updated with the latest solutions.
Tired of Microsoft Teams Error C Data crashing your meetings? Get proven, step-by-step solutions to clear cache, reset, and restore seamless teamwork. Fast, reliable fixes for the latest Teams versions.
Discover how to use Microsoft Teams background images effectively with step-by-step guides, custom upload tips, and best practices to make your video calls professional and engaging. Elevate your remote work game today!
Discover how to use Microsoft Teams Web App on any browser effortlessly. Step-by-step guide, tips, and troubleshooting for smooth collaboration anywhere. No downloads needed!
Tired of the frustrating Microsoft Teams "User Not Authorized" error blocking your meetings? Discover proven, step-by-step solutions to fix it fast and reclaim your productivity. Works on desktop, web, and mobile.
Struggling with Microsoft Teams errors on iPhone or iOS? Discover step-by-step fixes for crashes, sign-in issues, and more. Get back to seamless teamwork in minutes—no tech expertise needed!
Battling Microsoft Teams Tasks sync error? Get instant relief with our proven, step-by-step fixes for Tasks not syncing in Teams. Boost productivity now—no tech expertise needed!
Unlock the power of Microsoft Teams Breakout Rooms with this 2026 beginner tutorial. Step-by-step guide to create, manage, and elevate your virtual meetings effortlessly. Perfect for educators, teams, and beginners!
Struggling with Microsoft Teams "Error N" network errors? Get step-by-step fixes for Solving Microsoft Teams "Error N" Network problems, from quick restarts to advanced troubleshooting. Restore seamless calling and meetings now!
Tired of Microsoft Teams "Media Error" ruining your video shares? Follow our step-by-step guide with the latest fixes to get videos playing smoothly again – no restarts needed!
Tired of Microsoft Teams "Code Error" blocking your redemption? Get proven, step-by-step Troubleshooting Microsoft Teams "Code Error" Redemption solutions. Clear cache, update, and redeem successfully—fast and easy!
Stuck with Microsoft Teams "Error QSP" during installation? Follow our step-by-step guide with quick fixes to resolve the issue fast. Updated for the latest Teams versions—no tech skills needed!
Encountering Microsoft Teams "Offline Error" status? Discover proven, step-by-step troubleshooting tips to resolve it fast and get back to seamless collaboration. Updated with the latest fixes.
Tired of Microsoft Teams Test Call Error 2026 ruining your meetings? Discover simple, effective fixes to restore audio instantly. Step-by-step guide with expert tips for seamless Teams calls.
Frustrated with "Where is My Teams Calendar?" Troubleshoot syncing issues in Microsoft Teams step-by-step. Restore your calendar view and sync effortlessly—expert tips inside!
