The best Android emulators for gaming
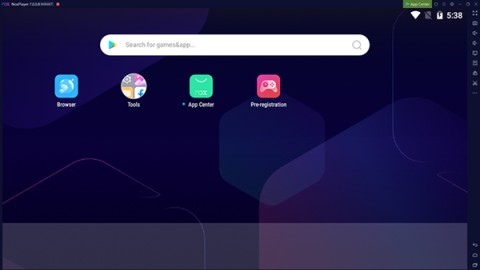
In this article, Quantrimang only gives a list of the best Android emulators for playing games.
In the era of information technology, owning and using a smartphone or tablet is not too difficult. But different companies use different operating systems, which will lead to their devices having different features and effects. Most prominent, can mention iOS, Android, or Mac, Windowsphone.
For those who do not use the Android operating system, finding and using emulators like BlueStacks is not new. However, to be able to use all the features and to experience the most perfect, they are forced to access the account, which few people know how to do.
Before proceeding, Download.com.vn has a small note with you, that is: Depending on which version of BlueStack you are using, the display of the main interface will vary. As in this article, we will do it on version 0.9.30.4239, so the steps in the first steps will be different, and starting from Settings, all will be the same, so you should pay attention. his version. Or the best way is to download the latest BlueStacks to do.
For other versions, you can choose Settings right from the main interface, or go to All apps in the upper right corner and follow the instructions.
First, you open up the interface of BlueStacks up, then click the white circle icon (as shown below).

Depending on the different versions of BlueStack, the access method will be different
Continue to select BlueStacks Settings.

In the BlueStacks Settings interface, scroll to the bottom and select Advanced Settings.

Then, looking for Accounts section , you will see there are two sections Google and Add account. These are also two options for users. Specifically:
Attention:
In the Accounts section, Add account will be the default, and Google, which means that previous users have used Gmail accounts to login, if they use Facebook accounts, or Appstore, the corresponding names will replace this. for Google.
Step 1: In the Advanced Settings interface , select Google (or Facebook, Appstore).

Step 2: A new interface appears with the top item is the Google account of the previous user, to delete this account, click the three-dot icon in the top right corner, select Remove The account in the window appears right below.

Step 3: Remove account? - Do you want to delete this account? It is a notification that BlueStacks will ask you shortly, select Remove account to confirm , or Cancel to return.
Need to remember:
If you choose Remove account to delete this account, all information and data from that account, as well as related messages, contacts will no longer exist!

Removing the account will delete the account currently logged on BlueStacks
Step 1: Also from Advanced Settings, you click Add account.

Step 2: There will be three options: Appstore, Facebook , Google . Most often there are two options below, so Download.com.vn will skip the first item.
For example:
If you choose any item, the corresponding account will have to be used to login. Select Google - use your Gmail account, select Facebook - use the Facebook account you are using. If not, you can see the tutorial on creating a Gmail account and creating a Facebook account here.

Step 3: In the Add a Google Account window , you also have two options, namely:

If you select Existing, the Sign in window will appear for you to log in. For now, just enter your Gmail address and you're done.

And if you choose New :

The next steps will be the same as when you created a Gmail account outside of Windows.

After each step, BlueStacks will check your login information, if it is correct, it will move to the next step. However, in my opinion, this method does not really work, moreover, perhaps up to now, everyone must have a Gmail account.

And this is the interface if you choose to log in with your Facebook account.

BlueStacks is a popular Android operating system emulator and many people choose to use it to experience Android applications, games or utilities. Knowing how to use this emulator will help you feel more comfortable and comfortable to experience with BlueStacks.
Some reference articles: Fix error 25000 on Bluestacks fastest , How to quit applications, uninstall apps on BlueStacks.
In this article, Quantrimang only gives a list of the best Android emulators for playing games.
These are the best Android emulators to play PUBG Mobile
Learn how to efficiently transfer photos and data from your computer to the BlueStacks emulator in the 2024 and 2025 versions.
Learn how to disable the background mode of BlueStacks to enhance your computer’s performance while saving resources.
With just a few clicks, users can easily backup and restore BlueStacks data to protect important information on this Android emulator.
Instructions for locking the mouse cursor when playing games on BlueStacks, Instructions for turning on/off the mouse cursor lock feature when playing games in the BlueStacks App Player emulator.
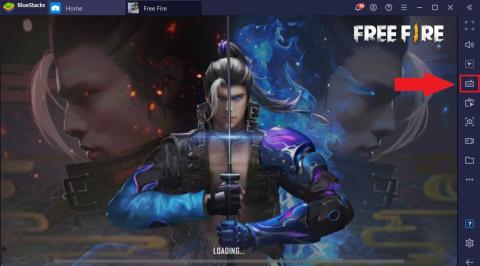
Improved mouse sensitivity for Free Fire on BlueStacks, BlueStacks has made important improvements for Free Fire gamers. Please upgrade BlueStacks 4.230.10
BlueStacks supports many languages in the World, including Vietnam. And if you want, you can also set up Vietnamese for BlueStacks easily.
Mobile game development has evolved to the point that your smartphones can handle gameplay with high graphics. One example is the Player’s Unknown Battleground or most commonly called PUBG. This is an online multiplayer battle royale game which main purpose is to survive in the ground and be the number 1 among the 100 players. Since your goal is to be on top, you have to watch out for your enemies. Thus, playing it on a small device can be a hassle as you might miss your chance. So, here are the ways to play PUBG mobile on PC.
The virtual keyboard for chatting on BlueStacks is different from the gaming virtual keyboard that WebTech360 has previously instructed you.
For those looking for an app that can help you run the android system on your PC, then try using Bluestacks. This is an app that allows people to run any kinds of android apps such as games, texting on their computers. Many of you must be asking how the system works and is Bluestacks safe to use. Well, just like other emulators, Bluestacks is safe to use if you download the app from the official website. As for how it works, all you need to do is download the app on your computer. Bluestacks have been developing its features and their newest future is Bluestacks multiple accounts.
BlueStacks is a popular cloud-based Android emulator for PC, where users can enjoy thousands of apps on their computers. If BlueStacks Engine wont start on your system, then try running it in compatibility mode, close background applications and pause your antivirus software. BlueStacks should be running fine on your system if you followed this guide, but if it ever crashes or stops working, check out our collection of BlueStacks Guides articles. Whenever you encounter glitches with your system, be it hardware or software related, the Troubleshooting Page should be your first stop.
There are many Android emulators available on the market, if choosing the best emulator is really not easy. The following article will do a small test with the two most commonly used emulators, BlueStacks and Droid4X.
If you are already using BlueStacks on your computer, turning off BlueStacks autorun is the first thing you need to know to prevent this emulator from affecting the use of your computer.
Unfortunately, Google Play services has stopped on BlueStacks, an error that prevents users from accessing Google Play and is forced to log out.
Discover how to setup Windows 11 Always On Top windows effortlessly. Boost your multitasking with step-by-step guides, tips, and the latest 2026 updates for ultimate efficiency.
Struggling with a corrupted GPT bootloader in Windows 11? Discover step-by-step methods to repair it quickly and get your PC booting smoothly again. Expert tips for hassle-free recovery.
Discover how to effortlessly use the Windows 11 Character Map Tool to insert special characters, emojis, and symbols into your documents. Step-by-step guide with tips for beginners and pros.
Discover safe, step-by-step methods to fix Windows 11 registry errors without risking your system. Learn essential tools, prevention tips, and best practices for optimal PC performance.
Discover how to use Windows 11 Command Prompt for repair tasks. Learn step-by-step commands to fix system errors, boot issues, and more with expert tips for quick resolutions.
Struggling with Windows 11 Firewall blocking your local games? Discover proven fixes to unblock access, optimize settings, and get back to gaming without interruptions. Easy steps for seamless multiplayer fun.
Struggling with the frustrating Windows 11 "Memory Management" error? Discover proven, step-by-step fixes to resolve it quickly and get your PC running smoothly again. Updated with the latest tips for optimal performance.
Struggling with Windows 11 System Restore Error 0x80070005? Discover proven, step-by-step solutions to fix access denied issues and restore your system smoothly. No tech expertise needed!
Discover how to enable and use the Windows 11 clock with seconds for precise timing. Step-by-step guide to customize your taskbar clock, troubleshoot issues, and boost productivity with accurate timekeeping.
Discover a step-by-step guide to changing your Windows 11 product key without reinstalling. Save time, avoid data loss, and activate your OS effortlessly with our expert tips.
Discover how to set up a Windows 11 guest account correctly for secure, hassle-free sharing. Follow our expert steps to enable limited access without risking your main profile—perfect for family or visitors.
Struggling with the "We Couldn
Struggling with a sluggish Windows 11 PC? Learn proven steps to fix registry bloat, optimize your system, and restore lightning-fast speed. Simple, safe methods for everyone.
Struggling with the Windows 11 Hyper-V Virtual Switch error? Discover proven, step-by-step fixes to get your virtual machines running smoothly. Say goodbye to connectivity issues and hello to seamless virtualization. Updated with the latest troubleshooting tips.
Tired of constant interruptions? Learn how to disable Windows 11 notifications and ads with simple, step-by-step instructions. Reclaim your focus and enjoy a cleaner PC experience today.
