Photoshop makes it easy to isolate and change the color of an object in a photo. Here's how to change the color of an object in Photoshop .

Before start
To change the color of an element in an image, you need to know how to use the Object Selection Tool and overlay layers in Photoshop . This tool works best on simple contrast images with obvious color differences, but you can always work with more complex images.
The Mask tool allows you to non-destructively edit parts of a photo by masking parts of the photo from view. You can use masks to edit multiple photos, change colors, and even create details for mockups.
Together with the Object Selection Tool , you will use an overlay to change the color of an object in an image.
1. Prepare photos
Ideally, there should be high contrast between the subject and the background of the photo. If the colors are too similar or blurred, you may not be able to achieve the desired results using this method.
After selecting the desired photo, upload it to Photoshop .
2. Use the Object Selection Tool
The Object Selection Tool is located in the toolbar on the left as shown below. Use the W key to access it faster.

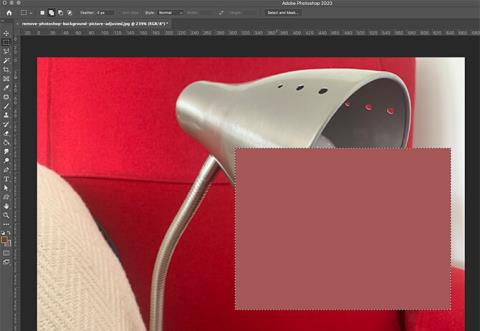
With the Object Selection Tool, drag the selection over the color of the object you want to change. You can do this using Rectangle Mode, but you can also enable Lasso Selection Mode for greater precision.
Although the Object Selection Tool works well, it is not always perfect. If you miss any details in the selection, hold Shift on your keyboard and drag the selection over those areas to add them to the selection.

If there are areas in the selection you don't want to change color, hold Alt while selecting these areas to remove them from the current selection.
When only the color you want to change is selected, go to the Layers Panel and click Create a New Group .
3. Create a Mask
On the Layers panel , click the Add Layer Mask icon , which will turn your selection into a mask. This overlay allows you to change colors in a non-destructive way, leaving the rest of the photo intact if you change it again in the future.
4. Change color
Once you have the mask, go to the Layers panel and click Create New Fill or Adjustment Layer . A menu appears, select Solid Color .
Use Color Picker to select any color from the color spectrum. For best results, choose a color that is completely different from the original color. After selecting the color, press OK . At this point, the color is very dark, lacks texture, and doesn't look like an actual color change.
5. Adjust brightness and contrast

To make the color change look realistic and in harmony with the original, you need to adjust the brightness and contrast of the color overlay.
Click Create New Fill or Adjustment Layer again. Next, go to Brightness/Contrast . This action will open a settings menu, but for now, you can ignore it.
Go to the Layers Panel , click & drag the color overlay above the brightness and contrast layer, remember to keep it in group. With the color layer selected, change the layer blending mode to Color. This action makes it look more realistic.
Finally, click the brightness/contrast layer to reopen the settings panel and change the brightness levels to your liking. Changing the contrast level will reveal texture and shadow details that were present in the original image. Try both settings until it looks realistic.
6. Save the photo

Go to File > Save As . Saving the image as a PSD file will allow you to edit the colors again by clicking on the corresponding color layer.
Above is how to change the color of objects in photos using Photoshop . Hope the article is useful to you.


