Why do some Excel documents not display data or contain blank pages when printed? Below are the causes and how to fix errors in printing Microsoft Excel files .

How to fix the error of printing blank pages in Microsoft Excel
Causes Excel documents to print to blank pages
Format cells
Sometimes, you can format cells in a Microsoft Excel document in a variety of ways so that they appear on a blank page. This situation occurs when cells contain white text and the cell background is also white, or when specific data values are set that are not displayed or printed.
The document contains blank pages
If a Microsoft Excel document has a block of empty cells between data areas, the printed document may contain blank pages.
The page contains an error
If a cell on the page contains an error, the Excel file may also have a blank page error when printed.
Hidden columns
Another cause is that the document includes hidden columns and manual page breaks.
How to fix errors printing Microsoft Excel to a blank page
Set up a specific print area
Printing Excel files does not necessarily have to follow standard sizes and layouts, depending on your data. Therefore, printing may be distorted. To fix the problem, you just need to set the area you want to print as follows:
- In an Excel worksheet, select the cell you want to display on the printed page.
- In the Page Layout tab , click Print Area and select Set Print Area .
- Go to View > Page Break Preview to see how the page prints.
Set the number of pages you want to print
With this method of fixing Excel errors, you just need to check the number of pages before printing and discard blank pages.
You can also apply this fix when blank pages are in the middle of an Excel document. However, you will have to go through each page in the Print window to make sure no blank pages appear.
Adjust the scale according to the paper size
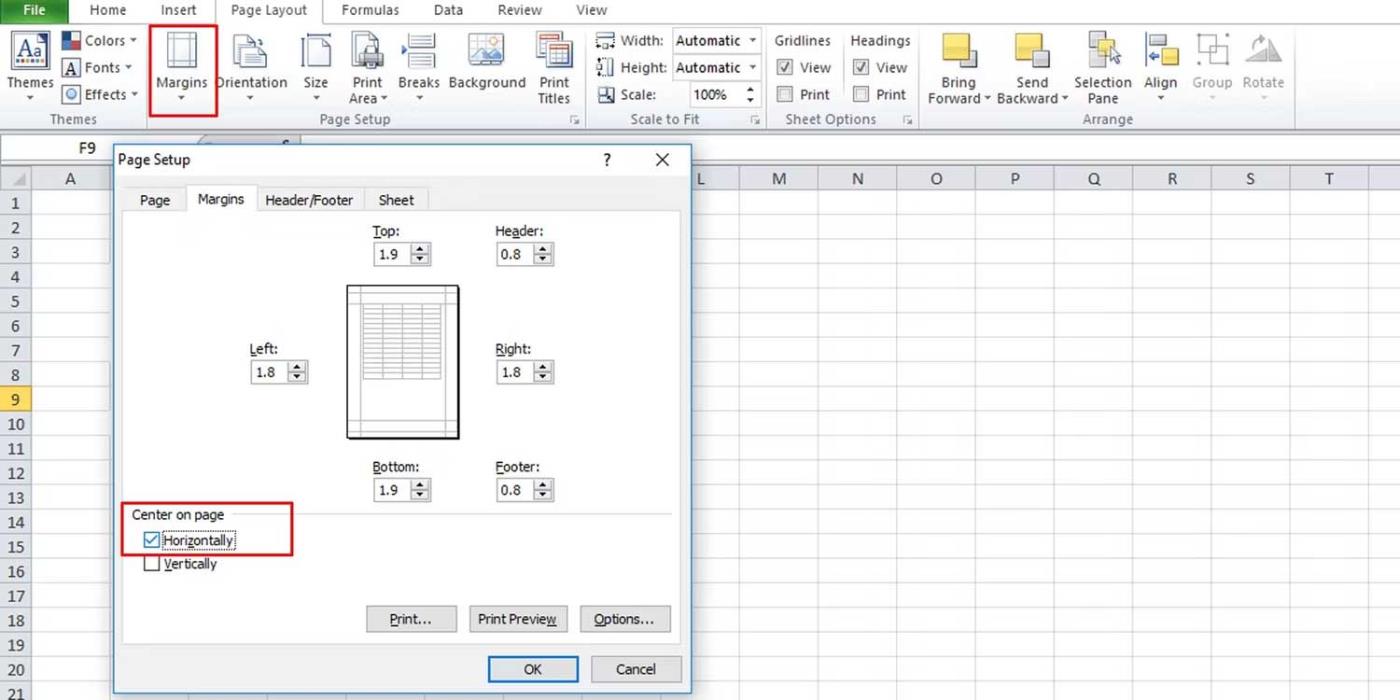
By default, Excel does not explicitly provide you with defined pages. Therefore, it is difficult to know where a page ends and begins. The first thing you need to do is center the data on the current page. Proceed as follows:
- Go to the Page Layout tab on the ribbon, click Margins and select Custom Margins .
- In the Margins tab , in the Center on page section , check Horizontally .
Then, adjust the scale:
- Go to the Scale to Fit section in Page Layout.
- Reduce the scale from 100% to a size suitable for the printed page.
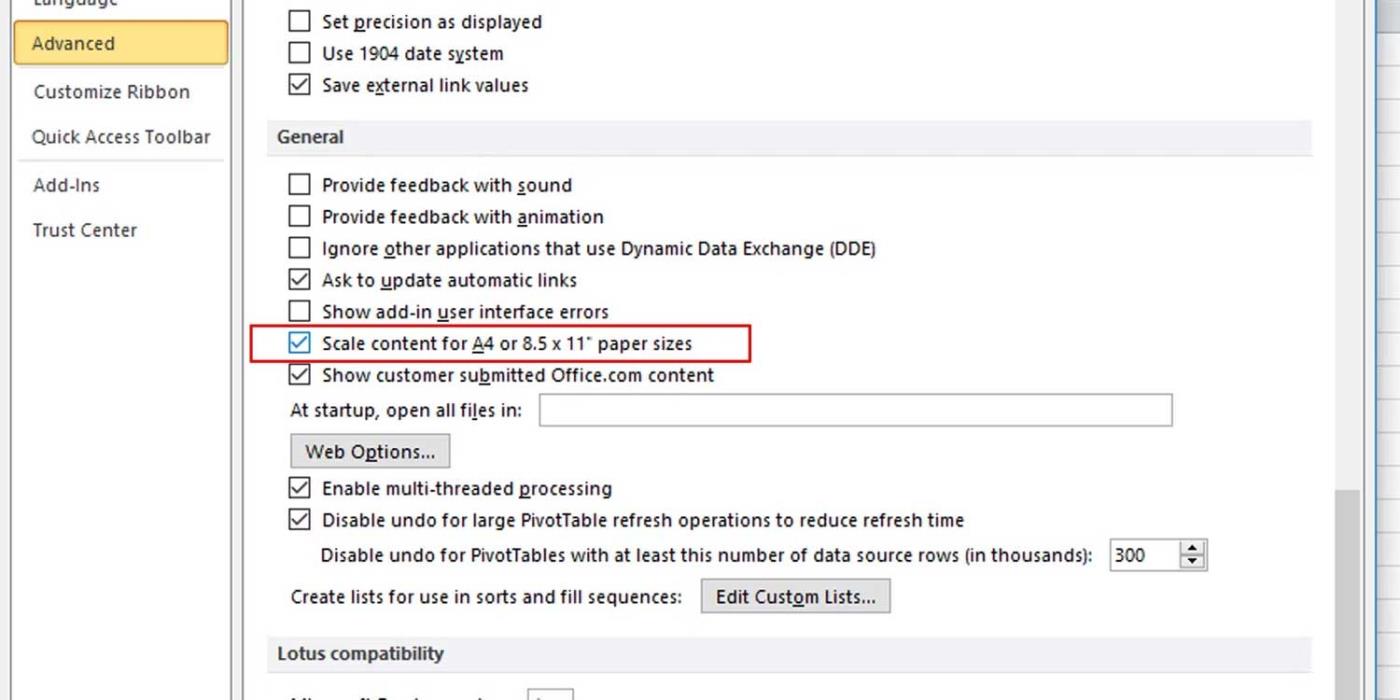
View the data displayed on the page before printing to see if the problem goes away. Another way is to scale using options in Excel:
- Go to File Options .
- In the Advanced tab , scroll down to the General section .
- Make sure to check Scale content for A4 or 8.5 x 11" paper sizes .
Copy the work to a new Excel file
This is the simplest way to fix Excel printing errors. You just need to copy the data you want to print and paste it into the new Excel file. This way, you will know exactly what is in the file and what data is printed.
Check text
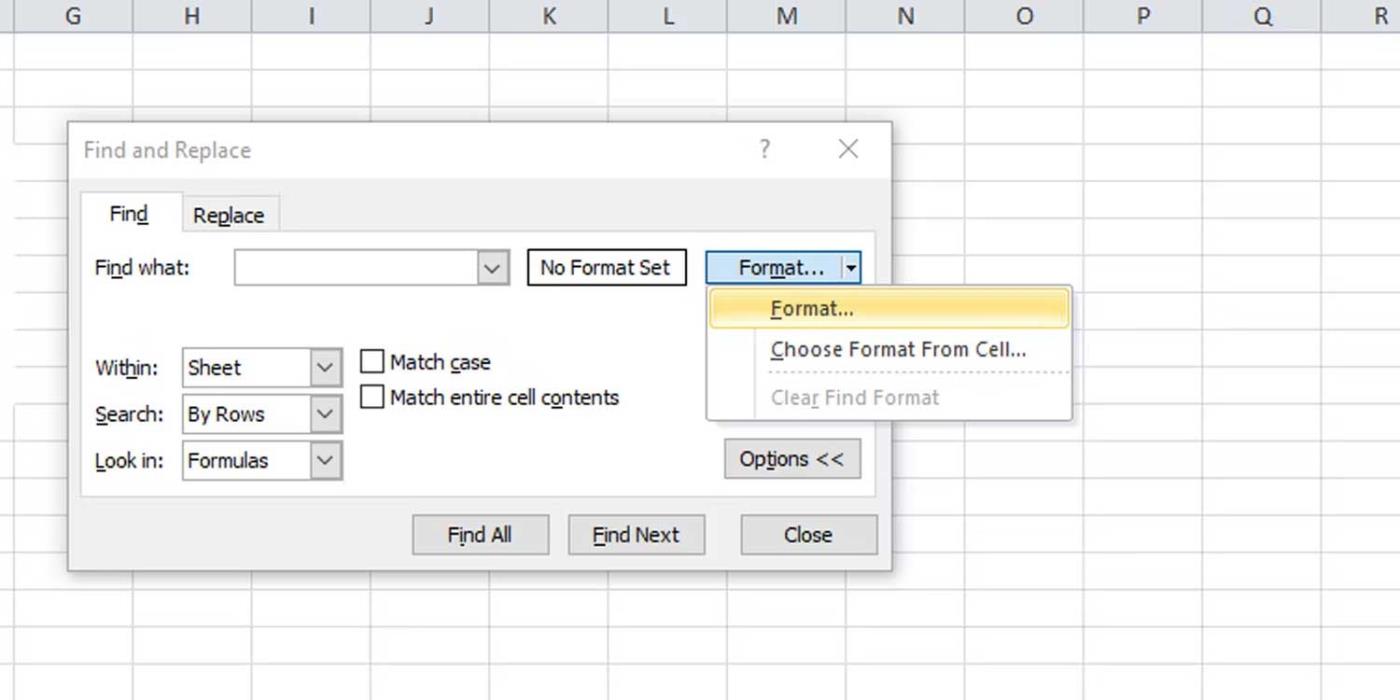
You don't need to regularly check each cell in Excel if you know there are cells containing white text. An easier method is to perform a specific search using Excel's find and replace feature as follows:
- Press Ctrl + F to open the Find and Replace box .
- Expand Options to see more options.
- Click Format and select Format .
- In the Font tab , select white and click OK .
- Click the Find all button to see all cells containing white text.
Above are ways to fix errors in printing Excel files to blank pages . Hope this article helps you fix the problem.


