What is MSWLogo? How to install the Logo software

At present, computer programming is brought into the school very early, students in grades 4 and 5 are familiar with the simple commands of the MSWLogo software.
MSWLogo is simple programming software for kids. Here's how to use MSWLogo for beginners.
Basically, MSWLogo is a simple programming training program. You only need to understand the commands to be able to create everything you want.
After downloading and installing the software, click Help> Demo and follow the instructions . This article will give you a few examples of what MSWLogo can do.
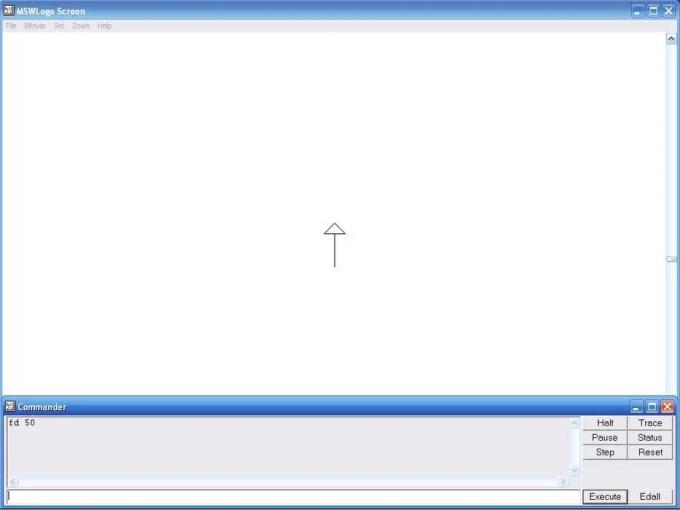
First, you will see a turtle located in the center of the screen. Getting started is simple. In the command prompt window, type in the box: Forward 50 .
Click the Execute button or press Enter on the keyboard, do this after typing everything into the command line window. This command will draw a line as long as 50 foot steps. Easy, right?
Note: You can shorten the command, for example, Forward 50 to FD 50.
If you want to line straight to the right, instead of pointing up, type:
RT 90 FD 50
This command rotates the turtle 90 degrees to the right and the turtle will move forward 50 steps.
When the screen becomes cluttered, type: clearscreen or CS (short). This command will clean up the screen and erase everything you've drawn and, at the same time, move the turtle to the upside.
If you want to rotate the turtle to the left, type:
LT 90
Next, type the command backward:
Back or BK 50
The turtle will step back 50 steps.
When there are too many commands from within the command prompt, type:
Cleartext or CT
Now you know all the basic commands of the MSWLogo programming software.
Process (sequence of actions) is the steps the turtle will draw or create something. You can run the process by typing its name into the command line window.
To create the process of drawing squares on the screen. Click File , then, edit it in the main window, then type a new process name. Specific steps are as follows:
Type: Square , then Enter or OK . Click later from Square and press Enter . Continue typing:
FD 50 RT 90 four times
Then, click File save and exit .
In the command line window, type procedure Square> Execute . Then, the tortoise will draw a 50 x 50 x 50 x 50 square.
Now click Edall in the command line window and go to the square of the newly created process, delete the FD 50 RT 90 command .
Repeat the above steps again but type the shorter command:
[Repeat 4 FD 50 RT 90]
Now click File save and exit . Move to the command prompt window, type Square again and press Enter . The turtle will draw a square on the screen.
Once you know how to draw a square, you can easily create another shape. For example, to draw a triangle, change 4 FD 50 RT 90, to:
Repeat 4 FD 50 RT 120
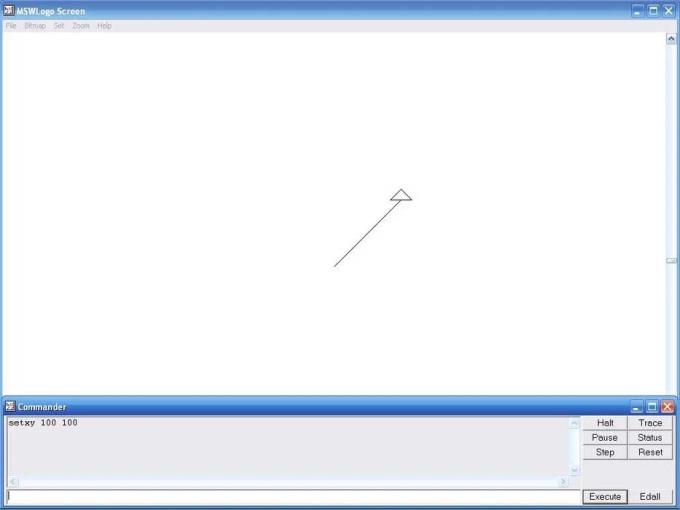
The main screen of MSWLogo is like an invisible grid. You can move turtles to different positions by typing the coordinates.
In the command prompt window, type:
Setxy 100 100
Then press Enter .
The turtle moves to the 100 coordinates of both x & y.
The software can then perform a different process, for example, Draw a square.
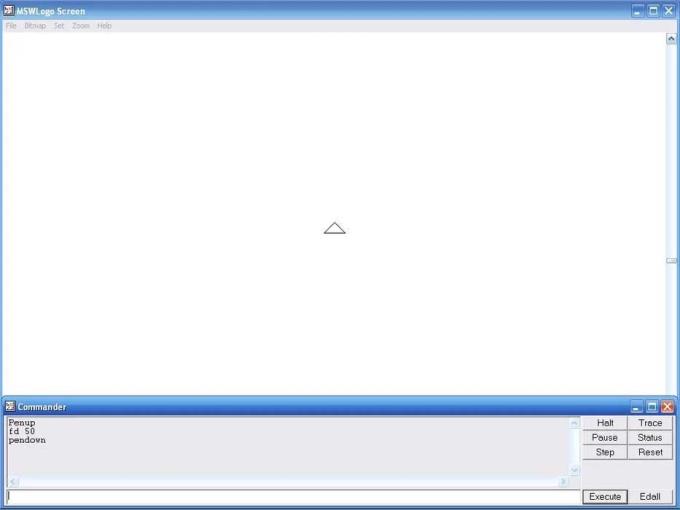
In this step, you will know that the turtle in MSWLogo is like a pen. At the command prompt, type:
Penup or PU (abbreviated) and FD 50
Then press Enter . This command will lift the turtle's pen. The turtle moves forward 50 steps but does not draw anything.
To put the stinger of the turtle down, type:
Pendown or PD
Now the turtle will draw pictures when moving.
MSWLogo will create a window containing clickable user buttons to run processes.
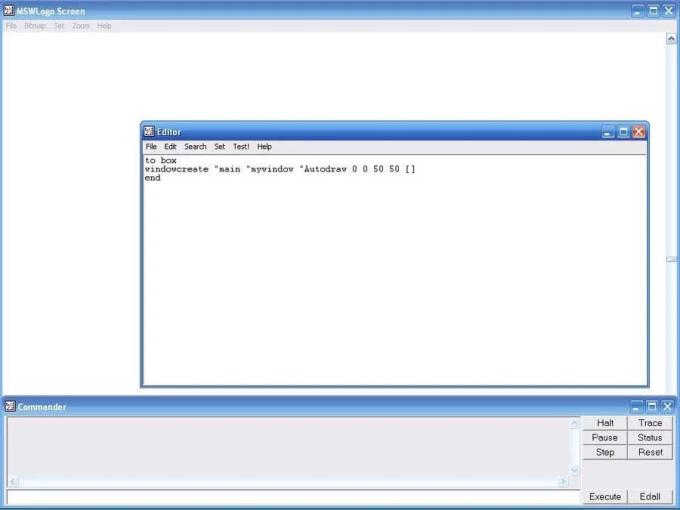
Let's start by creating a new process: Click File> Edit . Name the new process Box. Press Enter after from Box. Time to type:
windowcreate "main" mywindow "Autodraw 0 0 50 50 []
Now type in the command prompt:
Box
Then press Enter .
This command will create a window at the top left of the screen.
Next, click Edall> Enter later (windowcreate "main" mywindow "Autodraw 0 0 50 50 [])
At this step, you can create some functional buttons. First, click the Reset button in the command window to clear the box. Type:
buttoncreate "mywindow" mybutton "Square 10 20 30 10 [square]
Now type in the command prompt:
Box
Then press Enter .
A window will be created again, but this time, it has a button.
Finally, we need to create a window close button instead of having to press reset. Go to the process box, then press Enter after the button buttoncreate .
Type:
buttoncreate "mywindow" mybutton2 "Close 10 10 25 10 [windowdelete" mywindow]
The windowdelete command will delete a window but you must type "mywindow" first to notify the window software you want to delete.
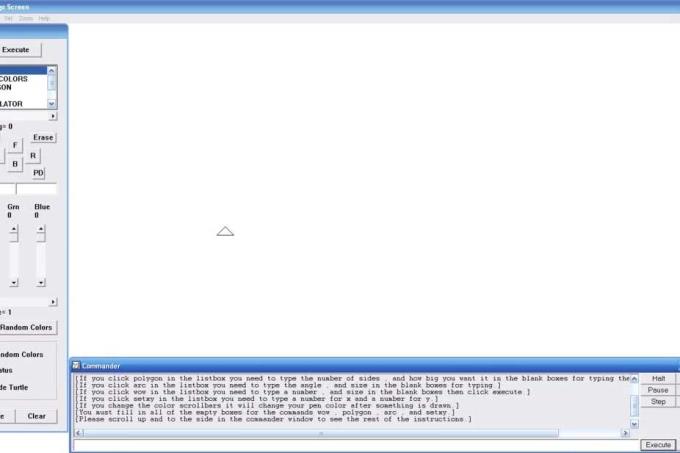
Now go to the command prompt, type in the process box again and press Enter. We will have a window containing a button to draw a square and close the window.
This is the final result.
Hope the article is helpful to you!
Explore the top classic tank shooting games that offer immersive gameplay and stunning graphics. Dive into the tank battle world with these must-try games.
Discover how to earn free spins in Coin Master every day. Learn the most effective tricks to gather spins effortlessly.
Discover everything about Gacha Club OC, from creation to customization, and tips to enhance your gaming experience.
Learn how to create a room and play with friends in Mini World: Block Art, including multiplayer options and map sharing. Perfect for gamers looking to enhance their experience.
Learn the efficient ways to tame various mounts in Mini World Block Art, speeding up your travel and enhancing your gameplay experience.
Discover the best MP40 skins in Free Fire and find out how they enhance gameplay. Learn more from WebTech360 about the top choices for Free Fire players.
A detailed guide on how to install the racing game ZingSpeed (ZingSpeed Mobile) on your computer using various methods.
Discover effective methods to delete all of your friends in Roblox effortlessly while maintaining your favorite connections!
Discover how to easily check how many hours you’ve spent playing Minecraft, along with detailed statistics of your gameplay for a comprehensive gaming experience.
Learn how to play PES 2019 (Pro Evolution Soccer 2019) with our comprehensive setup guide, ensuring a smooth gaming experience. Ideal for newcomers to Pro Evolution Soccer games.
Learn how to easily switch between Survival and Creative modes in Mini World: Block Art and enhance your gaming experience effortlessly.
Discover the best lightweight games for PC that are perfect for young gamers. Enjoy these popular titles without heavy system requirements!
Searching for a captivating gacha game to immerse yourself in? Check out our top 10 gacha games that are worth playing in 2023.
Learn how to connect a controller to Parsec for a seamless gaming experience. Perfect for multiplayer sessions and enhanced gameplay.
Learn how to install Discord on your Amazon Fire Stick using alternative app stores. This guide provides a step-by-step process to access Google Play Store apps.


