Changing opacity is a key feature of every image editing software, including Procreate. Mastering opacity allows you to bring your artwork to the next level. This function is a bit more complex in Procreate if you don’t know the exact steps to take.

Up until version 5, Procreate featured an opacity slider, readily accessible in the Adjustments menu. This has changed with the latest versions, making the process a bit less straightforward.
That’s where this article comes in. In the sections below, we’ll show you how to change the opacity both in Procreate on an iPad, and Procreate Pocket on an iPhone. You’ll learn how to apply different opacity settings for individual objects or entire layers.
How to Change the Opacity of an Object or Layer in Procreate Pocket on an iPhone
Procreate Pocket is designed for the iPhone screen, which is, of course, smaller than that of an iPad. Due to this design difference, many options are streamlined on Procreate Pocket, making them easier to remember and use. This is the case with layer opacity too.
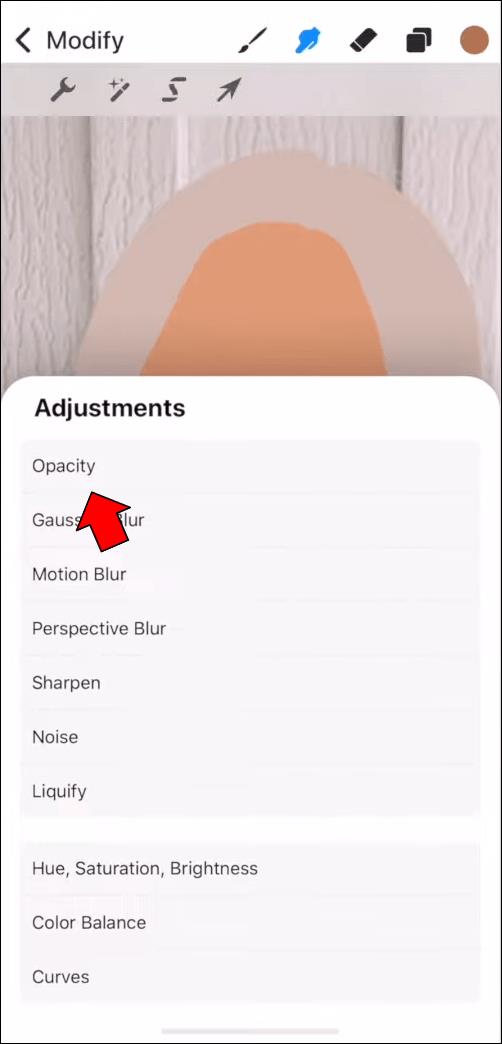
- Tap on the “Modify” button represented by a magic wand.
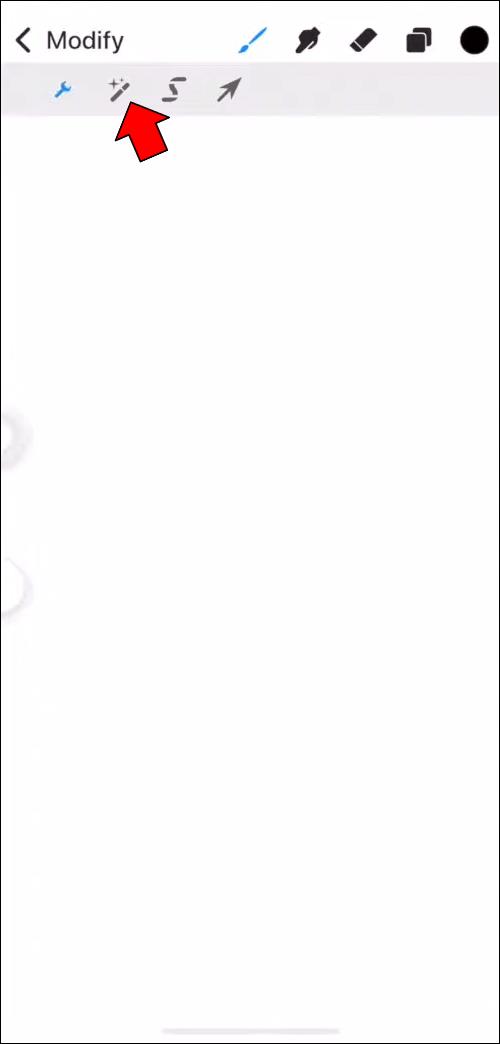
- Choose “Opacity” from the drop-down menu. This action will show the opacity slider.
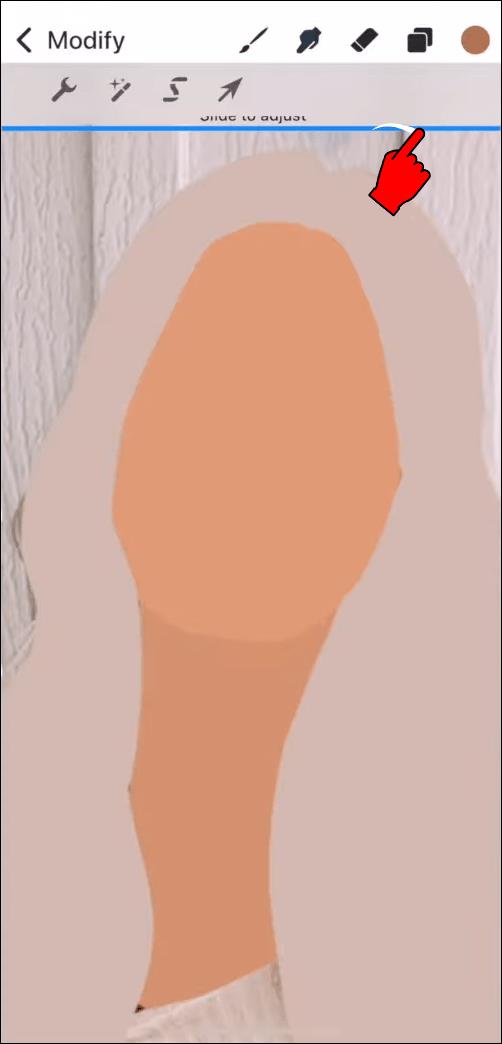
- Slide right or left to increase or decrease layer opacity.
How to Change the Opacity of an Object or Layer in Procreate on an iPad
You can change the opacity of different elements, including objects, layers, or the whole image. The technique used for each will be slightly different.
There are two methods to manipulate layer opacity in Procreate for iPad: via finger gestures and the Settings menu.
Changing Layer Opacity Using Finger Gestures
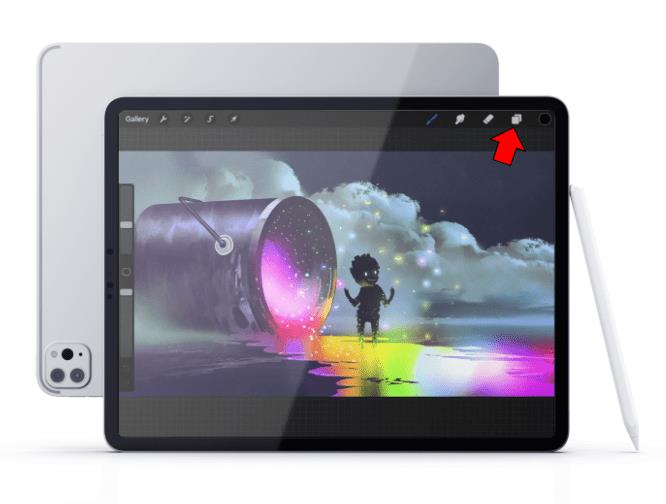
- Open the “Layers” panel and find the layer you want to change.
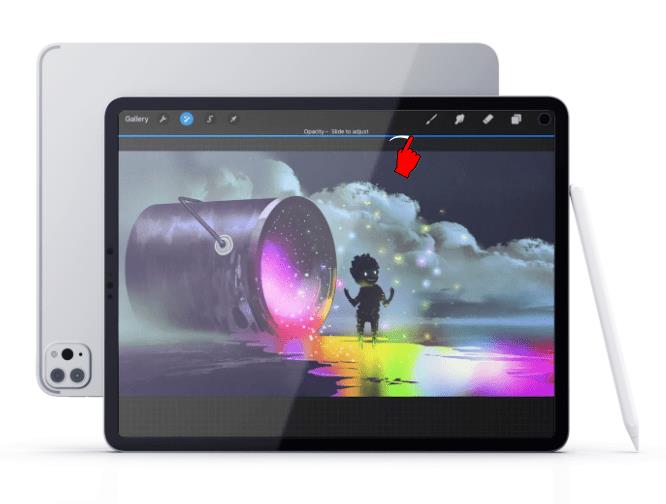
- Using two fingers, double-tap the layer to bring up the opacity slider.
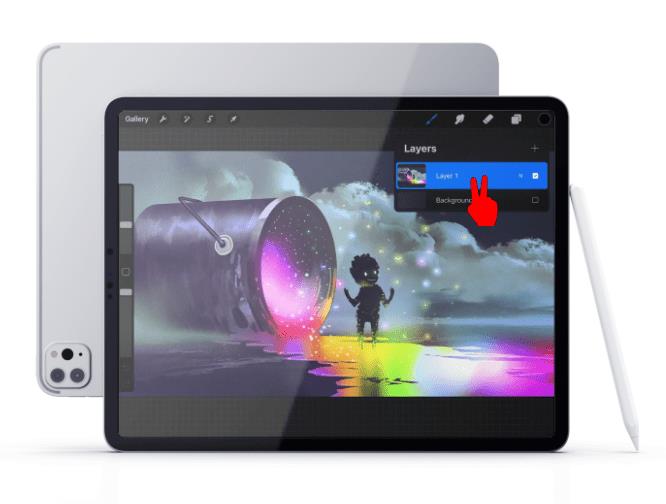
- Slide a finger right to increase opacity or left to decrease it.
Changing Layer Opacity Using Layer Settings
- Enter the “Layers” panel, locating the desired layer.

- Tap on “N” next to the layer name. Note that “N” denotes blend mode, which will be “Normal” by default. If you’ve changed the mode, you might see another letter. However, it will be in the same place.
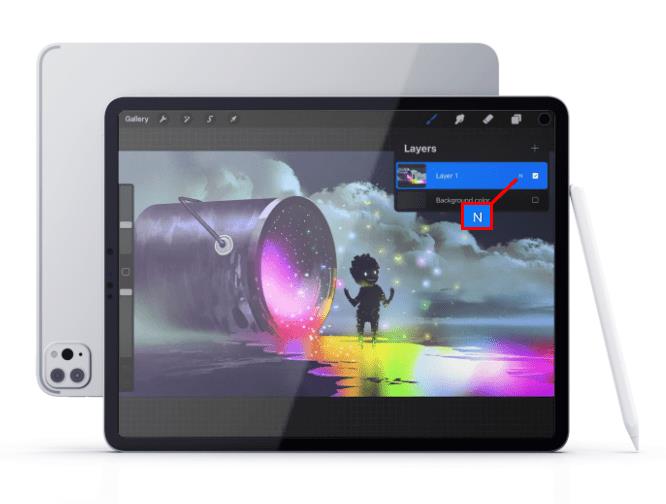
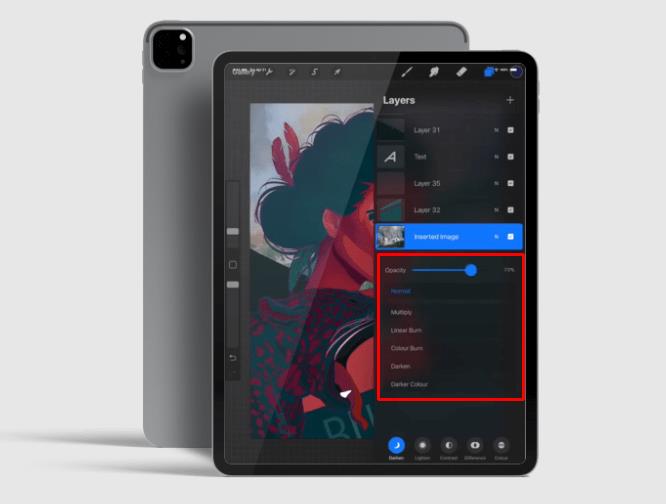
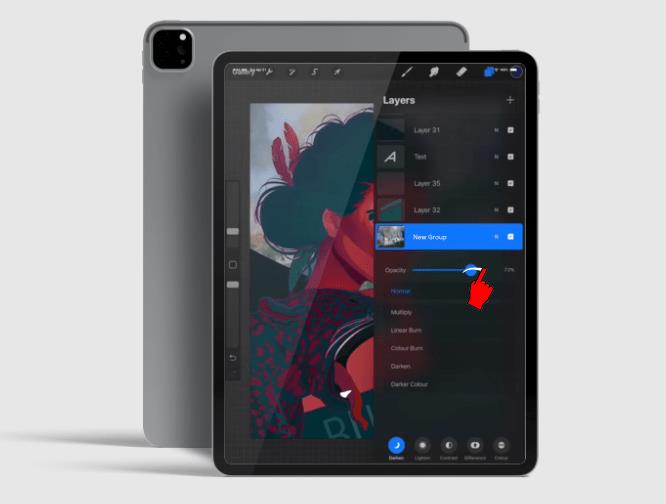
- Tapping “N” will bring up layer settings with the opacity slider at the top. Slide right for greater opacity or left for less opacity.
How to Change the Opacity of Multiple Layers in Procreate on an iPad
If you have several layers that need their opacity changed, you’ll need to employ a workaround. The reason for this is that Procreate doesn’t allow opacity changes for multiple layers at once.
You could go through each layer and adjust the opacity individually, but that would take a long time. If you’re working with a large number of layers, this method will more likely lead to confusion.
That’s why an alternative method would be preferable.
You can work around the limitations by merging several layers into a single one. Then, changing opacity for all elements simultaneously will be quite easy. Here’s how to do that.
- Open the “Layers” panel. Locate the layers you want to merge.

- Swipe the first of those layers right to select it. The action will be successful if the layer turns blue. Do the same with all layers you wish to merge.
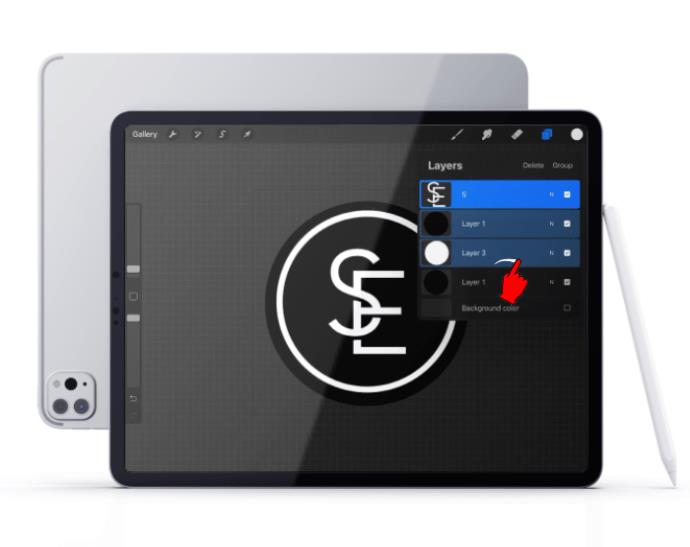
- At the top of the panel, you’ll see the “Delete” and “Group” options. Choose “Group” to bring all of the selected layers together. They won’t be merged yet at this point.
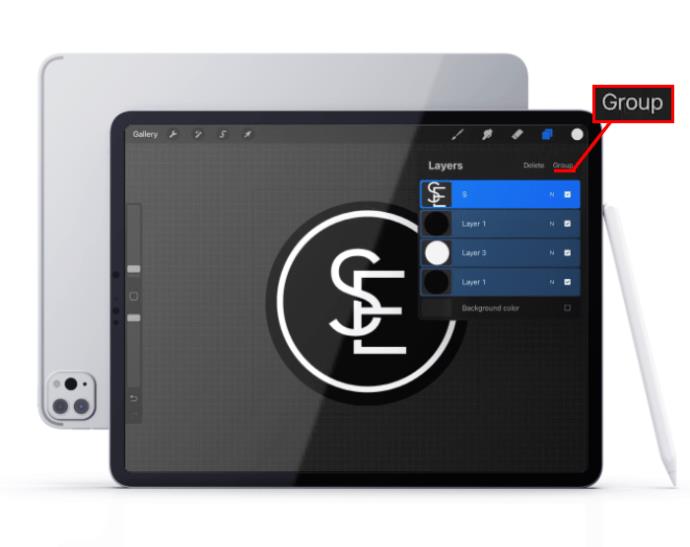
- Now would be a good time to create a copy of the group. Creating a duplicate will be useful if you want to change any individual layer later on. Such changes won’t be possible once the merge is done. If you want to duplicate the group, keep reading, as the method for that will be outlined in the next section.
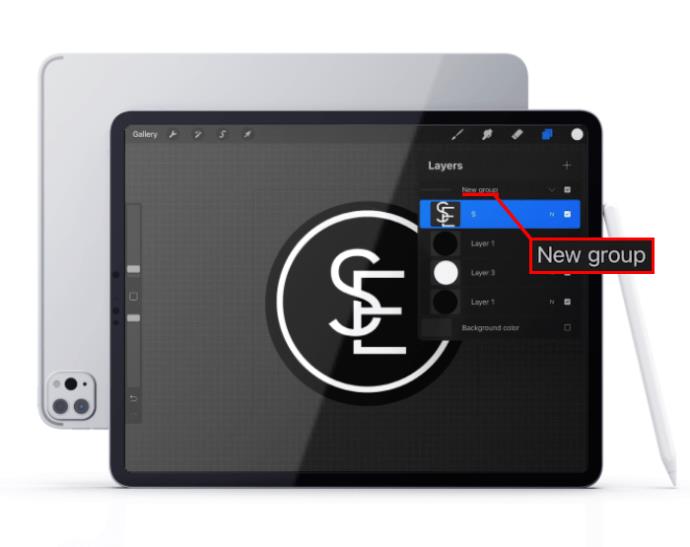
- You’ll see “New Group” appear in the panel. Tap on it to bring up its settings.
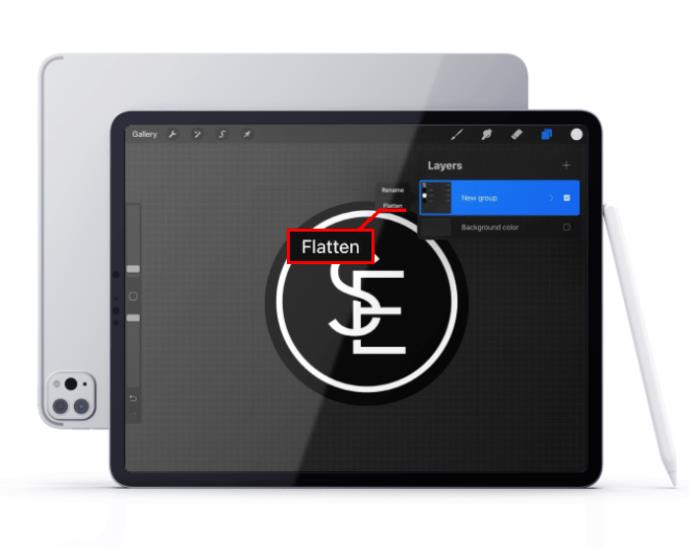
- Tap on the “Flatten” option. This step will merge all layers within the group.
Once the layers have been merged, you can change opacity for all of them at the same time. This can be done using the methods explained above – by using finger gestures or via the Settings menu. Let’s go over those techniques briefly.
Change Opacity on Merged Layers Using Finger Gestures
- Double-tap the merged layer. The opacity slider will appear.
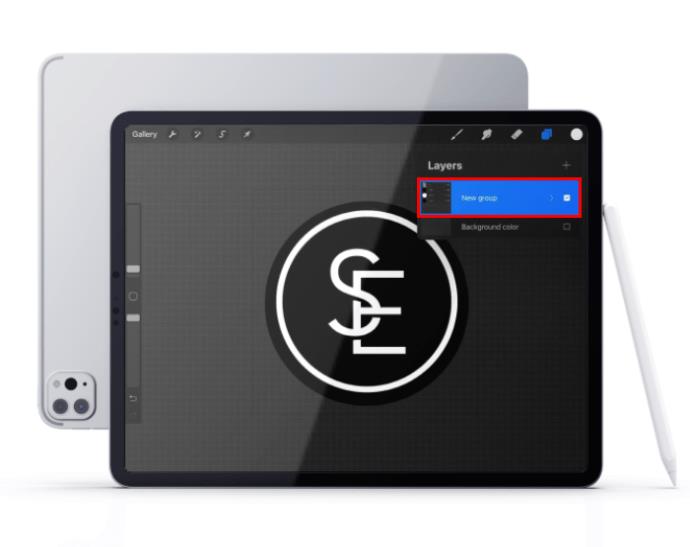
- Change opacity settings by dragging the slider right or left.
Change Opacity on Merged Layers Using the Settings Menu
- Tap “N” on the merged layer in the “Layers” panel to bring up the “Settings” menu.
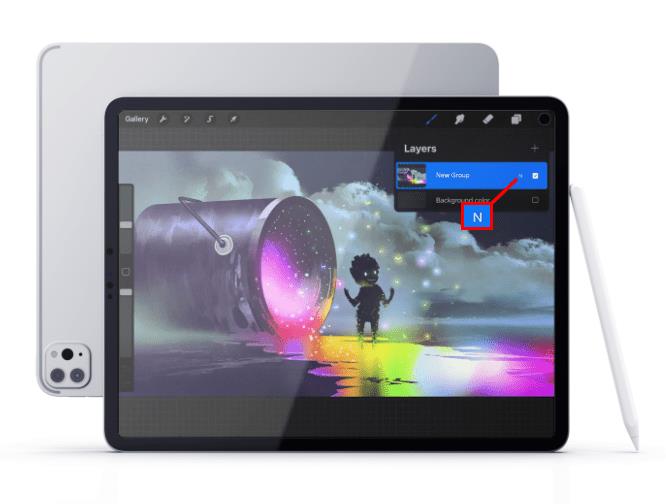
- Slide right or left on the opacity slider located at the top of the menu to adjust opacity.
How to Duplicate Layer Groups
- After you’ve grouped the layers, find “New group” and swipe left.
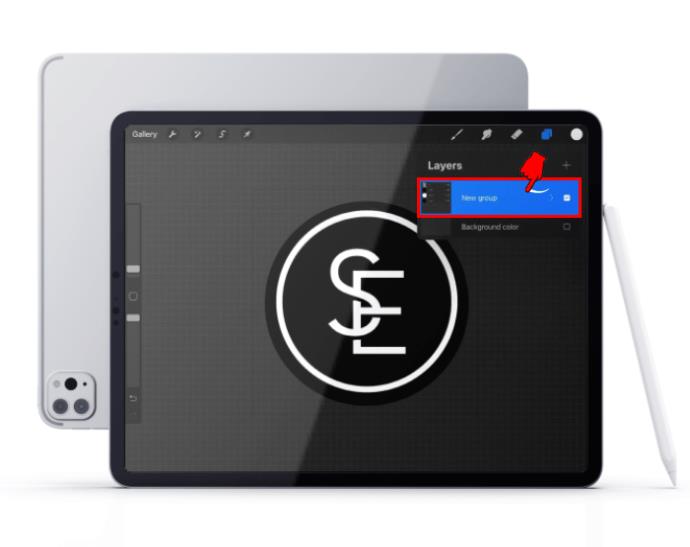
- From the selection, choose “Duplicate.” This will create a copy of the selected group while keeping the original layers separate.
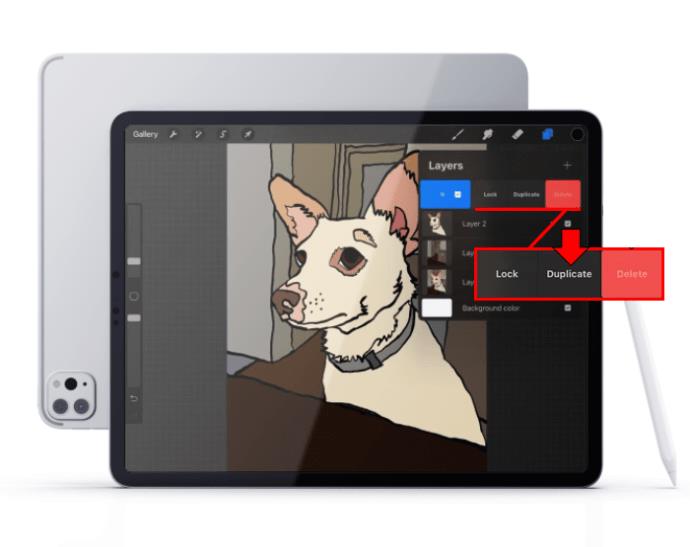
- Tap the checkbox next to the duplicated group. This way, any changes you make moving forward won’t reflect on that group and it won’t be visible.
How to Change Opacity for Individual Elements or Layer Parts
Although you’ll more often change opacity for the whole layer, you might want to change only a certain section of it. This will usually happen if you’ve already merged layers containing individual elements or if you drew different objects using a single layer.
Adjusting opacity for various parts of a layer in Procreate isn’t overly complex, depending on how detailed those objects are. The method for doing that will require the Selection tool.
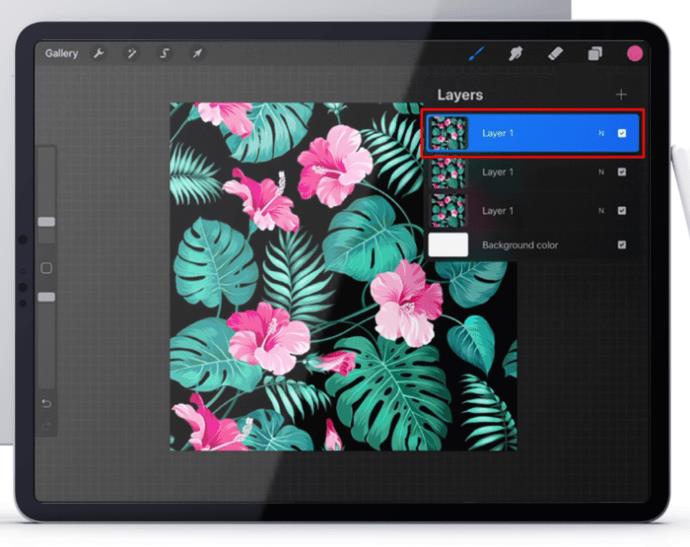
- Find the layer you want to manipulate and select it.
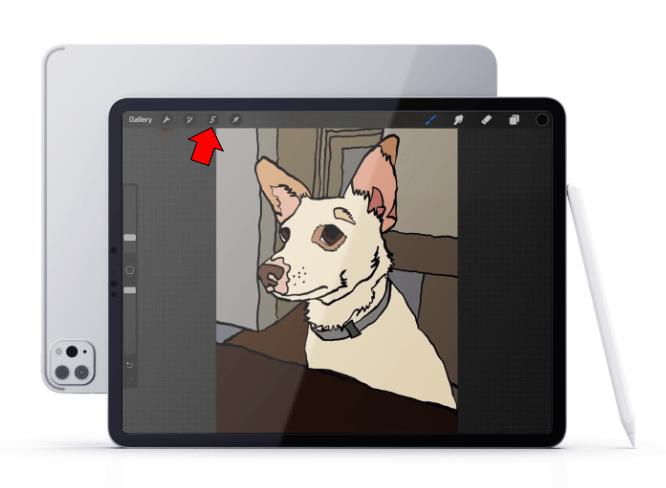
- Select the stylized “S” icon located in the upper left. This will bring up the “Selection” menu at the bottom of your screen.
- Choose the tool you’d like to use from the available options. You can use the “Automatic” or “Freehand” option, depending on the complexity of the layer.
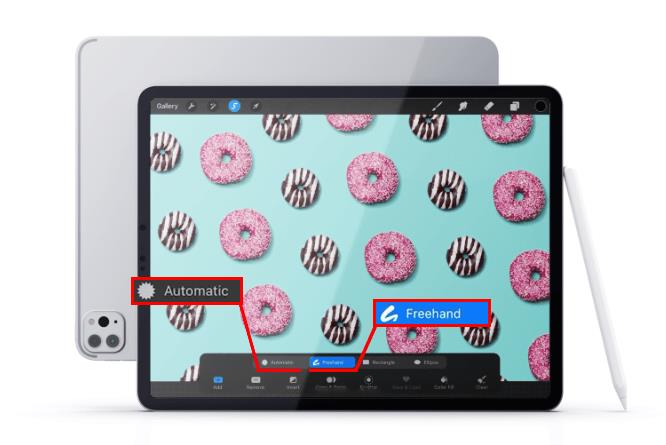
If you have relatively few elements that differ in color and contrast, the automatic selection tool will be the better choice. If the layer is more complex, this tool might not be able to select individual elements accurately. In that case, you’ll need to select them manually using the Freehand option.
- Copy the selected element and paste it on a new layer. This will happen automatically when you tap the “Copy and paste” button.
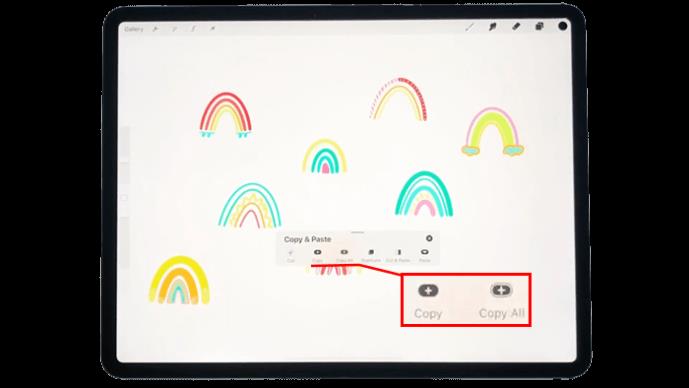
- Once you have the element on a new layer, you can change its opacity using the methods described in previous sections.
How to Change Opacity for the Whole Picture
If you want to adjust opacity for the entire image, you’ll again need to manipulate layers. In particular, this method will include layer merging. The only difference between the merging process we’ve described previously and this one will be that you’ll select every layer within the project.
Once you select, group, and flatten all layers, the entire picture will be one layer. Then, you can adjust opacity using the same technique as described for single layers.
Bring Your Artwork to Life Through Opacity Adjustments
Adjusting opacity can make certain elements or layers more discreet while allowing others to pop. With enough tinkering with the opacity settings, you can make delicate changes to your artwork that would be hard to achieve otherwise.
Now that you know how to adjust opacity in Procreate and Procreate Pocket, you’ll have a new tool to express your creativity.
Have you adjusted opacity on your Procreate project? Was it for a single layer, an element, or the entire image? Let us know in the comments section below.


