If you’re an AirPods Pro user, you know the sound quality is a big improvement over standard AirPods. But did you know there are ways to improve the buds even further?
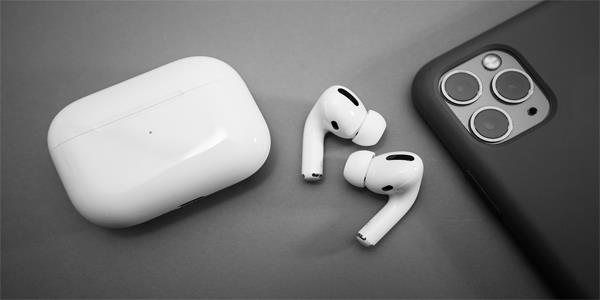
This guide will show you how to improve the sound quality of your AirPods Pro so you can enjoy your music and podcasts to the fullest.
Making the Sound Even Better
AirPods Pro is the newest addition to Apple’s popular line of wireless headphones. The Pro model features several significant upgrades, including active noise cancellation, improved sound quality, and a new design.
If you’re among the many people who have upgraded to Apple’s AirPods Pro, you may be wondering how to improve their sound quality. While they offer a great listening experience out of the box, there are a few things you can do to make them even better.
Update Your AirPods Pro
Like any other technology, your AirPods Pro will benefit from regular updates. Apple often releases updates that improve sound quality, among other things. Make sure to install updates as soon as they become available to you. And how do you do that?
One of the great features of AirPods Pro is they are designed to update automatically as long as your smartphone is connected to the Internet. This means that all you need to do is place the AirPods in their charging case, plug in the charger, and then place them close to your iPhone while it’s connected to the Internet.
Once the update is complete, you’ll be able to enjoy the latest features and improvements Apple has to offer. So if you’re looking for a hassle-free way to improve the sound quality of your buds, this is the method for you.
Turn Off Active Noise Cancelation
Active Noise Cancellation (ANC) is a great feature for blocking out unwanted noise, but it can sometimes have negative effects on the overall sound quality of your listening experience.
This is because ANC can muffle or distort sound, making it difficult to hear certain details or nuances in the music. Apple’s automatic firmware updates also include tweaks to the Equalizer that are meant to make noise cancellation even more effective.
If you don’t need ANC turned on, you should disable it to avoid any potential sound quality issues.
The steps to toggle off ANC on your AirPods Pro are straightforward.
These steps work if you have an iPhone with Face ID.
- Swipe down from the top-right corner of your iPhone.

- Long-press the volume slider to open additional controls.
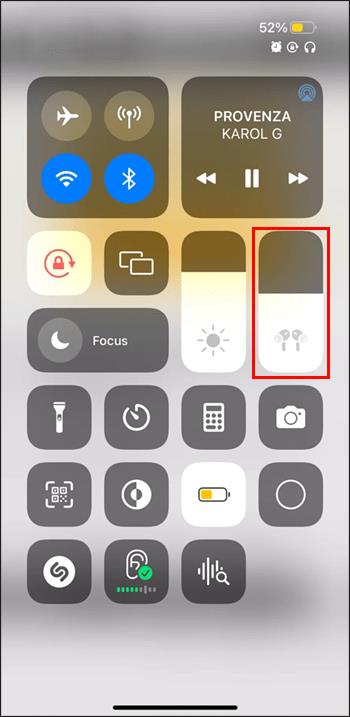
- Tap the “Noise Control” icon and then choose “Off.”
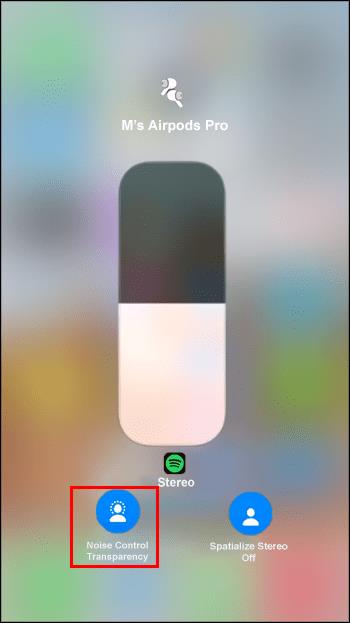
If you have an iPhone with a Home button, follow these steps.
- Swipe up from the bottom of your iPhone.

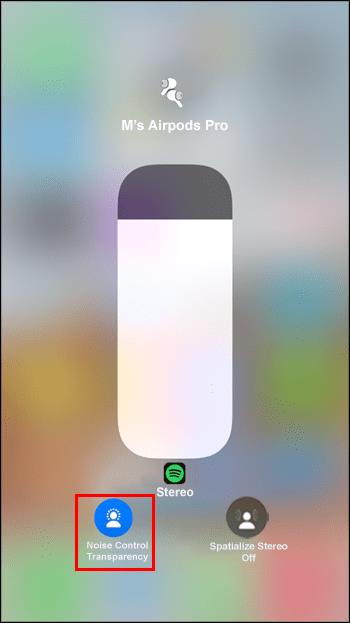
- Long-press the volume slider to expand the controls.
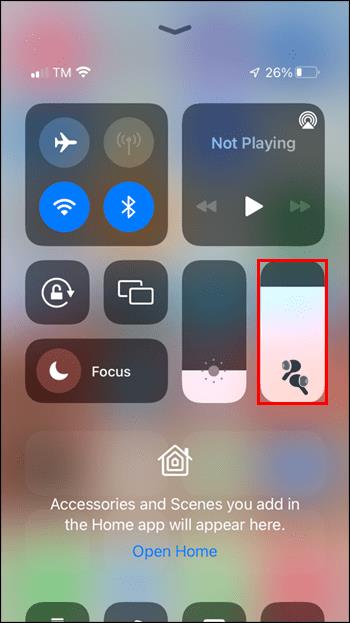
- Tap “Noise Control” and then tap “Off.”
Tweak Your iPhone’s Headphone Accommodation Settings
As any audio enthusiast knows, finding the perfect sound settings for your headphones can be a meticulous process. AirPods Pro offers three presets that can give you a head start: Balanced Tone, Vocal Range, and Brightness.
Balanced Tone is the default setting and offers a well-rounded soundscape that should please most listeners. If you’re looking for a little more clarity, Vocal Range boosts the mid-range frequencies and slightly decreases the bass impact, making it ideal for podcasts and other voice-centric content.
Brightness prioritizes treble frequencies and further flattens the bass, making it perfect for music with a lot of high-pitched instrumentation.
To access these presets, follow these instructions.
- Open “Settings” on your iPhone and tap “Accessibility.”
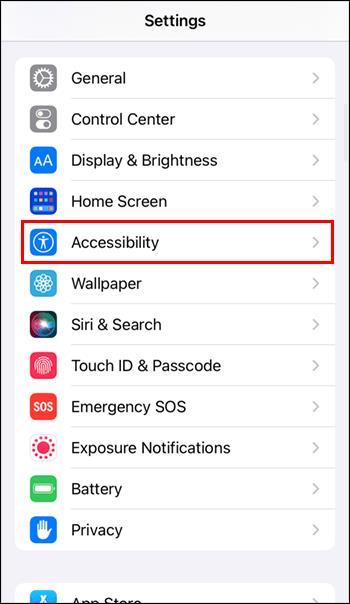
- Select the “Audio/Visual” option and tap “Headphone Accommodations.”

Customize the Audio Setup on Your iPhone or iPad
If you’re not satisfied with the sound quality of your AirPods Pro, there’s a little-known feature that may be able to help. It’s called “Custom Audio Setup,” designed to create a hearing profile tailored specifically for you.
The process is simple.
- Open the Settings app on your iPhone/iPad and tap “Accessibility.”
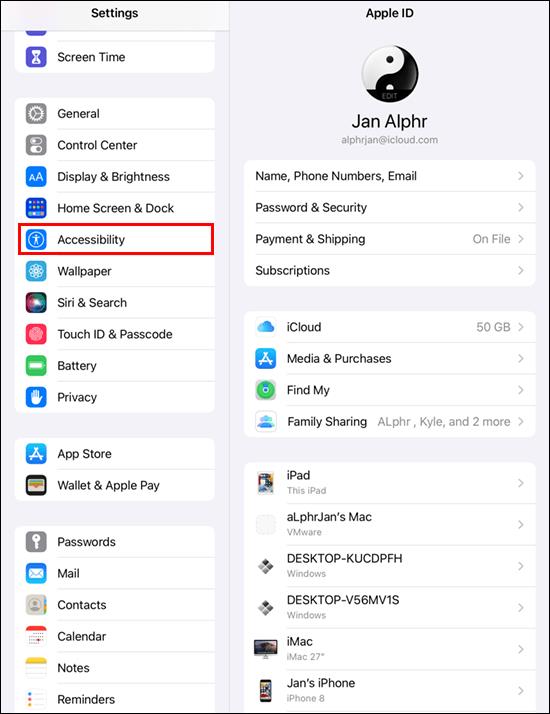
- Tap “Audio & Visual” and then select “Headphone Accommodations.”

- Tap “Custom Audio Setup.”
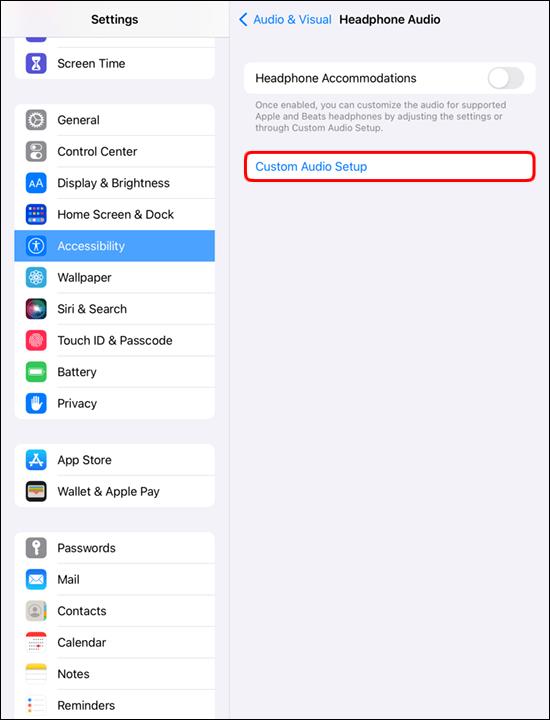
Once you’ve turned that on, you’ll need to put in your AirPods Pro and wait for a series of questions and sounds. Based on your responses, the system will create a hearing profile that aims to improve the sound quality of your AirPods Pro for both music and phone calls.
If you’re unhappy with the results, you can always go back and run the setup again. Even if it doesn’t provide a major improvement, it’s still worth doing just to fine-tune the sound of your AirPods Pro to better suit your hearing.
Turn On Spatial Audio
If you’ve ever wanted to feel right in the middle of your favorite movie or TV show, now you can with AirPods Pro. Spatial Audio uses dynamic head tracking to create a theater-like experience anywhere you go. You’ll feel like you’re hearing the sound all around you, just like in a real-life situation.
In addition, Spatial Audio can also help to reduce distractions and background noise. This can be especially beneficial when you are trying to focus on a particular task or when you are in a noisy environment. Overall, Spatial Audio can significantly improve the sound quality of your AirPods Pro and provide a more immersive listening experience.
Here’s how to turn on Spatial Audio.
- Open “Control Center” and long-press the volume slider. You should see an “AirPods Pro” icon.

- Toggle the “Spatial Audio” or “Spatialize Stereo” button that appears in the bottom-right corner of your screen.
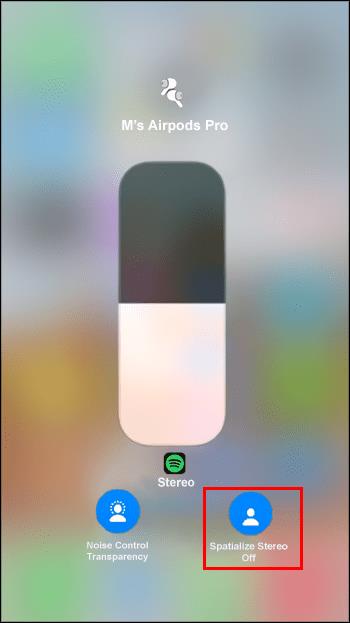
After that, just sit back and enjoy the show.
Test the Fit of Your AirPods Pro
Wearing the wrong size ear tips with your AirPods Pro can result in suboptimal audio quality. If you’re having trouble getting a good seal, or if your AirPods Pro don’t seem to be staying in your ears as well as they should, it’s worth checking to see if you’re using the right size ear tips.
Apple provides a software-based Ear Tip Fit Test that makes it easy to figure out which size ear tips (small, medium, or large) fit your ears best.
To use the Ear Tip Fit Test, take these steps.
- Connect your AirPods Pro to your iPhone and then open the “Settings” app.

- Navigate to Bluetooth > AirPods > Ear Tip Fit Test.
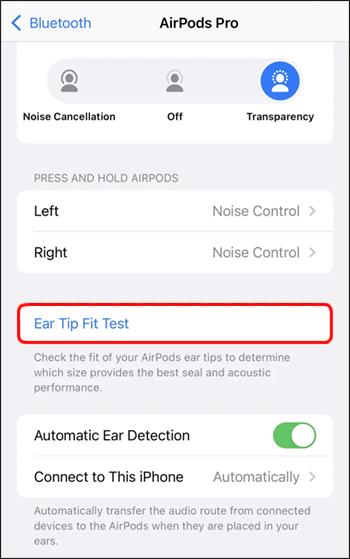
- Follow the on-screen prompts to complete the test.
Once the test is complete, you’ll know which ear tips provide the best seal for your ears.
Turn On Conversation Boost
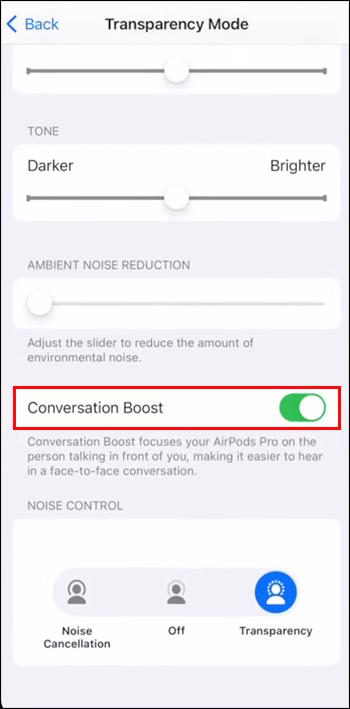
The new Conversation Boost feature on the AirPods Pro is a great way to improve the sound quality of your phone calls. This feature automatically adjusts the audio settings for phone calls based on your environment. This can be helpful in noisy situations, as it will make it easier for you to hear the person on the other end of the line.
Conversation Boost can also be used to amplify the sound of your voice so it’s easier for the person on the other end to hear you.
The best part about this feature is that it can be turned on and off with a simple press of a button, so you can use it when you need it and turn it off when you don’t.
To turn on Conversation Boost, follow these steps.
- Open the “Settings” app on your iPhone and tap “Accessibility.”

- Select “Headphone Accommodations.”

- Tap “Transparency Mode” and toggle the “Conversation Boost” option.
Experiment Until You Find the Perfect Setup
AirPods Pro is a great product, but there are ways to improve the sound quality. We all have our own preferences, and therefore there’s no guarantee that you’ll like all the features we’ve discussed. But with a little bit of experimentation, you can ensure that you get the most out of your AirPods Pro audio experience.
Have you tried any of these tips to improve the sound of your AirPods Pro? Let us know in the comments section below.


