The Amazon Echo is everywhere, and it’s available in multiple iterations; from the OG Echo to the Echo Dot, from the Echo 2 to the Echo Plus, and even the Echo Show. There’s no doubt that Amazon’s Alexa-powered smart home device is having a bit of a moment. The chances are that you’ve probably got at least one of these devices in your home already and, it should come as no surprise to learn that Wi-Fi woes are chief among the issues for Amazon Echo owners.

Thankfully, there is a solution to your Echo setup/Wi-Fi problems. This article explains how to properly set up Wi-Fi on your Echo and the issues you may face before or during use.
Amazon Echo Wi-Fi setup: How to Properly Set Up an Amazon Echo
Most connection issues begin with the setup. A device that was not correctly set up or was unable to connect early on can cause problems. First, we’ll walk you through the proper steps to start using your Echo device.
- Download the Amazon Alexa App from iOS or Android. You can also access Alexa online.
- Plug in your Echo using its power cable. The ring light will turn blue and start spinning to let you know it’s turned on.
- Next, the orange light replaces the blue one to signal setup mode as Alexa welcomes you to the Amazon Echo.
- The setup process should start automatically and you’ll be prompted to sign in with your Amazon account “email” and “password.” If the prompt fails, move to the next step. Otherwise, skip to Step 6.
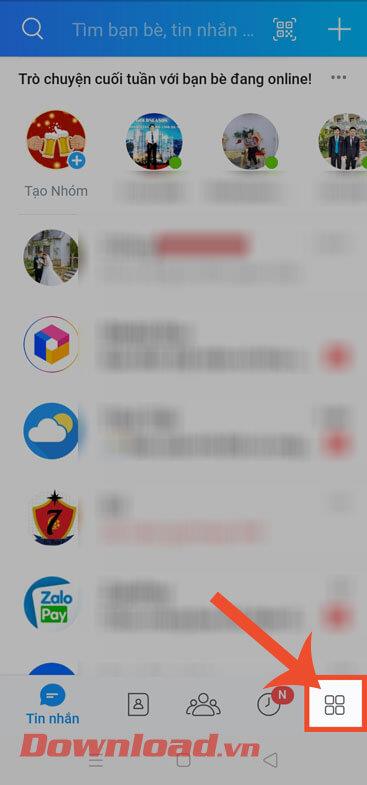
- If the setup doesn’t start automatically, or the orange light doesn’t appear when you first switch on your Amazon Echo, go to the Alexa app and tap on “More > Add a Device.”
- Now, select “Amazon Echo” and choose your device from the list.
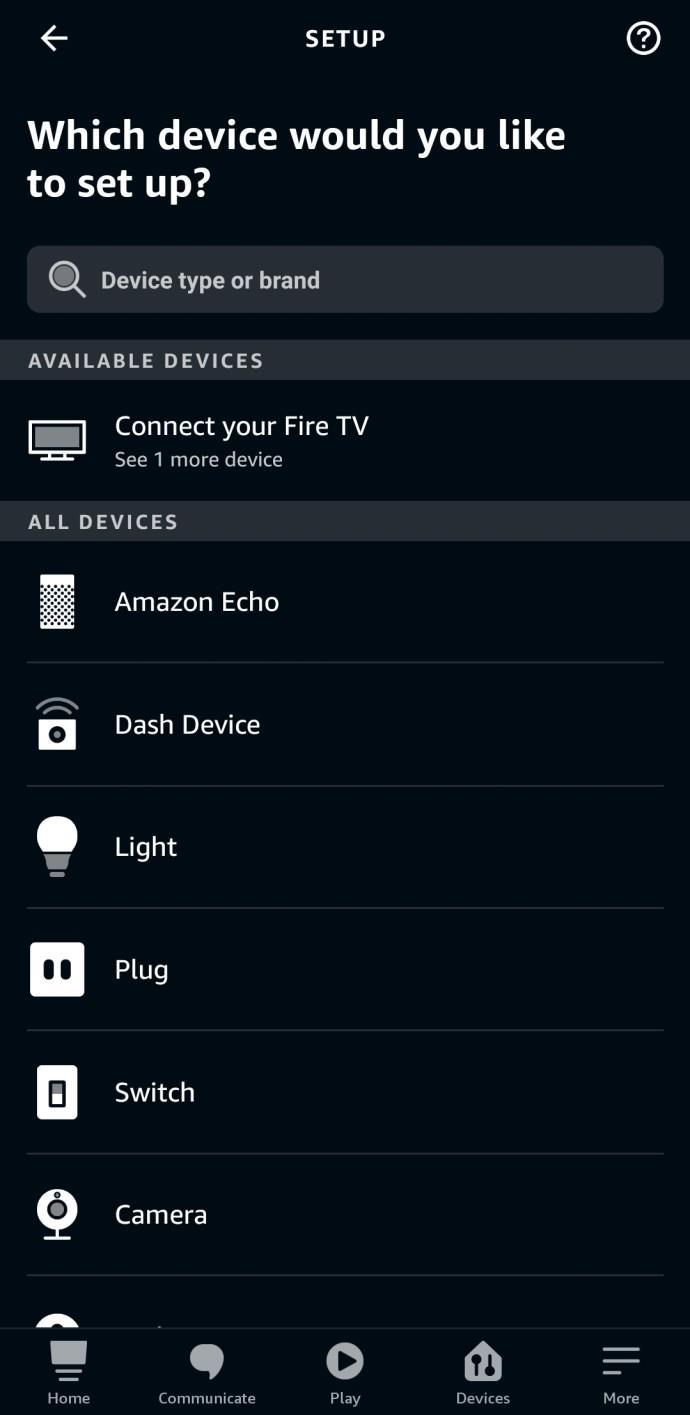
- Follow the on-screen setup instructions.
- The next step involves connecting the app to your Echo and connecting your Echo to your Wi-Fi network. On the “Begin Echo Setup” screen, click “Connect to Wi-Fi.” The orange ring should now appear on your device. If the orange light still doesn’t appear, go to step 11.

- Close the app, open “Settings,” and go to “Wi-Fi.” If the phone has recognized your Amazon Echo device you will see a Wi-Fi network with a name that starts: Amazon-XXX. It can take up to a minute to appear on the list.
- Selecting this Wi-Fi network will drop your phone from your main Wi-Fi network and connect it directly to the Amazon Echo.
- Once connected, you get prompted to connect the Echo to your main Wi-Fi network. Enter your “Wi-Fi password” when asked and Echo will join the network.
- From this point on, any Echo device on the same network can communicate with each other and with the Amazon Alexa app.
- If the orange light still doesn’t appear, press and hold the “Action” button for five seconds, then go back to step 7 and try again.
Upon completing the above steps, your Amazon Echo device is connected to your Wi-Fi network and becomes the internet server for your phone or tablet. This setup lets you control the Echo using the app while also getting internet to your portable device. You will need to repeat this process above for every Amazon Echo and Echo Dot you connect to your network.
How to Use an Amazon Echo
Getting started with your Amazon Echo requires knowing what the individual buttons and lights mean.
The majority of the Amazon Echo devices get controlled similarly, with the bonus of a touchscreen on the Echo Show. Each model comes with an action button, volume controls, a light ring, and a microphone-off option.
The Action Button, which you’ll need to use during setup and troubleshooting, is the button with a “single white dot” in the center. You can use this button to turn off the alarm and timer and wake up the Echo.
The Volume controls are either represented with “plus” and “minus” buttons or via a “ring,” which is found on the Amazon Echo 1st Gen. models and the Echo Plus. You can increase the sound level on the Echo Plus by rotating the volume ring clockwise.
The Microphone button, which stops Alexa from being able to listen to you, is depicted by a “microphone with a line through it.” Once disabled, the light ring will turn red. Pressing it again will turn the microphone back on.
To start using your Amazon Echo, following setup, say, “Alexa,” followed by your question or command. If it has recognized your voice, the light will turn blue to indicate it’s listening.
The Amazon Echo and Echo Dot don’t do a whole lot on their own—or they’re certainly not as valuable without enabling Alexa Skills, which brings us to the following tutorial.
My Amazon Echo Won’t Connect to Wi-Fi
Amazon Echo devices can only connect to a router with 2.4GHz only or dual-band Wi-Fi (2.4 GHz/5 GHz) networks that use the 802.11a/b/g/n standard. For dual-band routers, your Echo device WILL connect to the 5GHz band, although there is a way to force it onto the 2.4GHz spectrum.
1. Test Your Wi-Fi Network and Security
Connection problems have two possible roots. It’s either your Echo device or your internet (most likely) router). Let’s take a moment to review some of the first steps to troubleshooting your Echo.
- If you can’t connect your Amazon Echo to your Wi-Fi network, turn the device off at the plug, wait 10 seconds, and repeat the setup process above.
- Make sure you know your network password—this is the password needed to access your Wi-Fi network and is typically found somewhere on your router. This password is not your Amazon account password.
- Ensure other devices, such as your phone or smart TV, are connected to the Wi-Fi. If they’re not, this may signal that your Wi-Fi isn’t working rather than your Amazon Echo.
- If your main Wi-Fi network isn’t working, reboot the router by turning it off at the plug. If it’s still not working you may need to update the firmware for your router or modem hardware and the instructions will depend on your router. You can also contact your internet service provider.
- If you saved your Wi-Fi password to Amazon previously, but you recently changed the password, you’ll need to re-enter your new password to connect the Amazon Echo to your network again.
- By default, your router may use both WPA+WPA2 for security. To resolve connection issues, switch the router security type to either WPA or WPA2 only. If the router also has an option to set the type of encryption, setting it to AES only is recommended.
2. Reduce Your Wi-Fi Congestion
If you have multiple phones, tablets, Amazon Echo, smart devices, TVs, and computers on your Wi-Fi network, or you’re downloading or streaming apps and content, you may find your Wi-Fi struggles to keep up.
- Turn off devices you aren’t using to free up bandwidth.
- Move your Amazon Echo closer to your router.
- Keep the Amazon Echo away from possible interference, such as microwaves or baby monitors.
3. Reset the Amazon Echo
If testing/adjusting the Wi-Fi network and Reducing Wi-Fi congestion doesn’t solve the connection problem with your Amazon Echo device, try resetting it to start from scratch.
- Find a paper clip, earring, or the SIM card tool found with new phones to press and hold the Reset button on the Echo device on the base of your device. The light ring on your Echo will turn orange, and then blue.
- Wait for the light ring to turn off and on again.
- The light ring should turn orange, and your device will enter the setup mode. You can try repeating the following steps at the top of this article.
Now that you know how to set up your Amazon Echo and resolve common issues, you’re ready to go. Given the abundance of Amazon devices, you can easily find plenty of documentation on fixing almost any problem that may occur.
Echo Device Connection Troubleshooting FAQs
Why won’t my Echo connect to Wi-Fi?
To start, ensure that your phone (or tablet) connects to the correct Wi-Fi network, including the band (2.5GHz or 5GHz).
Next, try restarting your router or your Echo device. If the connection issues continue, you may need to perform a factory reset and start over from scratch.
What can I do if I can’t get my Echo working?
If you’ve completed the setup tutorial and taken the proper troubleshooting steps, it might be time to reach out to Amazon Support. You may have a faulty device or something specific to your network preventing a successful setup.


