Sunset is always a scene that every photographer wants to capture. However, taking sunset photos is not easy. Even so, you still have some ways to make sunsets more beautiful in Photoshop .
Sunset scenes always bring people indescribable emotions. Many photographers always want to capture the most beautiful moment of sunset. However, that is not easy even for professional photographers. It's all because the light levels at dusk are difficult for the camera to handle.
In fact, even if you adjust the highlights appropriately when sunset comes, some parts of the image may still be dark. In addition, the sun in the photo may be blurred and blend into the surrounding environment at the time of shooting.
In this article, let's learn with WebTech360 how to edit sunset photos in Photoshop in the 3 most common cases!
How to edit overexposed sunset photos with Camera Raw
This example takes advantage of the Radial filter available in Adobe Camera Raw to darken the selected image area. This will make your sunset photos more interesting and not look too flat. You can download sample photos here: https://www.pexels.com/photo/woman-in-a-red-dress-looking-at-the-sunset-4210065/ and follow the instructions.
1. Press Ctrl + J to create a copy layer of the image.
2. Right-click on the copied layer and select Convert to Smart Object .
3. Go to Filter > Camera Raw Filter .
4. Select Radial Filter on the far right of the vertical menu. Left click on the center of the sun.
5. Using 4 Box Handles , expand the Radial Filter until the circle fills the screen and the top and bottom parts disappear outside the frame.
6. Enter the following values for each slider in the following filter: Temperature +59; Exposure -.45; Contrast +69; Highlights -60; Shadows -20; Whites +18; Blacks -46; Saturation +16 .
7. Click Edit . Next, scroll down to Effects and enter the value: Grain 20; Vignetting -32 . Then, click OK to return to Photoshop.
8. With the copy layer, reduce the Opacity to 82% .
The article has created a Smart Object so you can go back to Camera Raw and make more in-depth adjustments. All you have to do is double click on the Camera Raw filter in that layer.
How to add the sun using Camera Raw
When you want to create a sun from scratch because it is missing or too blurred in the photo, the Radial Filters can still complete the task well. This tutorial also uses the Brush tool to create realistic sun shapes. You can download example photos here: https://www.pexels.com/photo/seaport-during-daytime-132037/
1. Press Ctrl + J to create an image copy layer.
2. Right-click on the layer and select Convert to Smart Object .
3. Go to Filter > Camera Raw Filter .
4. Select Radial Filter in the rightmost vertical menu. Left click at the position you estimate that the center of the sun will be just below the horizon.
5. Using 4 Box Handles , reduce the Radial Filter until the circle is large enough to sketch the sun.
6. Enter these values in each of the following sliders: Feather 59; Exposure +4.00; Contrast +65; Highlights +34; Whites +36; Saturation +21 . Then, click OK to return to Photoshop.
7. With the copy layer highlighted, create a Layer Mask by clicking the Add a Layer Mask icon at the bottom of the screen.
8. Press B to open the Brush tool. Then, select Soft Round Brush in the brush settings.
9. Turn on the X key to create a black foreground.
10. Use your mouse to draw the sun from the mountain to create a sunset landscape.
When doing this, you need to remember the following tips:
- You can zoom in on the image to make drawing easier by clicking Ctrl and the + key . To reduce the zoom size, click Ctrl and the - key . To return to full screen, click Ctrl + 0 .
- To move around the screen, use the Hand tool , press the spacebar, and move the mouse.
- Use the brackets [] key to increase or decrease the brush size.
- You can press Ctrl + Z to easily undo without any error.
How to edit sunset photos that are too bright or saturated
This is a fairly common error. Such photos often have parts that are too dark or have too much red, yellow, or both.
This example builds on the effects of Radial Filters by adding a second filter and adding Graduated Filters to correct the fine details of dark areas in the image. You can download sample photos here: https://www.pexels.com/photo/architecture-buildings-city-cityscape-366283/.
1. Press Ctrl + J to create a copy layer of the above image.
2. Right-click on the layer and select Convert to Smart Object .
3. Go to Filter > Camera Raw Filter .
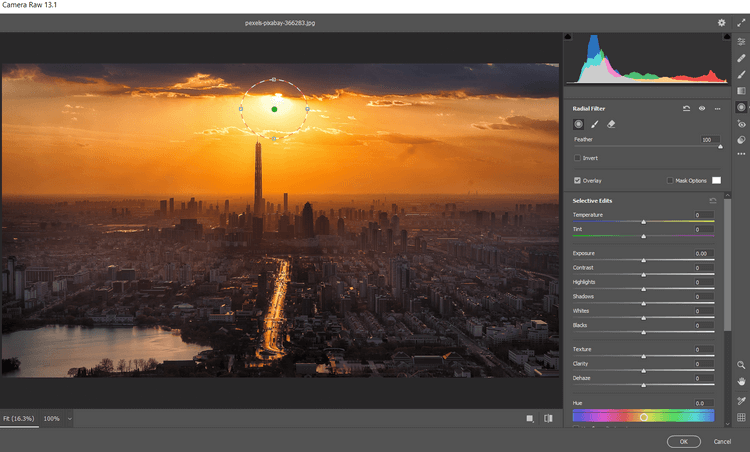
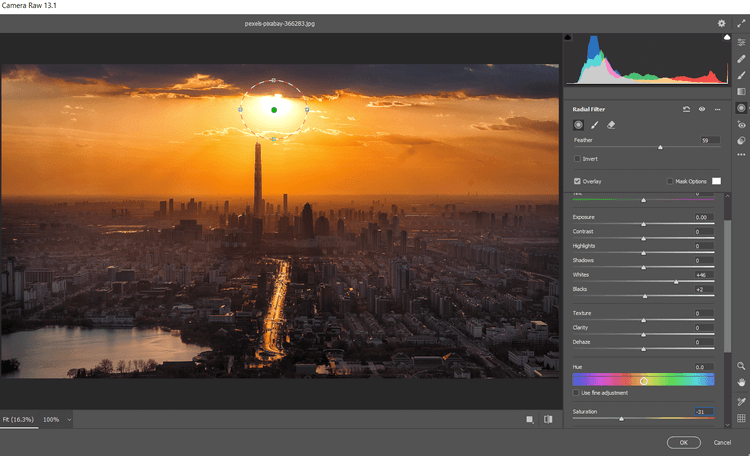
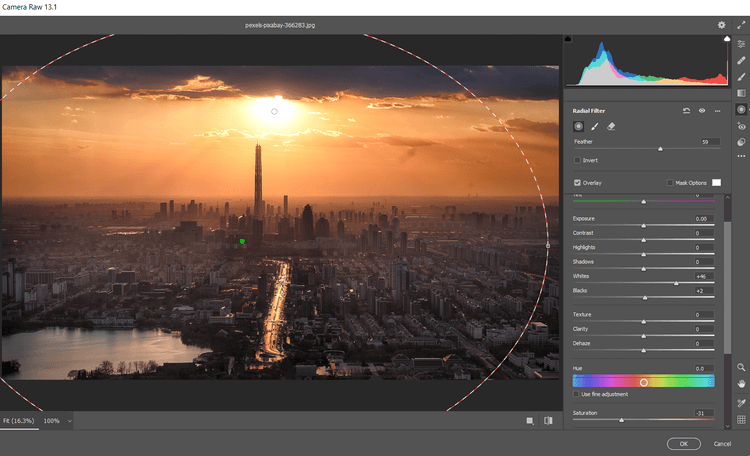
4. Select Radial Filter in the rightmost vertical menu. Left click to place the first Radial Filter near the center of the sun.
5. Using 4 Box Handles , increase the size of the filter so it is slightly larger than the sun.

6. Enter the following values in each of the following sliders: Feather 59; Whites 46; Blacks +2; Saturation -31 .

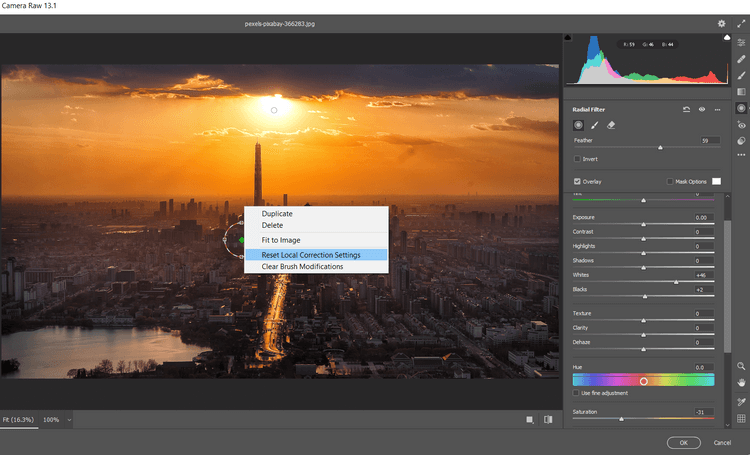
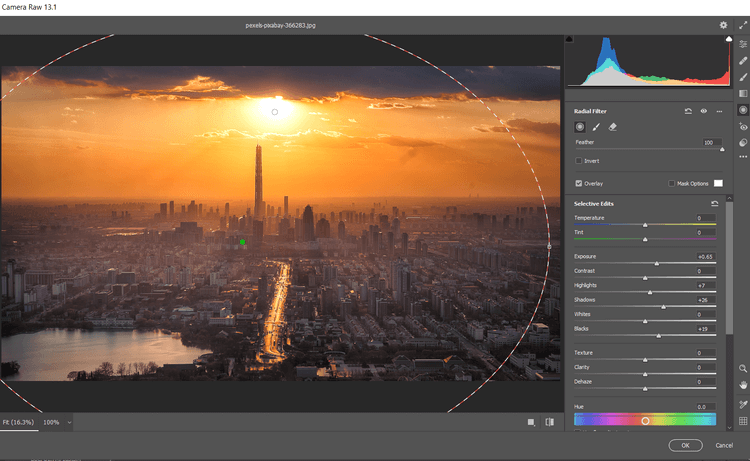
7. Click to place another Radial Filter between the buildings in the center. Right-click and select Reset Local Correction Settings .

8. Using 4 Box Handles , increase the filter size so that it extends harmoniously beyond the screen and covers the entire image.

9. Enter these values into each of the following sliders: Feather 100, Exposure +.65; Highlights +7; Shadows +26; Blacks +19; Saturation +17 .

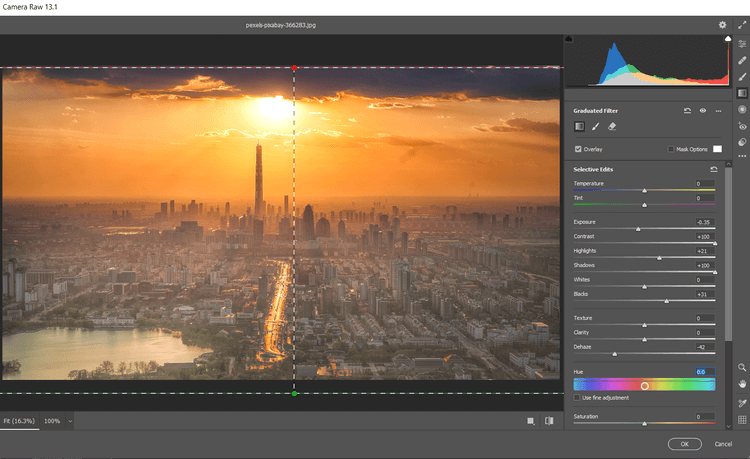
10. Click on the Graduated Filter icon in the rightmost vertical menu. Create the first Graduated Filter by clicking on the bottom of the screen and dragging the handle in all directions from the top of the screen.
11. Then enter these values for each of the following sliders: Exposure -.35; Contrast +100; Highlights +21; Shadows +100; Blacks +31; Dehaze -42 .

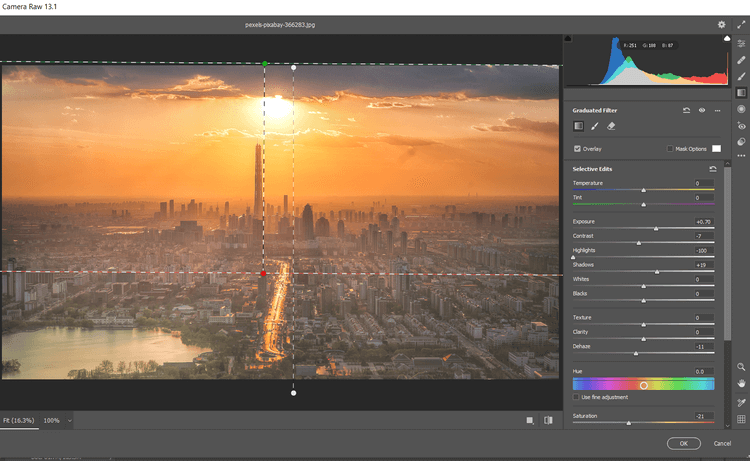
12.Create a second Graduated Filter by left clicking from the top of the screen. Then, drag the filter down, toward the center of the photo. Here, right-click and select Reset Local Correction Settings .
13. Then, enter these values into the following sliders: Exposure +.70; Contrast -7; Highlights -100; Shadows +19; Dehaze -11; Saturation -21 . Click OK to return to Photoshop.

Continue editing photos in Photoshop. We'll create a Saturation Mask , then group the layers to hide some of the effects.
Add a saturation overlay and group layer groups
1. Select the copy layer, then click the Create a New Layer icon .
2. Create a Stamp Visible layer by pressing Shift + Ctrl + Alt + E .

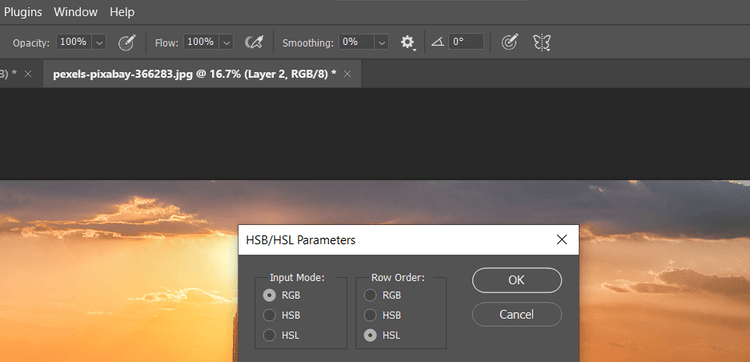
3. Go to Filter > Other > HSB/HSL . In the dialog box that appears, make sure RGB is selected in Input Mode . In Row Order , select HSL , then click OK .

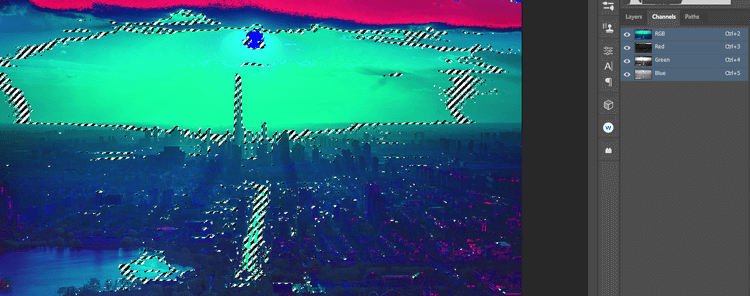
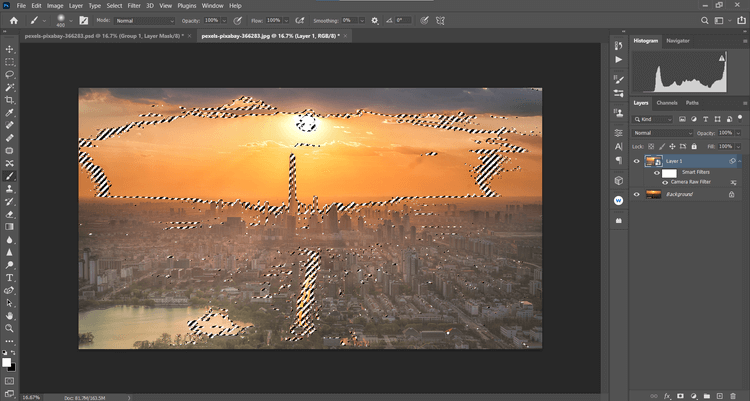
4. Go to Channels . Select RGB + Ctrl .

5. Return to the Layers tab . Delete the duplicate layer by dragging it to the trash icon.

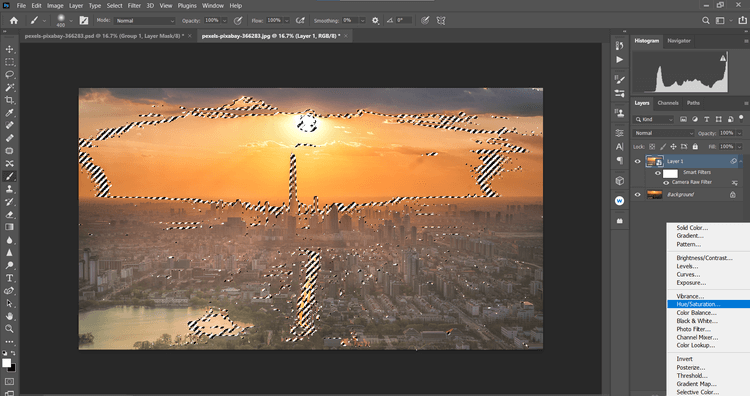
6. With the Background layer selected, create a Hue/Saturation layer .

7. A Saturation Mask will be created on the Background layer . Click RGB in the drop-down menu, then select Reds . Change Saturation to -39 and Lightness to +19 .
9. Then, select Yellows in the drop-down menu. Change Saturation to -19 and Lightness to +42 .
10. Click the Hue/Saturation layer , then Shift + Click on the copy layer below it. Then, click the Create a New Group icon in the lower right corner of the screen.

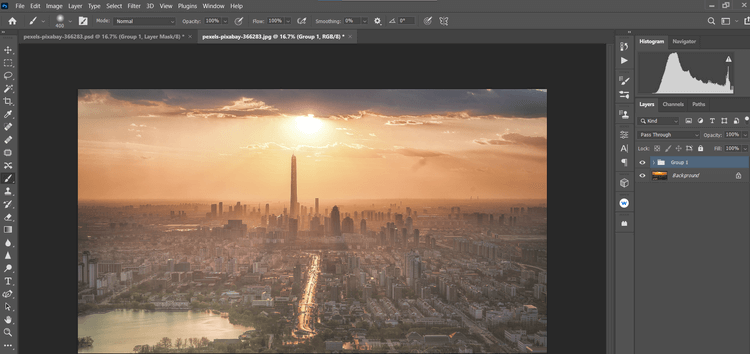
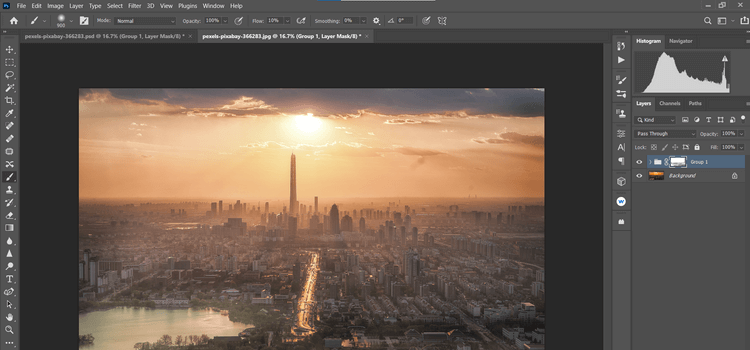
11. Click the Create A Mask icon in the lower right corner of the screen. Press B for the Brush tool. Then, select Soft Round Brush in the brush settings. Turn on the X key to create a black foreground.

12. Set the Flow to 10% , remove the effects so the details look natural.

Taking and editing sunset photos can be one of the most difficult tasks for millions of photographers around the world. Hopefully the above guide will help them and you get the sunset photos you want.
