One thing many people want to do when they get a new gadget is personalize it. You can change some basic things on your new laptop or desktop, such as the background image, to choose something more personal. You can also change the window colors to your favorite ones or try the dark mode.

But did you know you can go into even more detail?
For example, change the cursor?
If that’s what you’d like to do, this article has you covered.
How to Change the Cursor on a Chromebook
This section will walk you through changing the cursor on a Chromebook. Suppose you don’t feel like using the typical Chromebook default cursor. In that case, you have lots of options to make it more interesting.
There are various methods Chromebook users can apply to change the cursors, depending on how unique they want them to be.
If you only want to change the cursor’s size or color, you can do this in a few simple steps through Settings. Those who want something more exciting will need a third-party app.
From Settings
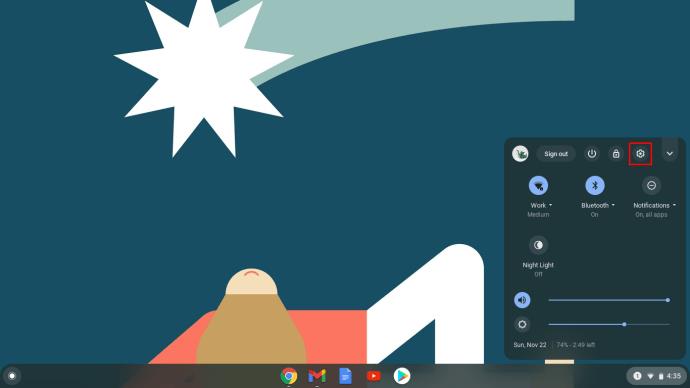
- Turn on your Chromebook and open the System menu. If you’re unsure how to do this, just navigate to the bottom right corner and click the time.

- When the System menu opens, select the gear icon at the top to open Settings.
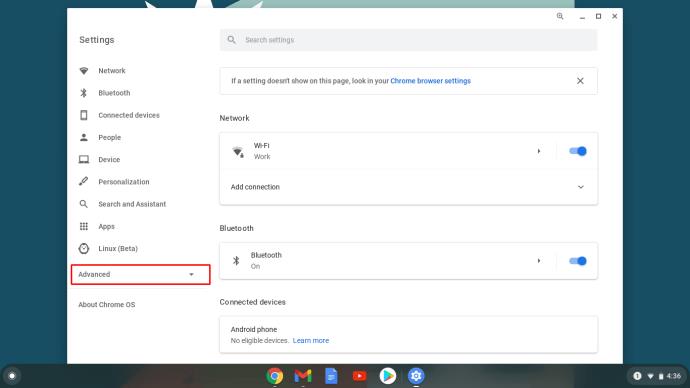
- You’ll see a menu on the left when the Settings window opens. Choose Accessibility. If you can’t find this tab, select the Advanced section to reveal a new menu below.
- Choose the second option – Manage accessibility features and then, from this menu, choose Mouse and touchpad.
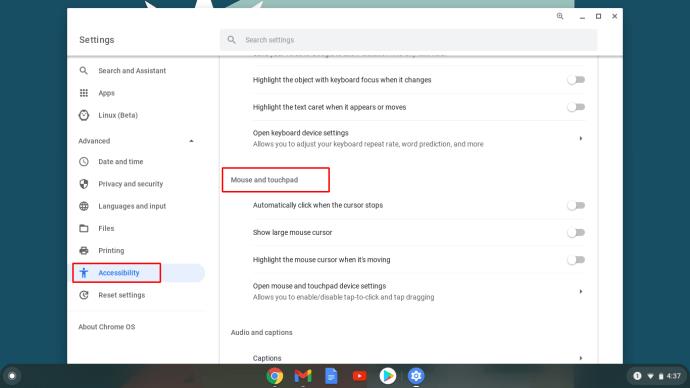
- You’ll see different cursor-related options here. Choose Show large mouse cursor to change its size. By default, it’ll be set to large when you click the toggle, but you can make it medium or small using the Adjust cursor size option you’ll see below.
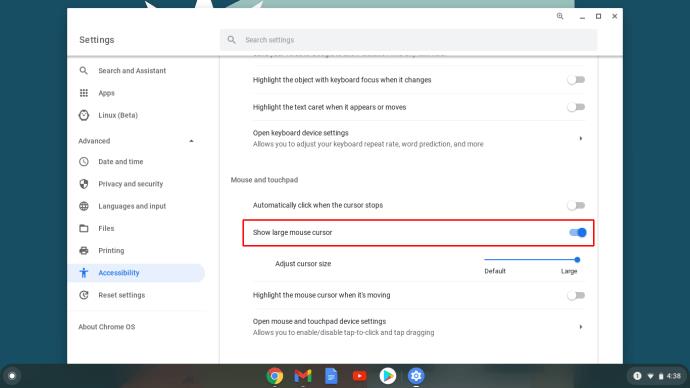
Other options enable you to highlight the cursor while moving it and customize tap and drag options. Do you want to adjust your cursor’s speed or change scroll directions? You can do all this within the Device and Touchpad settings, accessible from the Settings panel.
Note that you can enable the Accessibility shortcut in your System menu; you can skip some of these steps.
Third-Party Apps
If you want to change more cursor features, you can download a Chrome extension that’ll enable you to do so. You’ll discover several options that work perfectly well on Chromebooks.
We recommend My Cursor or Custom Cursor since their cursor libraries are quite large, and you’ll indeed find something you like. If you’re using Android or Linux apps, don’t be surprised if the cursor turns back into the regular one. These apps are not compatible with the Chrome extensions we’ve mentioned.
How to Change the Cursor on Windows 10
The default cursor might be the most straightforward choice, and most people still stick to it, but what if you want to try something different? Here’s how you can change your cursor if you’re a Windows 10 user.
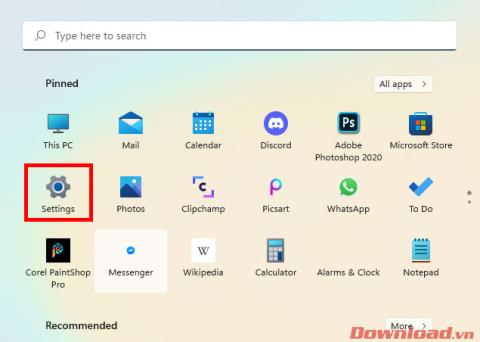
- Navigate to the taskbar and click the Windows button on the lower-left corner. You can also press the Windows key on your keyboard if you prefer.

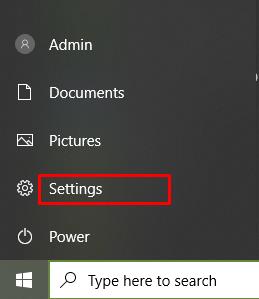
- When a menu appears, scroll to Settings and click to open.
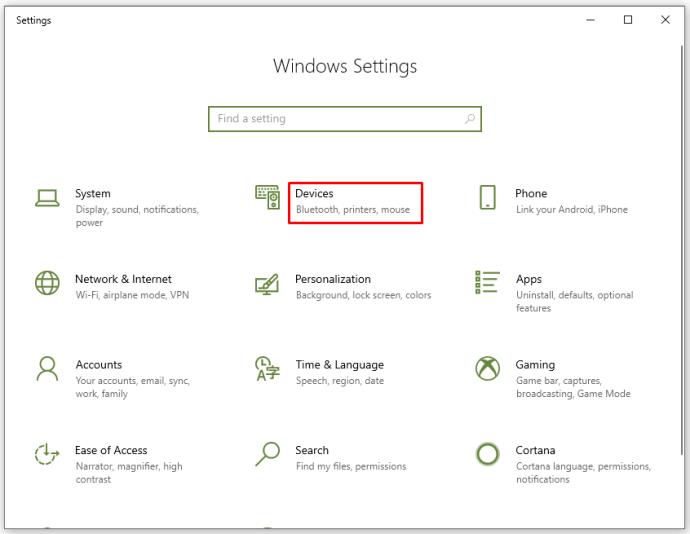
- In the Settings window, you’ll see the Devices option; click it.
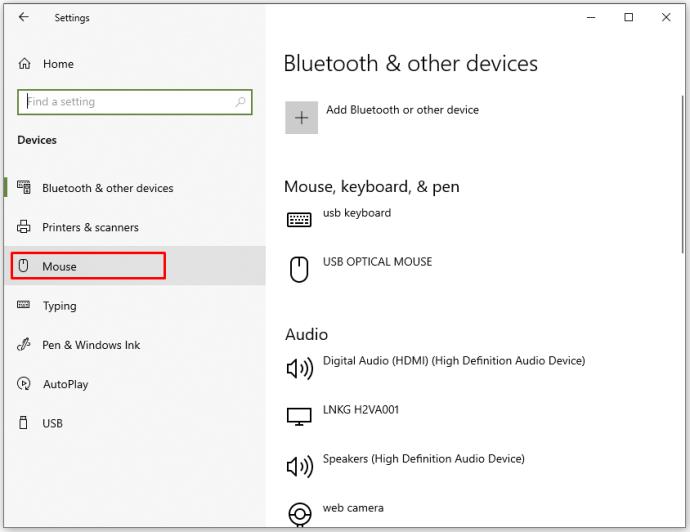
- From the menu on the left, choose Mouse. You can also reach this step faster – when you open the Windows menu, start typing “mouse” and click on the first result on the left.
- Once in the Mouse tab, choose the Additional mouse options on the right.

- From the pop-up window, choose the second tab, named Pointers.
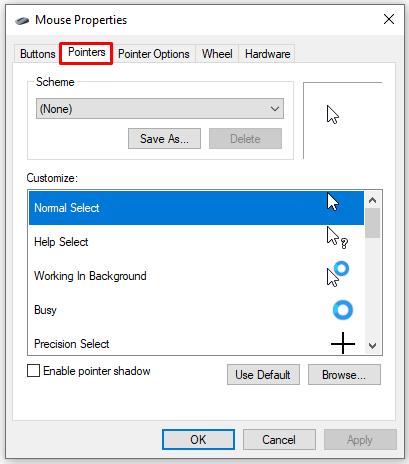
- Under Scheme, you’ll see that it’s the default one for Windows, and under Customize, you’ll see a list of available cursors.
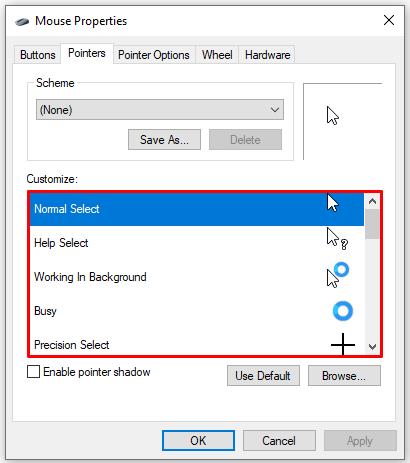
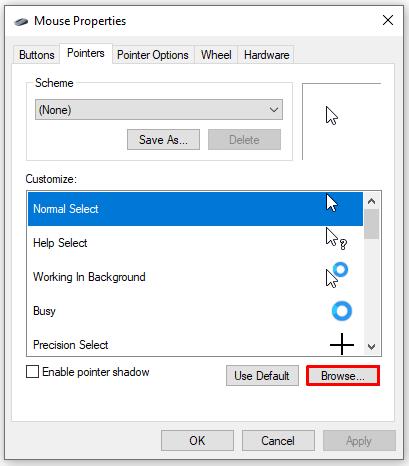
- You can also click on Browse if you want to add any third-party cursors you have downloaded. However, before you do that, you can choose from multiple cursors already available in Windows because clicking on Browse takes you directly to the Cursors folder.
- When you select a new cursor, click Apply and then OK to save the changes.
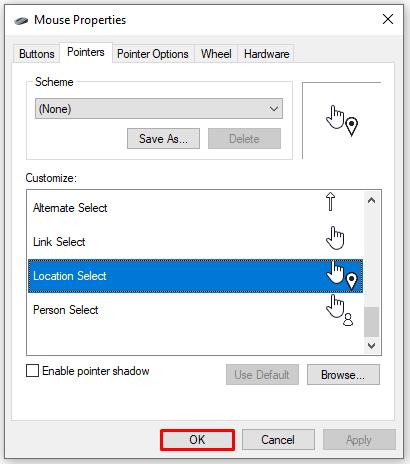
Be aware that you’ll be using the cursor on different backgrounds. Make sure it’s always visible and that it suits different resolutions.
Changing Color and Size
If you’d only like to change your cursor’s color or size, follow the instructions below.
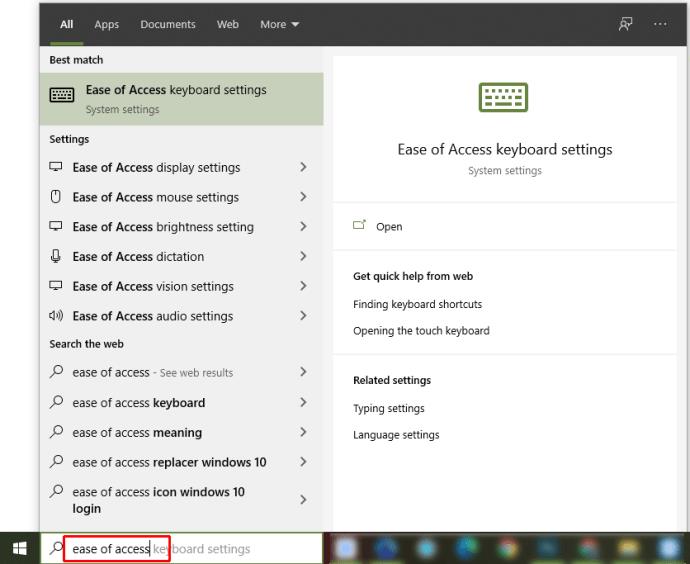
- Click the Windows icon or press it on your keyboard.

- Type in “Ease of Access.”
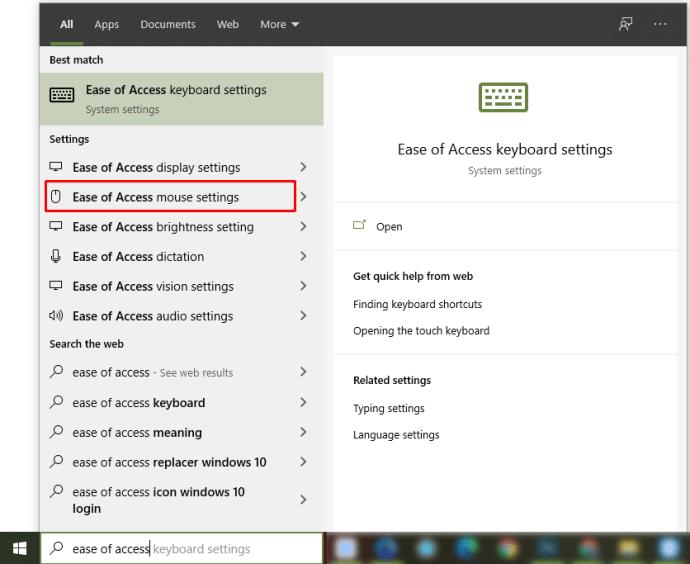
- Choose mouse settings from the results you get.
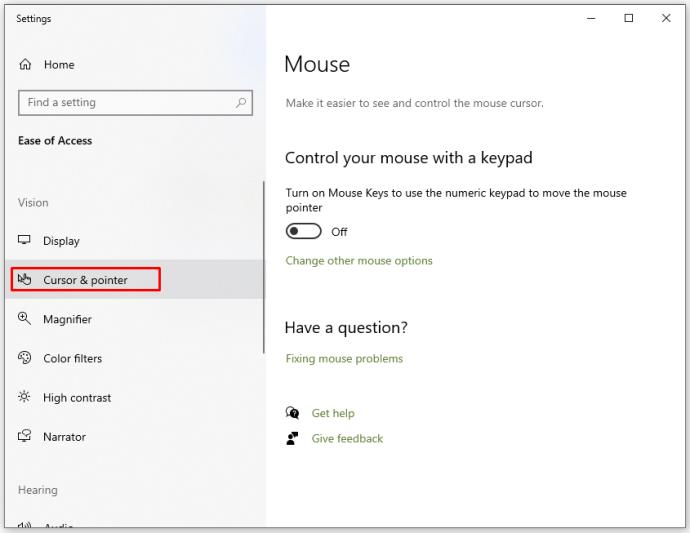
- From the list on the left, choose Cursor & pointer.
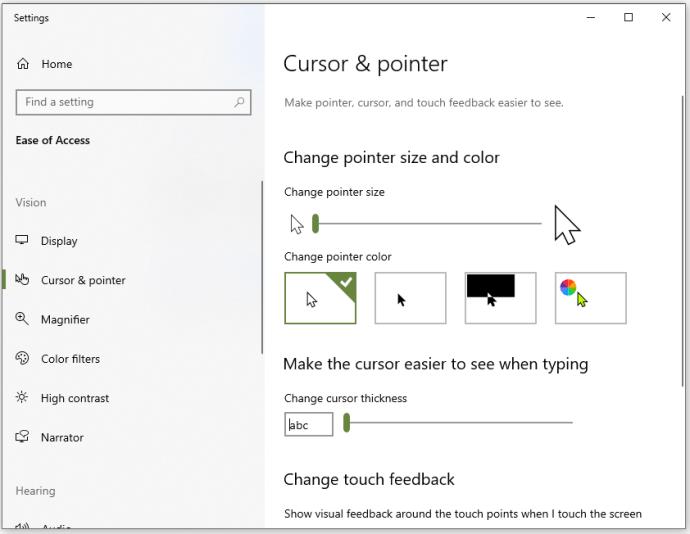
- Here you can customize the pointer size and its color. Also, you can change its thickness so it’s clearer on any background.
How to Change the Cursor on Mac
Mac users can also customize their cursors, although they may not have as many options. If the standard cursor doesn’t match your preferences, here’s what you need to do to make it fit your needs better and become more visible on the screen.
Do keep in mind that the cursor options you will see vary depending on the version of macOS you’re running.
To access the cursor, follow the steps below.
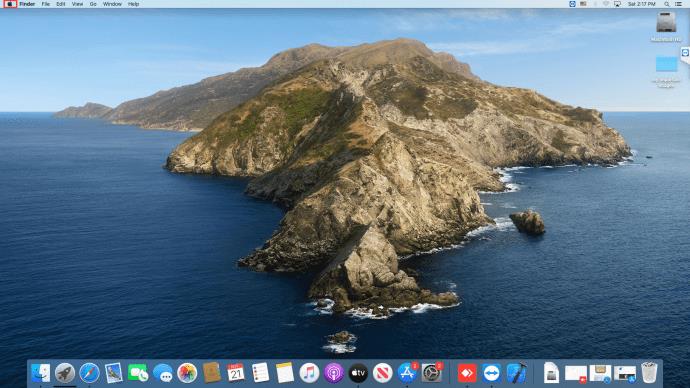
- Click on the Apple menu.
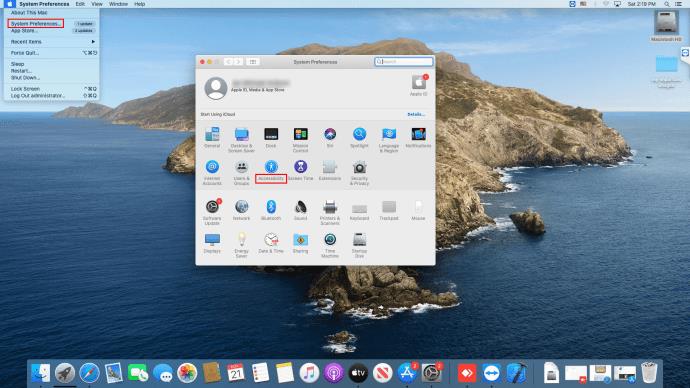
- Choose System Preferences and from there, select Accessibility.
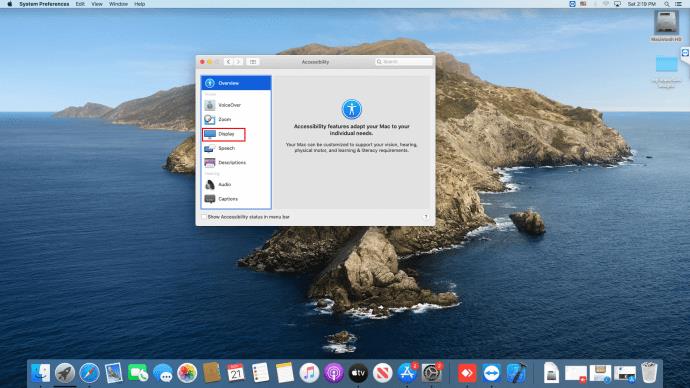
- From the newly opened menu, choose Display.
- Select Pointer to see what features you can change.
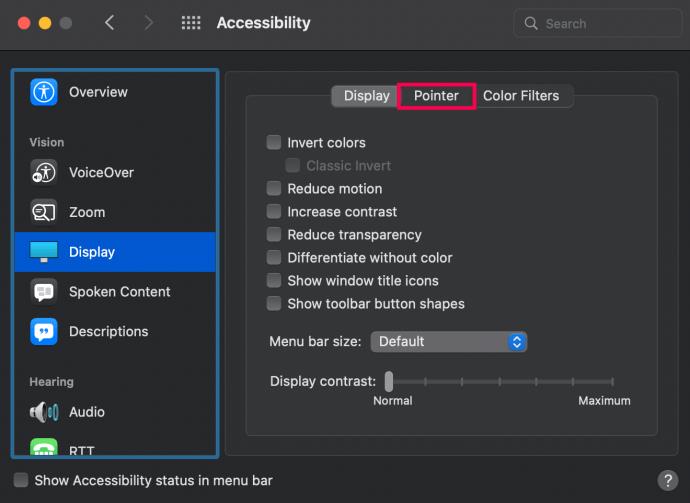
- Move the slider next to Pointer size to increase or decrease the cursor’s size.
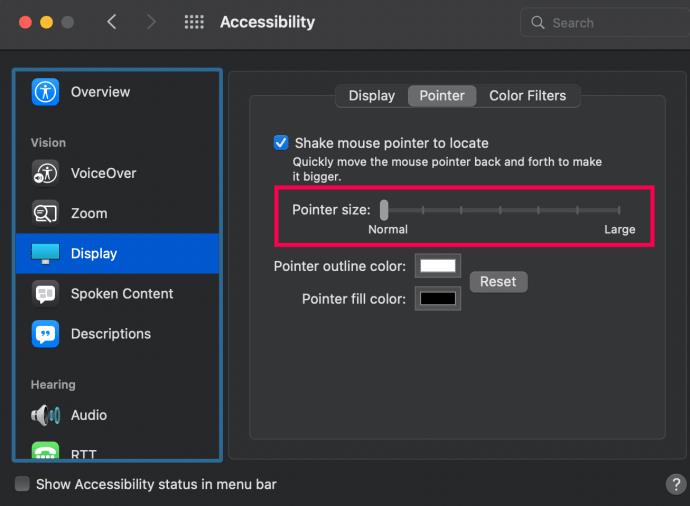
- Select the box next to Pointer outline color, or the Pointer fill color.
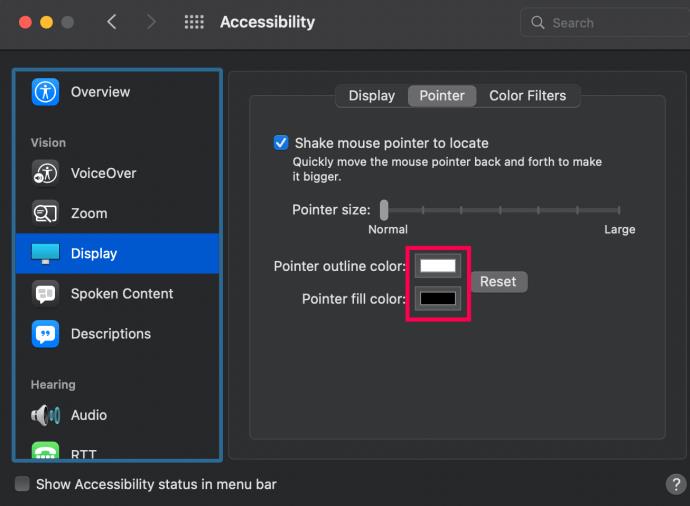
- A pop-up window will appear with a color wheel. Select your cursor’s new color.
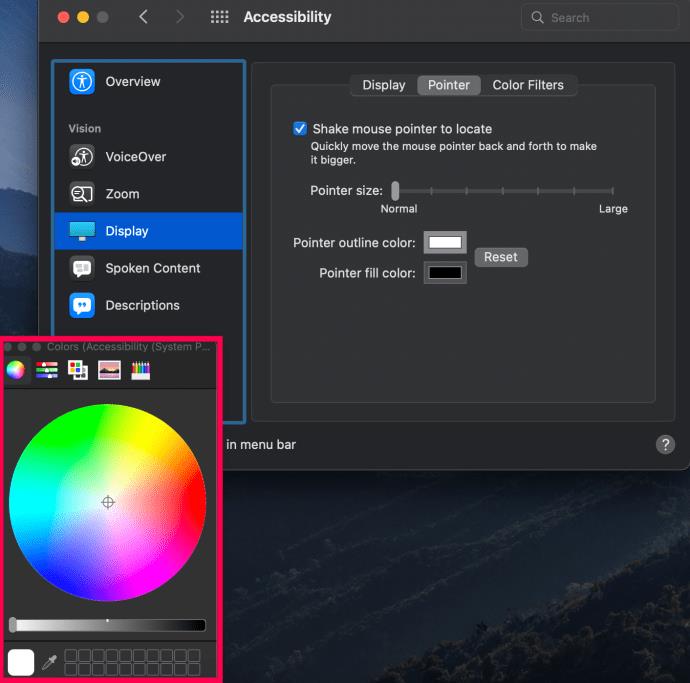
Note: If you’re prone to losing your cursor, be sure to check the box next to Shake mouse pointer to locate. This will increase the size of your cursor and make it easier to find.
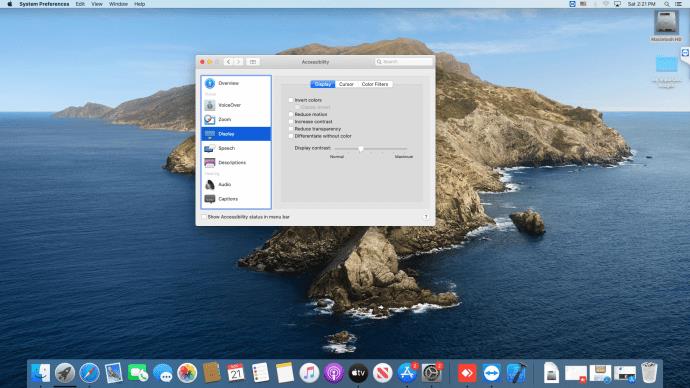
Mac makes it easy to change your pointer’s size, outline color, and fill color. But, if you’re running an older version of macOS, you may not see these options in the Settings. If that’s your predicament, we’ve listed a few options below to help you customize your cursor.
Option 1
You may not be able to change the cursor color, but here’s something you can try. If you move the slider next to the Display contrast, you can make the cursor easier to find on the screen. The color varies from light to dark.
Option 2
You can enable the locate option. If you can’t find the cursor on the screen, this feature allows you to move your finger on the touchpad or move the mouse quickly (or simply shake it) to make the cursor bigger for a few seconds. This makes it easier to find.
Option 3
Suppose you want the cursor to be permanently larger. In that case, you can navigate to the second option and drag the slider to make the cursor bigger or smaller.
Depending on what Mac OS version your computer is running, the steps may differ a bit. You may need to click on Universal Access instead of Accessibility. However, the icon will be in the same place within the System Preferences panel.
Changing the Cursor in Linux
And what if your Dell is running in Linux? Here’s how to change the cursor in this case, although you can only pick a different size.
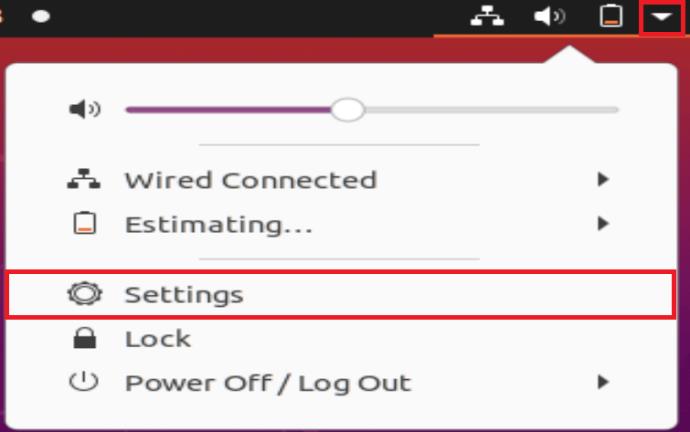
- Go to the Ubuntu Dash, navigate to the upper right corner of your screen, and select the down arrow. Then, click on Settings.
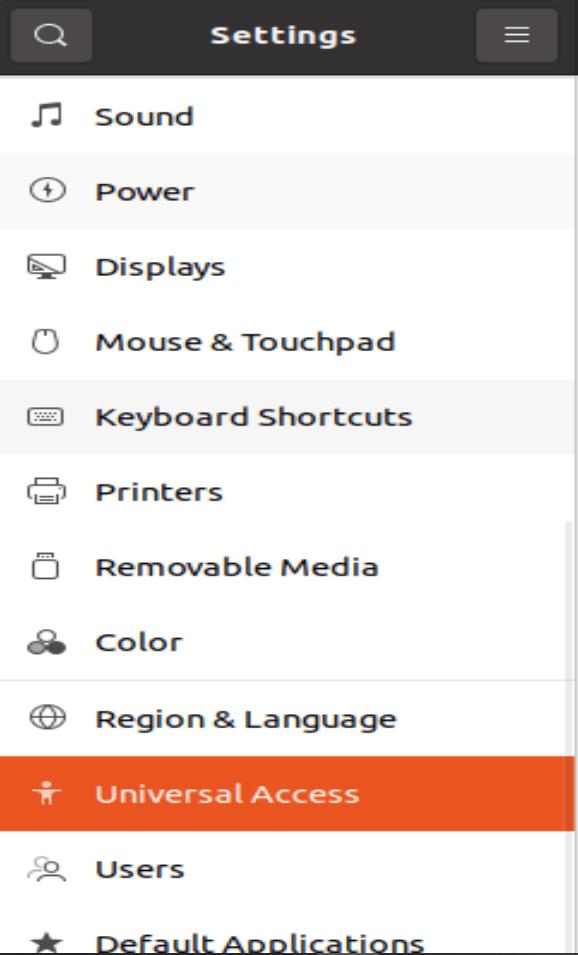
- When the Settings window opens, choose Universal Access from the menu on the left.
- In the Seeing column, you’ll see the Cursor Size option.
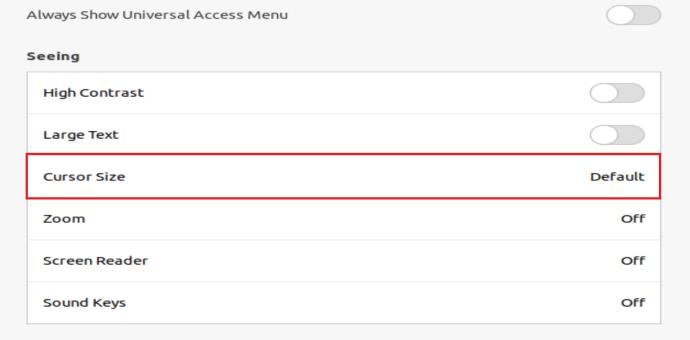
- Click on it to open the five different sizes and choose the one you want. Note that the smallest size is also the default option.

Where to Download New Cursors
Are you unhappy with the available options on your computer? As we’ve already mentioned, you can use a third-party app or an extension to download new, exciting cursors and install them on your computer.
Whatever library you choose to download from, these cursors will usually come in theme packs. There may also be a scheme available. Both of these methods are quite simple.
If you download a theme pack, it will automatically apply after downloading the file and double-clicking on it. This is because these packs usually contain an installer file, making them easy to use.
If you download a scheme, it may require a few more clicks. After completing the download, you should open the folder and locate the .inf file. When you find it, right-click on it and wait for a drop-down menu to appear. From there, choose Install. Then, follow the steps we’ve described in the Windows 10 section.
When you open Pointers, you’ll see the newly downloaded pack in the drop-down menu under Scheme.
If you’re unsure which cursor libraries to visit, we recommend Open Cursor Library or Cursors 4 U, where you can find all kinds of cursor sets. Also, if you use Chrome, you can install the Custom Cursor extension to discover new themes.
Frequently Asked Questions
Cursor customization is one small thing that can make work a little more fun. If you still have questions, keep reading.
Can I make my own cursors?
Absolutely! There are websites and third-party services that let you create your own cursors. The only problem you may run into is uploading and using those cursors. For example, Mac users will need to choose from the options available because there isn’t an option to upload a customized cursor.
Enjoying New Cursors
Whatever computer you have, you can quickly change the cursor size or contrast to make it easier to spot on the screen.
And if you want more than that, no problem. There’s no need to stick to the same old cursors if you would like something trendier or more suited to your personality. You can pick almost any theme you want as there are cursor libraries with all kinds of cursor packs: cartoons, seasons, celebrities, sports, food, and more.
Are you setting up a computer for your child? We’re sure they’ll love Frozen or Toy Story. Would you like a classy-looking cursor to match your professional Mac background? You’ll find something suitable in these libraries.
Have you already tried changing your cursor settings? Do you have any exciting ideas to share? Tell us about them in the comments section below.


