In this guide we will learn to Update Dell BIOS on Any Dell Laptop but first we will know about BIOS. Basic Input Output System (BIOS) refers to a program coded into a chip on the motherboard or system board, which gets the computer started. It enables the Operating System to communicate with the device’s hardware and controls other functions of the computer.
The BIOS of a computer can be updated if needed, and updates are released from time to time. However, reasons for updating BIOS don’t occur regularly; hence the need rarely arises. Any error during the update process can harm the system; hence it must be undertaken carefully and only when necessary.
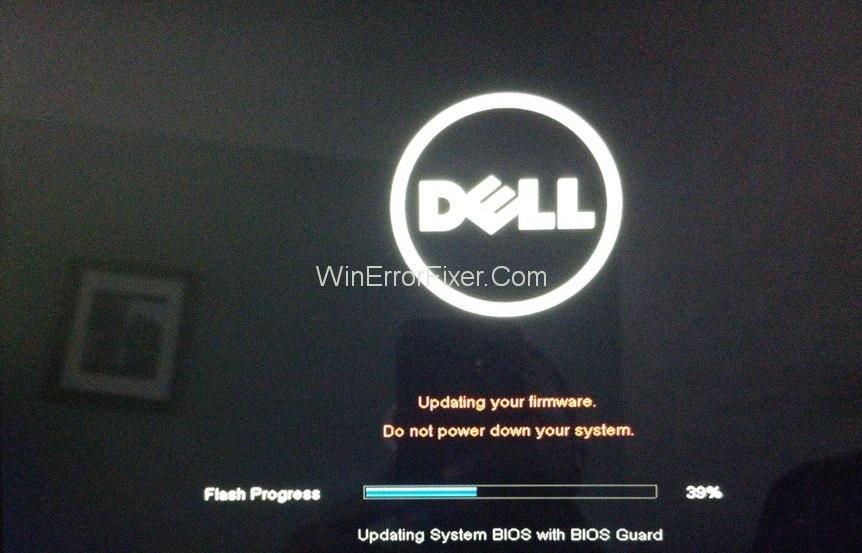
Reasons for updating BIOS include compatibility problem between system software and any hardware, or security issues. In case the need arises, there are ways to update BIOS, which have been simplified and discussed in this article.
Contents
How to Update Dell BIOS
The following are the methods to update BIOS on Dell computers.
Solution 1: Using Windows Operating System
The process starts with identifying the version of BIOS being used to run the system. Follow the steps below.
Step 1: Press Windows key + R to open the Run dialogue box.
Step 2: In it, type “msinfo32” and press Enter to open the System Information window
Step 3: In the System Information window, locate the BIOS version/date. Note the number next to the company name in this category.
Step 4: Next, find the Service Code of the device. It is usually mentioned in the top or bottom of the PC or laptop. If not, it can be obtained through Command Prompt (open it by typing “cmd” in the Run dialogue box or windows search and pressing Enter). Input the following command and press Enter:
wmic bios get serialnumber
The serial number displayed on running the command is the service code. Note it down.
Step 5: Now open the link, which is the drivers and downloads section
Step 6: On the site, you will find a box under the heading “Enter a Dell Service Tag.” In it, type the Service Code you just obtained, and click the Submit button. Your system model will then appear in the Product Support section. Read our guide to Find Your Dell Service Tag.
Step 7: On the same page, under the heading “Optimize your system with drivers and updates,” chose the “Find it Myself” option.
Step 8: Ensure that next to “View all available updates for,” your Windows OS is mentioned correctly. If you don’t find it, click on the Change OS option and chose your OS name.
Step 9: Now, for accurate search results, select “BIOS” under “Category” from the Refine Your Results section.
Step 10: A list of results will appear. Chose the BIOS file available for download from the list. Look at its details – the version and date. Now tally them with the version and date of your existing BIOS. You will find it in step 3.
If the BIOS update file’s version number is of higher than your existing BIOS, and its date exceeds your existing BIOS, you need an update. Hence, click on Download File.
however, If both the version number and date of the updated file and existing file are the same, it means your BIOS is updated.
Step 11: Open the file after downloading and follow the instructions for the complete installation. Click OK or Yes for the confirmation pop-ups. Do not shut down your computer during the update.
Solution 2: A Bootable Flash drive
In case the system is not booting due to some problem, the BIOS update can be done through a USB flash drive. To create a bootable flash drive and upload the BIOS update file on it from Dell’s website, you need access to another computer that is functional. Follow the steps below.
Step 1: First, you have to know your BIOS version. Since the system is not starting, it has to be known in a way different from Solution 1. Turn on the power to the computer and keep pressing the F2 key until the BIOS setup appears on the screen. The BIOS version will be mentioned next to BIOS Revision. Note it down.
Step 2: On the other computer, open the link. In it, enter the Service Code of the computer facing the issue, if you can find it written on the device. If not, select Browse All Products, then “View Products,” and select your device’s model.
Step 3: Following steps 7 to 10 of the previous solution, find the BIOS update file on the site. Check if it’s a newer version by comparing its value to that of your current BIOS version. If yes, download it.
Step 4: Now connect the flash drive to the computer. If it has any important data, back-up the data, as it will be deleted while making the drive bootable.
Step 5: There are various programs to make a flash drive bootable. A reliable program is Rufus. Download it from its website.
Step 6: Open the program. In the Device category, select your flash drive. In the File System category, select FAT32. Next to the option “Create a bootable disk using,” select FreeDOS. Finally, click Start. After the completion of the process, click Close.
Step 7: Now, you have created a bootable flash drive, copy the downloaded BIOS update file to it. Note down the exact file name. Make sure that no other file is there in the drive.
Step 8: Connect the bootable flash drive to the computer whose BIOS needs to be updated.
Step 9: Switch on the computer, and press F12 repeatedly until the Boot Menu appears.
Step 10: In the Boot Menu, use arrow keys to navigate to the flash drive in the options. Then press Enter to select it.
Step 11: A Command Prompt window will open. In it, first type C: and press Enter.
Then type “dir,” followed by the exact filename of the BIOS update file on the flash drive. Then press Enter.
Step 12: Once the BIOS Update Utility opens, follow the displayed instructions carefully. Make sure power is on during the entire process. Also, you have charged the battery sufficiently (connect the charging cable to avoid power off due to low charge).
Read Next:
Conclusion
Thus, the methods to update BIOS on a Dell computer have been discussed. The process is more or less similar to any other brand. You should update the BIOS only when necessary, as it is a complex process.
