Move the software from drive C to another location without reinstalling
SymMover is a tool designed to help users move data from C drive to another location without reinstalling.
The application migration, software installed on the computer from one location to another location is absolutely normal in the course of using the computer. However, with the applications installed, you cannot move them without removing them and after going to a new location, you will need to reinstall again, very laborious and time consuming. This is when you need Steam Mover .
Steam Mover is an extremely useful tool, helping to move installed applications and software from one location to another, even from one drive partition to another without removing and installing. set again. This is a method that can save us a lot of time and unnecessary operations.
In particular, if anyone has been, using Windows 10, it will see the need of Steam Mover. Because Windows 10 forces users to choose the installation location of applications, software right from the first step. This is really disadvantageous if you want to change the location of these applications during use.
Because Steam Mover will be more useful for users of Windows 10 operating system, the images in this article will be guided on this operating system. Moreover, this software only supports the NTFS standard, so before you start, check the location of the application you want to move and the location to move to see if it is in the correct format?
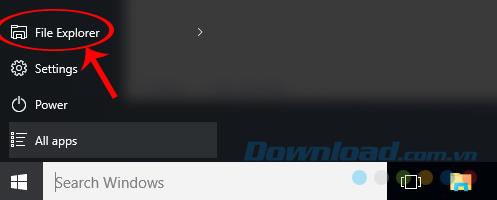
Step 1: Check the format of the two partitions on Windows 10. From the main interface, click the Windows icon in the lower left corner of the screen, select File Explorer.
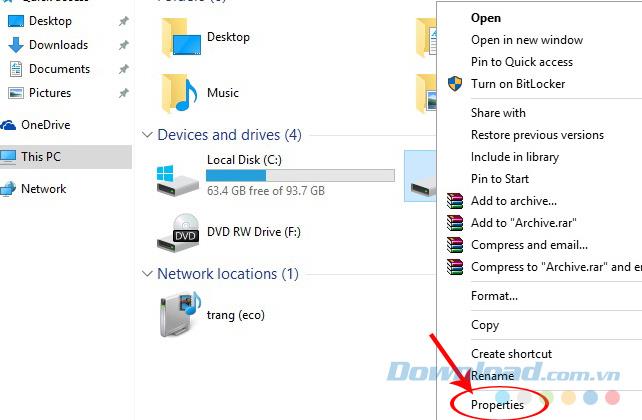
Step 2: Right-clicking on the drive will move the application and the drive will bring data to, select Properties .
Window as below appears, you check in the File system section to see if it is standard NTFS or not?
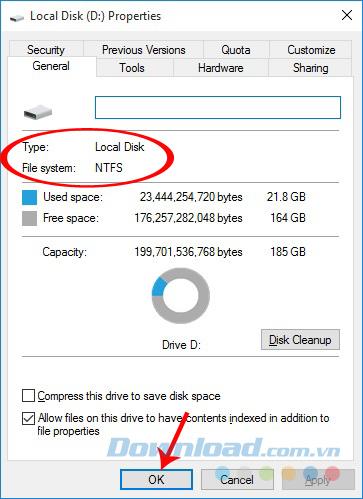
Identify as NTFS standard, then OK to close.
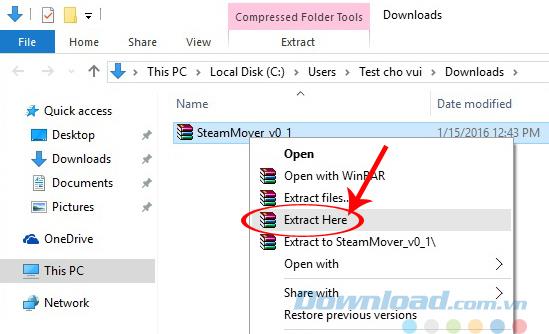
Step 3: After the test is complete, you proceed to download the installer of Steam Mover and extract it.
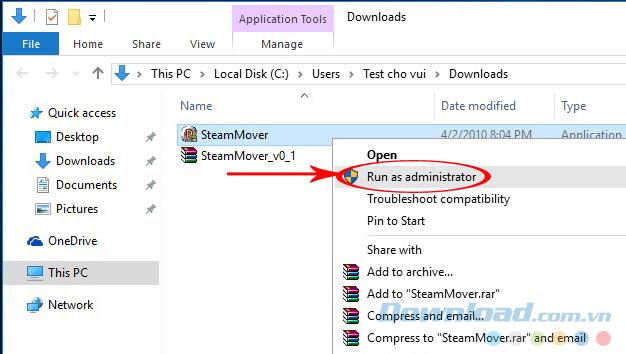
Step 4: Continue to run under admin rights SteamMover file by clicking the right mouse click it and select Run as administrator.
Step 5: The main interface of Steam Mover appears. The beginning will be a blank white frame. You observe:
Click the dot icon next to Refresh to select a location.
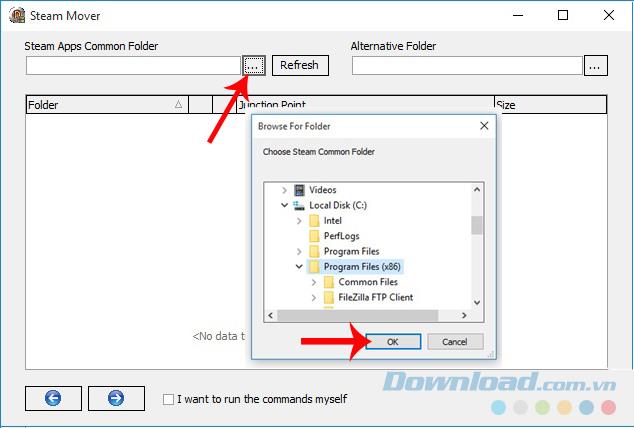
Select the location of the applications, the software needs to be moved, and then OK
Step 6: Continue to select the three dots on the opposite side to determine the new location for the application.
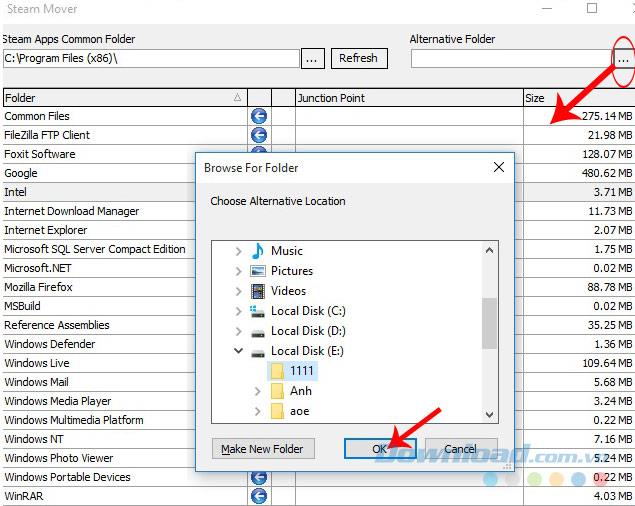
Choose a location to move the application to and then OK
Step 7: The interface will now display all the applications and software that have been installed in the folder of your choice. To move an item, just do the following:
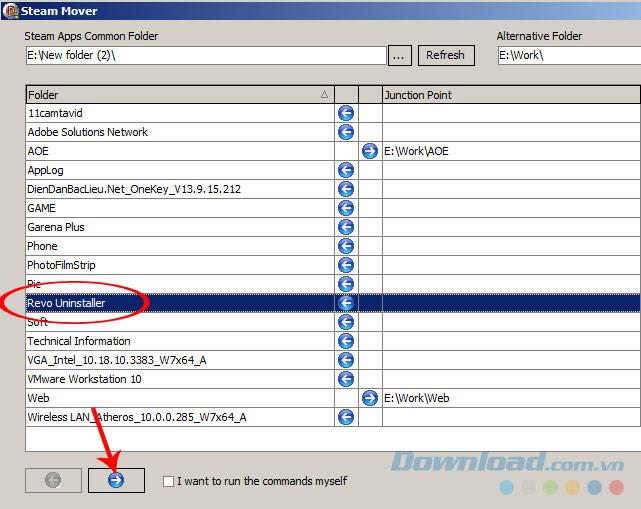
For example:
Download.com.vn will move Revo Uninstaller to the new partition. Click on Revo / green arrow.
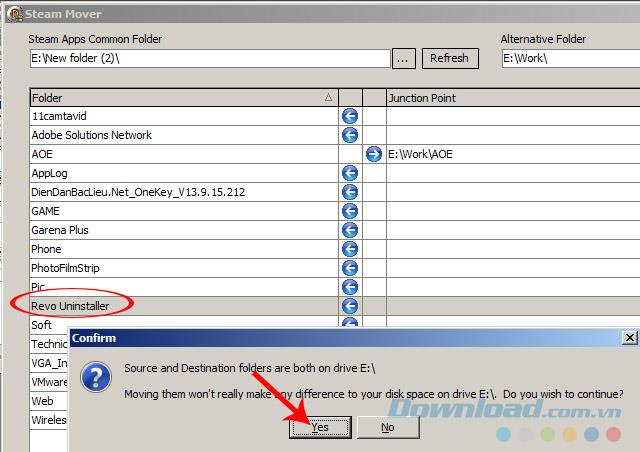
Click Yes at the message appears.
We will then get the result as shown below. Revo Uninstall has been moved to a new location.
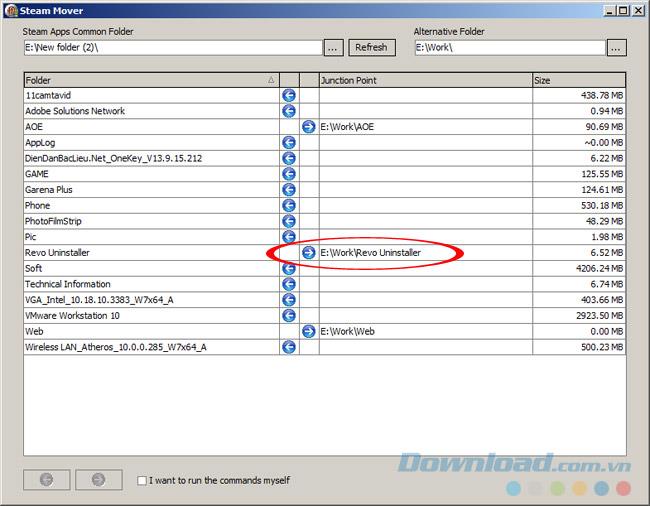
Step 8: To move these applications back to their original locations, just click on them, then click the green arrow (pointing to the left) and wait for the migration to be done automatically.
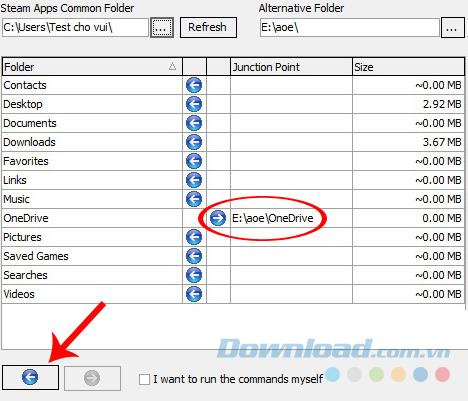
Can move any application or software without capacity limit.
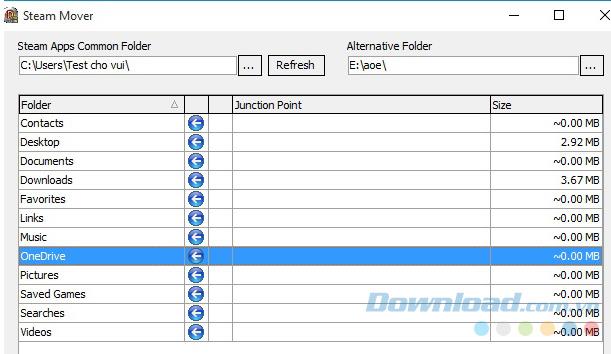
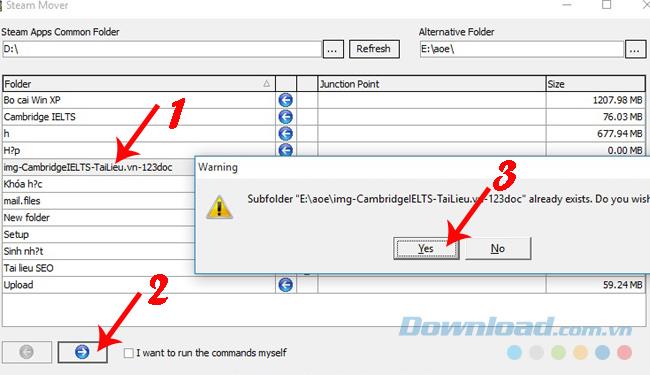
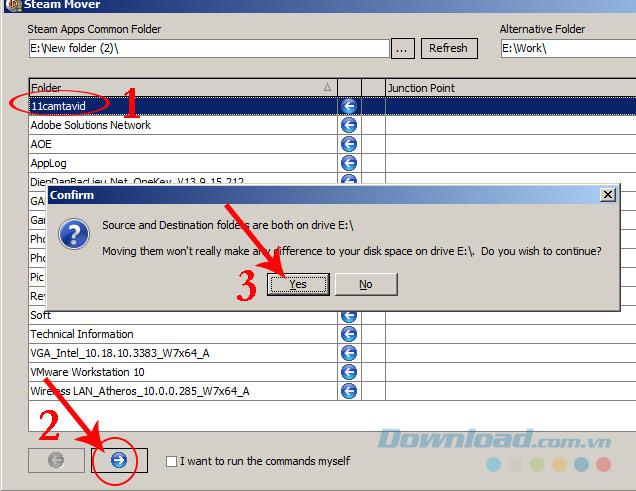
And here is the image Download.com.vn done on Windows 7 operating system. The operation of checking the partition, selecting the moving and arriving partitions and the application migration are completely the same.
We also click the three dots on the sides to determine the location of departure and arrival. Then select the application to move, select the green arrow icon below, Yes to agree and wait a bit.
And ... success!
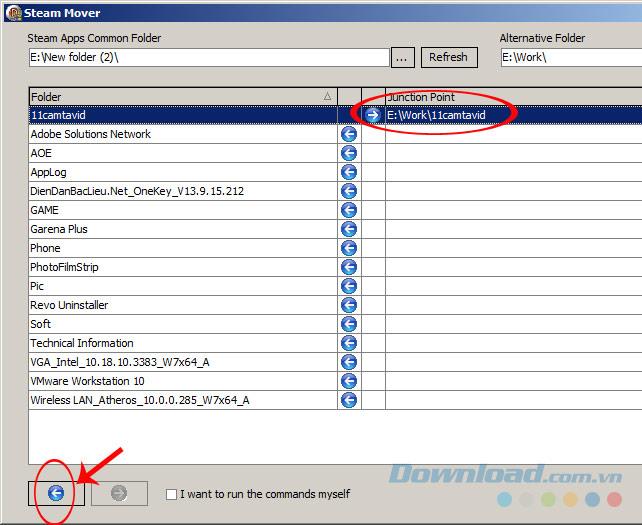
To bring the application, the software has just moved back to the old position, we are similar:
Attention:
The above article has just guided you how to move houses for installed applications and software to a new location without reinstalling. This way, we will save a lot of time and ensure that the computer capacity is not full after each new download and installation.
Wishing you and your family a happy new year!
Step-by-step guide on how to create a green tick for Facebook. Learn how to verify your account and gain credibility with the green verification mark.
Learn how to download torrent files directly using the Firefox web browser with the Torrent Tornado add-on. Simple steps for effective torrent downloading.
Learn how to view someone else’s TikTok followers, both on public and private accounts. Discover effective methods to access follower counts and improve your TikTok strategy.
Learn how to login to Facebook using your email, phone number, or even QR Code authentication without entering a password.
Learn how to stop echo during your Parsec streaming sessions with effective solutions. Echo is a common issue that disrupts communication in games, and we provide proven methods to eliminate it.
Discover how to change your avatar and cover photo on Zalo to express your personality. Follow our easy guide and optimize your Zalo profile image.
Learn how to manage your relationships on Zalo by marking close friends, similar to Instagram. This feature allows easy access to frequently contacted individuals.
Learn how to send screenshots via Viber quickly and without saving them. This guide provides step-by-step instructions to enhance your messaging experience.
Learn how to easily restore deleted messages on Zalo with our step-by-step instructions. Quickly recover your important chats on this popular messaging app.
Discover how to easily add background music to your personal Zalo page with our comprehensive guide on using Zalo for Android and iOS devices.
If you’ve ever found yourself at the end of a Minecraft raid, searching for the last raider to eliminate, you’re not alone. Many players have faced this challenge.
Learn how to uninstall Coc Coc browser completely from your computer, ensuring all data is removed. Follow these simple steps for an effective uninstallation.
Discover how to effectively use the Toshiba AW-A800SV washing machine control panel with our detailed guide!
Discover how to effectively use emergency features on Samsung Galaxy Watch and other smartwatches, including SOS alerts, fall detection, and health records.
Discover how to effectively <strong>share QR code on Zalo</strong>. QR codes enhance connectivity, enabling easy friend requests and more on Zalo.


