Instructions for creating green ticks for Facebook

Step-by-step guide on how to create a green tick for Facebook. Learn how to verify your account and gain credibility with the green verification mark.
Can't find the font you want to use for your document in Microsoft Word ? Don't worry, you can install new fonts for Word by following the steps below.

How to add new fonts to Microsoft Word
If you share a document using a new font with someone, the recipient needs to install that font on their computer. If the required font is missing, the text in the shared Word document will be corrupted.
Therefore, when sharing documents in Microsoft Word, you should include the new font installation file.
For those who don't know, Word uses built-in fonts on the computer. It does not have its own font and depends on the system font. So, if you download and add a new font on your computer, you can use it with Word.
If you already have your favorite font, you can install and use it right away. On the contrary, if you don't have it yet, you need to download it first.
Follow these steps to learn how to download and install fonts on your Windows computer :
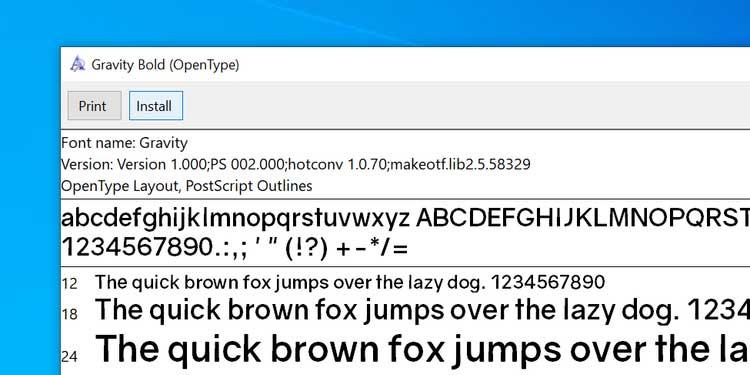
After installing the font on your computer, you can start using it right away in Word documents. As mentioned from the beginning, PC download fonts are always integrated into this famous text editing software and how to use it is as follows:
1. Open the document in Microsoft Word.
2. Click the Home tab at the top.
3. Click the arrow icon next to the current font to see the list of available fonts.
4. You need to find the newly installed font in the list. If you don't see it, enter the font name in the box and Word will narrow the list for you.
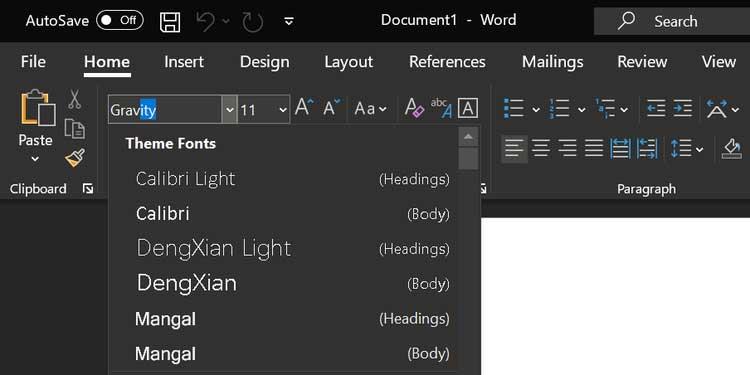
5. After choosing the font, you can start typing in this font style in the document.
6. If you want to use a new font for existing text, simply select that text with the mouse, then select the newly added font from the Fonts menu at the top. It's done.
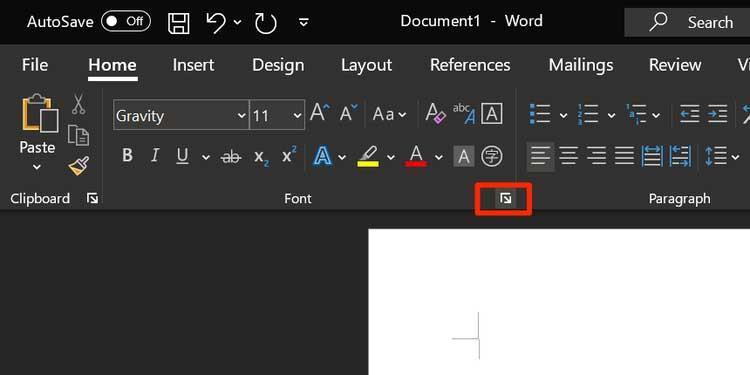
1. When in Word's editing screen, click the arrow icon in the Font section to see more options for the installed font.
2. A box will open, containing all the fonts listed inside. Select the new font from the drop-down menu - Font, click an option from Font style , set the size - Size for the font and click Set As Default below.
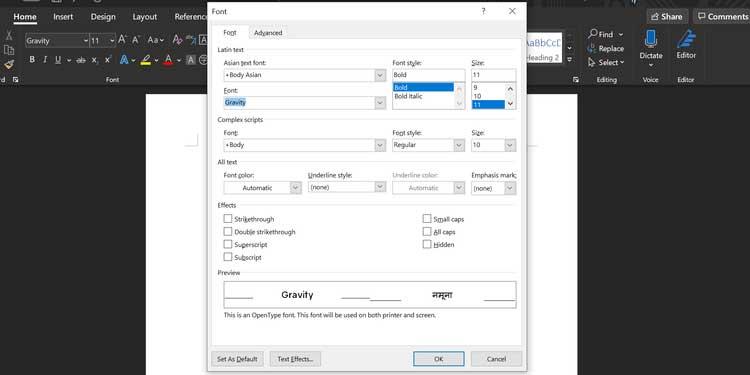
3. Word will ask if you want to make that font the default choice for the current document or the entire document. Click the second option: All documents based on the Normal.dotm template and click OK .

Here, whenever you create a new document in Word, the software will use the downloaded font as the default font for the document file.
Remember that deleting a font from Word means it will be removed from your computer. You can't keep using it on every app.
1. Press the Win key and click the configuration icon to open Settings .
2. Find and click on the Personalization option .
3. Select Fonts from the options on the left sidebar.
4. All installed fonts will appear in the right panel. Click the font you want to delete in this list.

5. A new screen showing font information will appear. Here, click the Uninstall button to delete the selected font from your computer.
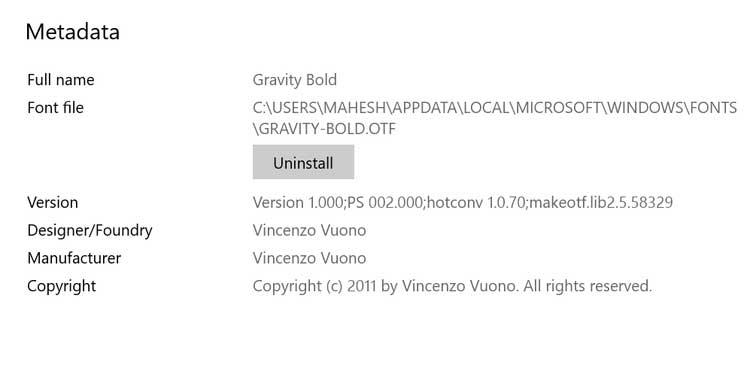
6. Click Uninstall again to delete that font from the system.
It's done.
Note: You cannot add new fonts to Word online.
Step-by-step guide on how to create a green tick for Facebook. Learn how to verify your account and gain credibility with the green verification mark.
Learn how to download torrent files directly using the Firefox web browser with the Torrent Tornado add-on. Simple steps for effective torrent downloading.
Learn how to view someone else’s TikTok followers, both on public and private accounts. Discover effective methods to access follower counts and improve your TikTok strategy.
Learn how to login to Facebook using your email, phone number, or even QR Code authentication without entering a password.
Learn how to stop echo during your Parsec streaming sessions with effective solutions. Echo is a common issue that disrupts communication in games, and we provide proven methods to eliminate it.
Discover how to change your avatar and cover photo on Zalo to express your personality. Follow our easy guide and optimize your Zalo profile image.
Learn how to manage your relationships on Zalo by marking close friends, similar to Instagram. This feature allows easy access to frequently contacted individuals.
Learn how to send screenshots via Viber quickly and without saving them. This guide provides step-by-step instructions to enhance your messaging experience.
Learn how to easily restore deleted messages on Zalo with our step-by-step instructions. Quickly recover your important chats on this popular messaging app.
Discover how to easily add background music to your personal Zalo page with our comprehensive guide on using Zalo for Android and iOS devices.
If you’ve ever found yourself at the end of a Minecraft raid, searching for the last raider to eliminate, you’re not alone. Many players have faced this challenge.
Learn how to uninstall Coc Coc browser completely from your computer, ensuring all data is removed. Follow these simple steps for an effective uninstallation.
Discover how to effectively use the Toshiba AW-A800SV washing machine control panel with our detailed guide!
Discover how to effectively use emergency features on Samsung Galaxy Watch and other smartwatches, including SOS alerts, fall detection, and health records.
Discover how to effectively <strong>share QR code on Zalo</strong>. QR codes enhance connectivity, enabling easy friend requests and more on Zalo.


