Do you have a bunch of data in an Excel document or Google spreadsheet, and you want to share it publicly by posting it on your website? Now you no longer have to create a static HTML table.
Download Google Docs, Google Sheets and Google Slides
In fact, Google allows you to embed a table into a web page that will be updated when the Google Docs, Sheets, Slides or Forms file is updated. The way to do that is to create something called spreadsheets directly. The following article will show you how to publish and embed Google Docs, Sheets & Slides files in web pages. Let's find out how to do it!
1. Publish the file
To publish a file, do the following:
- Open a file in Google Docs, Sheets or Slides.
- Click File> Publish to the web (File> Publish to web) located in the upper left corner of the file window.
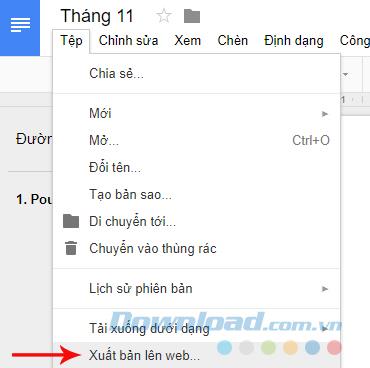
- The entire file will be published, but some file types have multiple publishing options:
- Spreadsheets: Publish entire spreadsheets or individual pages. You can also choose a publishing format (webpage, .csv, .tsv, .pdf, .xlsx, .ods).
- Slide: Select the speed at which slides are displayed.
- Click Publish .
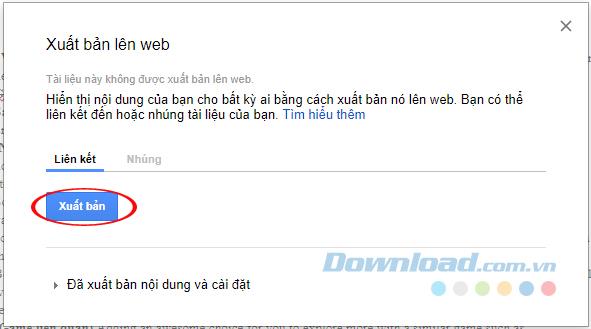
- Copy the URL and send it to the person you want to share the file with.
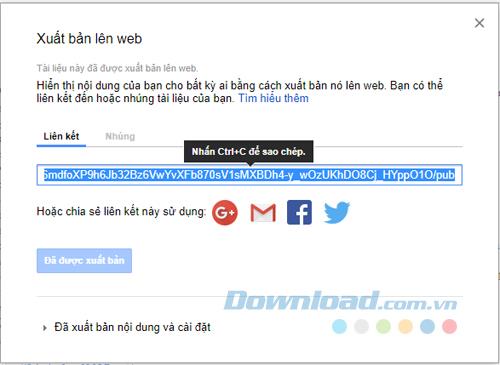
The published file will be updated automatically when any changes are made to the original file.
1.1. Stop publishing files
To stop publishing a file, open it in Google Docs, Sheets or Slides. Then click File> Public to the web (File> Publish to web). Next, you click on Published content & settings> Stop publishing .
1.2. What will the published file look like?
If you send the URL of a published file to someone, they will see that the version they can't edit is different from yours. This is what others will see:
- Document: A version without a toolbar.
- Spreadsheet: A version without toolbars. Everyone with "view" permissions can see the chart, the table format, and the value of the cell, but cannot view or edit the formula.
- Slide: A view-only version or a version in presentation mode with slides displayed full screen.
1.3. Control who can view the file
- If you own a file and want others to publish it, give that person permission to edit it.
- To prevent others from publishing files, change your sharing settings:
- Open a file in Google Docs, Sheets or Slides.
- At the top right you click on Share (Share).
- In the sharing dialog, click Advanced in the lower right corner.
- Then, click on the box next to Prevent editors from changing access and adding new people .
- Finally, click Done .

2. Embed the file
You can make a document, spreadsheet, slide or form appear on a web page by embedding it on your page or blog.
2.1. Embed documents, spreadsheets or presentations
- Open a file in Google Docs, Sheets or Slides.
- At the top left of the window, click File> Publish to the web (File> Publish to website).
- In the window that appears, select Embed .

- The entire file will be published, but some file types have multiple publishing options:
- Spreadsheet: Choose to publish an entire workbook or sheet individually.
- Slide: Choose the size of the presentation and the speed at which slides are displayed.
- Click Publish .
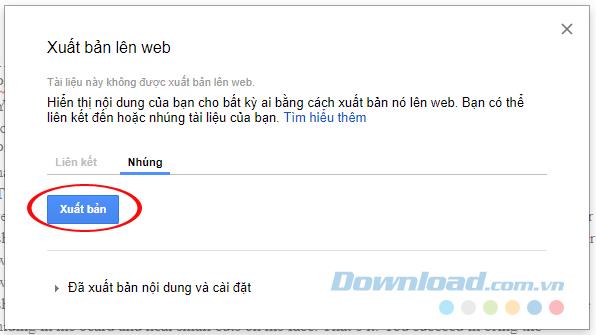
- Copy the code in the text box and paste it into your website or blog.
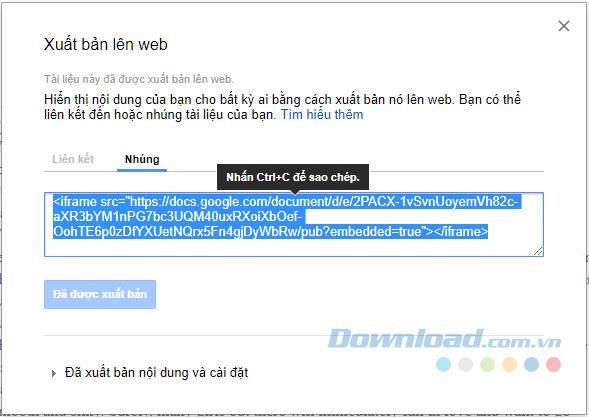
2.2. Embed spreadsheet
If you are embedding a workbook, change or add the parameters below to show or hide parts of a worksheet:
- gid = 1674242611 - ID of the spreadsheet.
- range = A1: B14 - Range you want to display.
- widget = false - If false, no sheet tabs are displayed at the bottom of the worksheet.
- headers = false - Number of row and column letters not displayed.
- chrome = false - Headers and footers are not displayed.
2.3 Embed a form
To embed a form, do the following:
- Open a file in Google Forms.
- In the upper right corner, click Send .

- At the top of the window, click Embed .
- To copy the newly appeared HTML, click Copy or press Ctrl + C on Windows or Cmd + C on Mac.
- Paste HTML into your website or blog.
2.4. Embed a file into Google Sites
To share published Google Docs, Sheets and Slides on a new Google Sites page , do the following:
- Open a page in Google Sites.
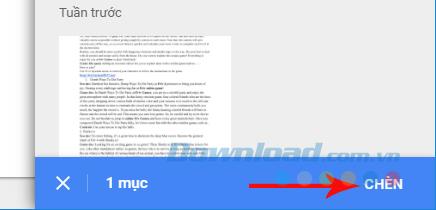
- From the menu on the right, click INSERT .

- Under Google Docs, choose:
- Docs
- Slides
- Sheets
- Forms
- Charts
- To add your selection to the page, select a file and click Insert .
You do not need to have a Google account to view the original file of the data. Anyone on the site can access Google spreadsheets in "view only" mode and download files in a variety of formats, but they will not have the right to replace the original spreadsheet. Above is an article to teach you how to publish and embed Google Docs, Sheets, Slides and Forms into a web page. How to do it is easy, right?


