Instructions for setting up and setting up email on an eM Client

How to link your email account with eM Client, with this software you can control everything on your email
You use multiple email addresses for different information and tasks, and when you open each of these different email services, it will take a lot of time. And when you want to switch from one service to another is a bit inconvenient.
At this time, you should use eM Client software , this software will help you to declare many emails together on one window, all tasks and information will be displayed fully on every email to be declared to you use. Currently, eM Client supports most popular services like Gmail , Exchange, iCloud and Outlook.com , even companies' own email addresses.
Below Download.com.vn will guide you how to declare email on eM Client software , including the addresses of the most popular email services. If no email in eM Client yet, please refer to the article How to set up and set up email on eM Client.
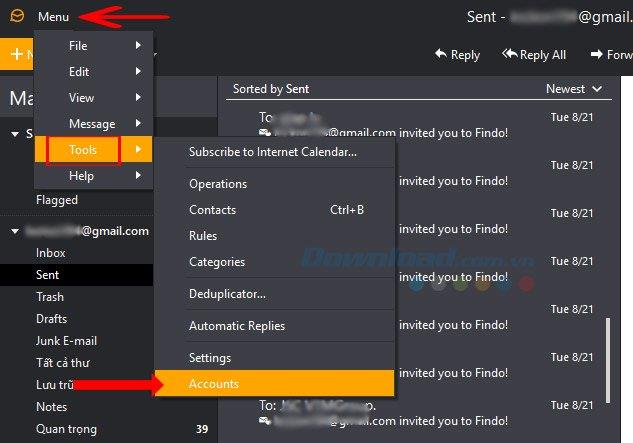
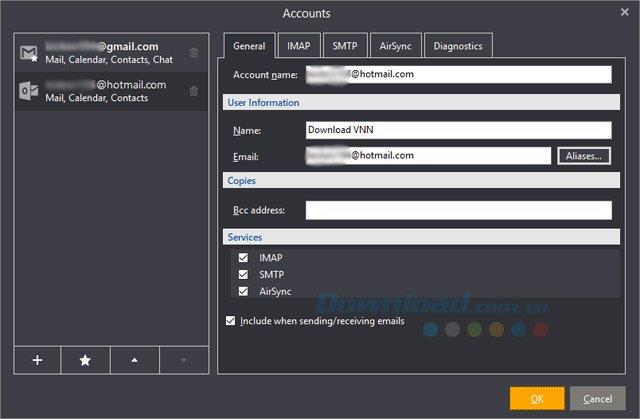
Step 1: In the main interface of eM Client, select Menu> Tools> select Accounts.
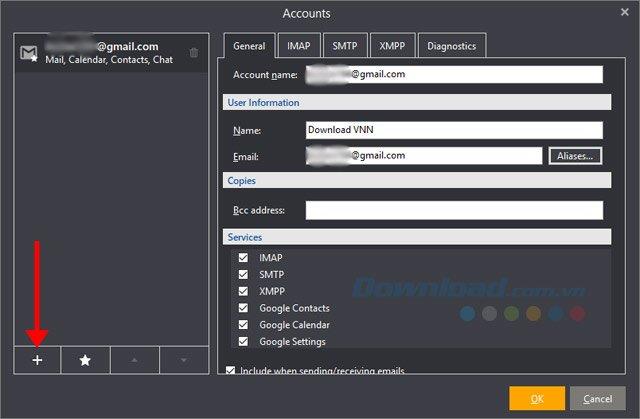
In the Account table , click the plus button below the list of email accounts declared in eM Client.
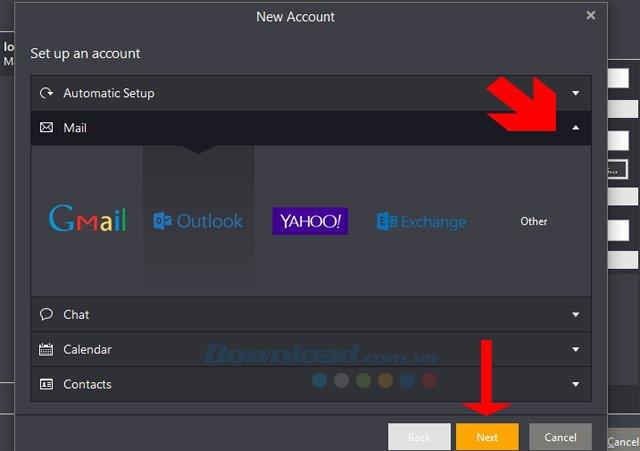
Step 2: Click on Mail , then select a type of email available to declare, including Yahoo , Outlook, Exchange and Gmail. Choose you then click Next.
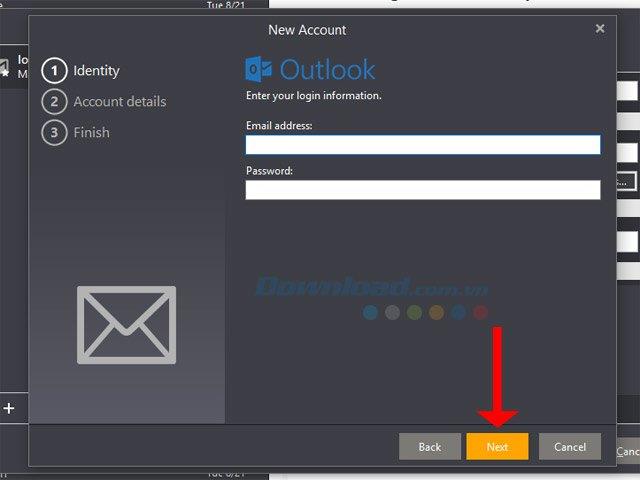
Here is to declare email with Outlook, you only need to enter the email address and password of Outlook and then click Next.
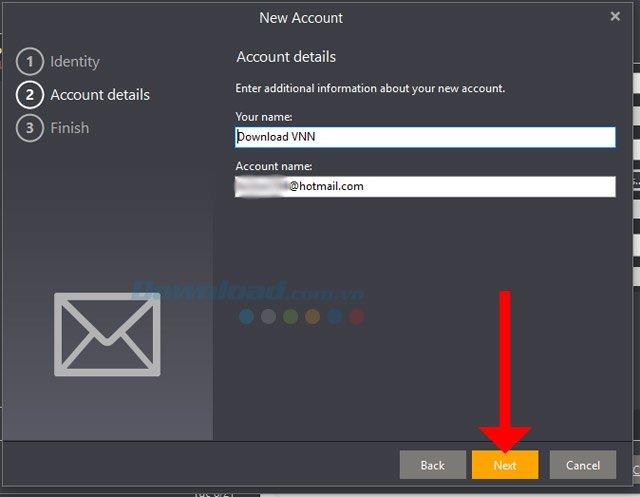
Click Next to continue, if the Your Name section does not contain anything, enter the name displayed on it.
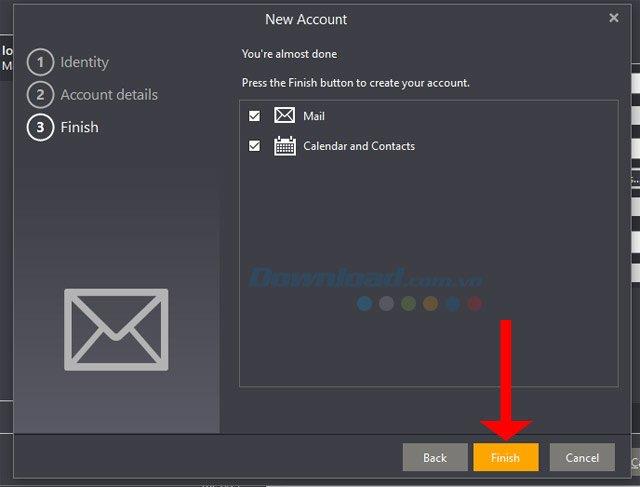
Then click Finish to create a new email account declaration.
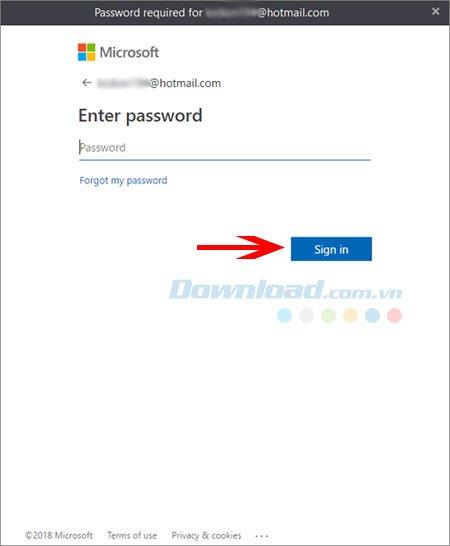
Step 3: Next is to log into your mail account into the notification window of the mail. Enter the password and click Sign in.
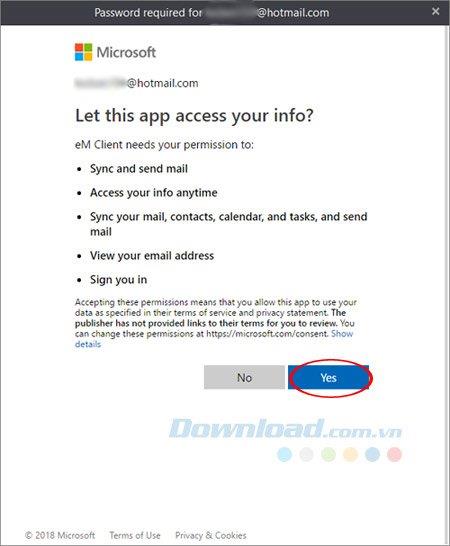
Click Yes to accept eM Client access to your email information.
Next, the email list that is declared will show you the email you added.
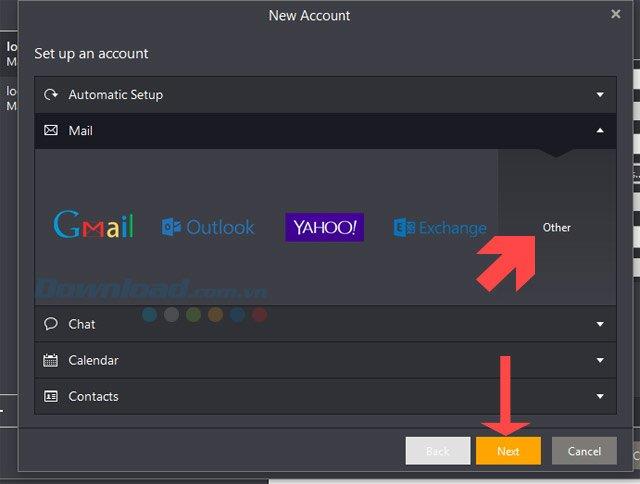
Step 1: Just like adding regular email to the eM Client, the only difference is that you click Other to add another type of email, then click Next.
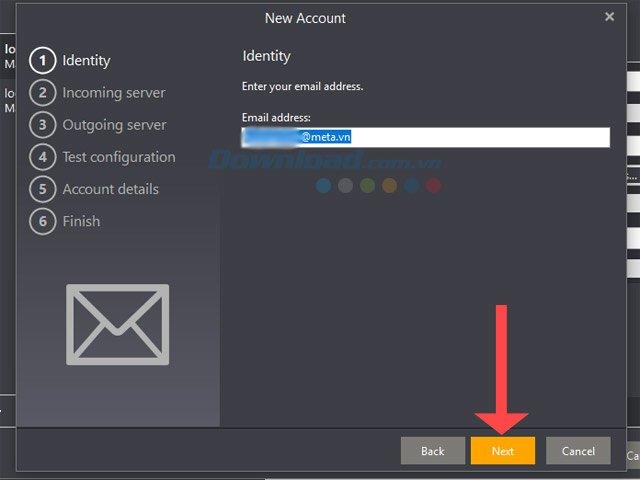
In the Identity section , enter your email name and domain name, then click Next.
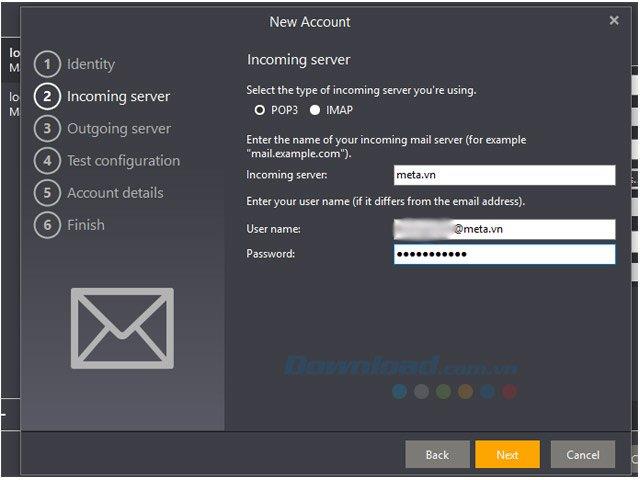
Next in the Incoming server table , enter the website domain name with the letter mail. For example, here is mail.meta.vn in the Incoming Server: box , the lower part is your email address with the password. Finished click Next.
And in the POP3 and IMAP options, depending on the needs to use mail you choose.
POP3: This protocol stores the user's email and local memory, meaning you can check your email even when there is no Internet connection. POP advantages:
IMAP : With this protocol, users can manage an inbox, sign in on many different devices such as smartphones, laptops, computers at the company, you will see the email list with the same structure and how sorting because they are done on the server, all changes are synchronized to the server. Some advantages of IMAP include:
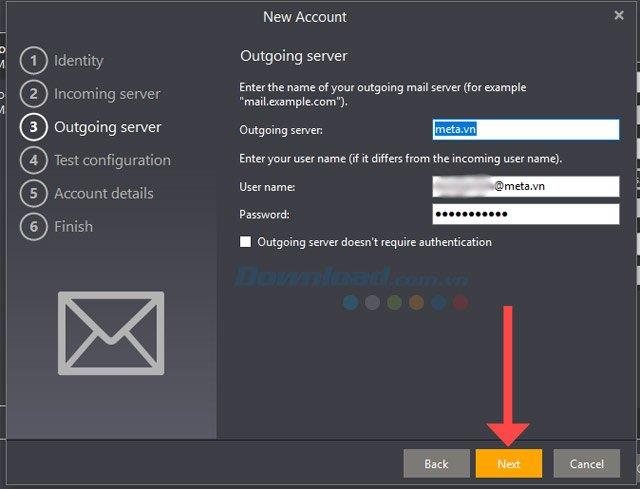
In the Outgoing Server part is still your mail and domain name, for example here is mail.meta.vn then click Next to continue.
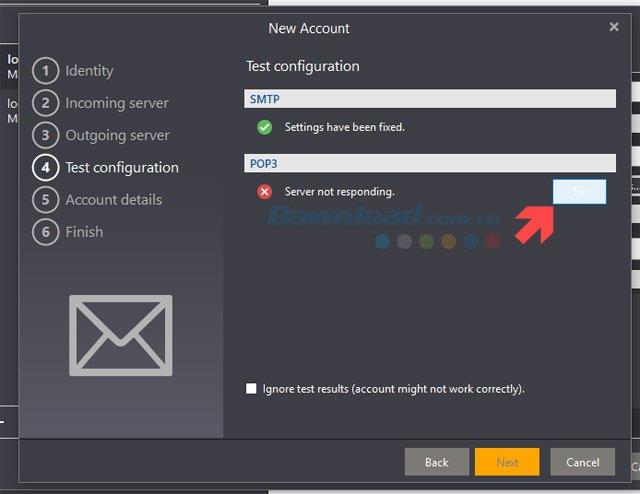
In the Test Configuration section , click on the FIX button if a problem occurs.
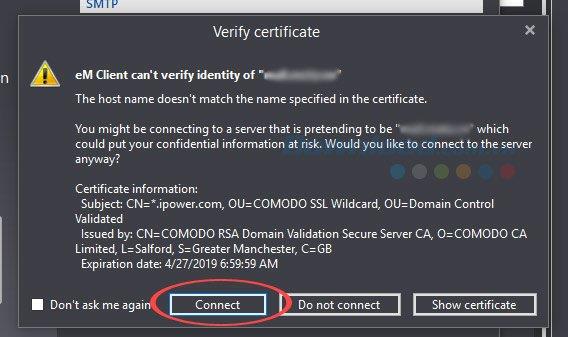
If the Verify certificate table appears, click Connect.
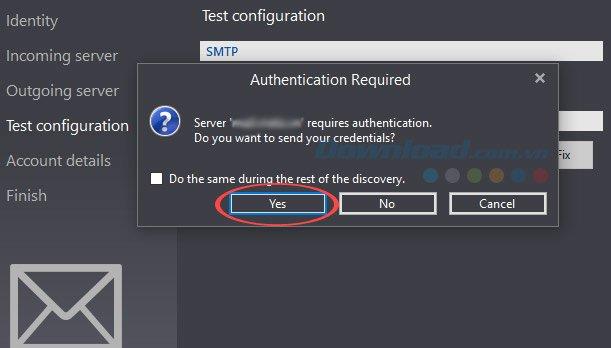
Next, click Yes to complete the error correction.
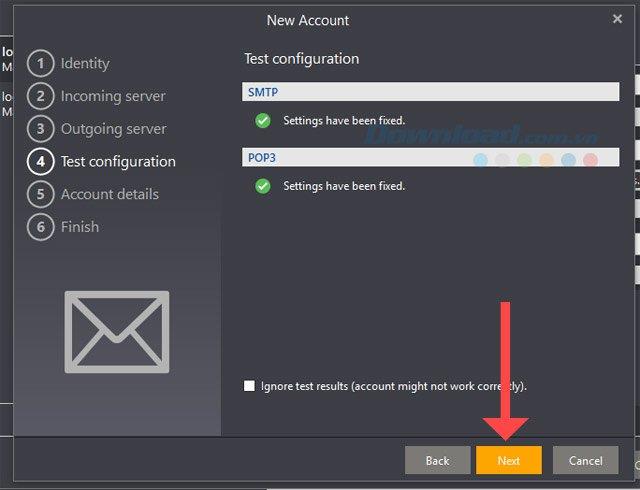
When you see two entries SMTP and POP3 show a green icon below, click Next.
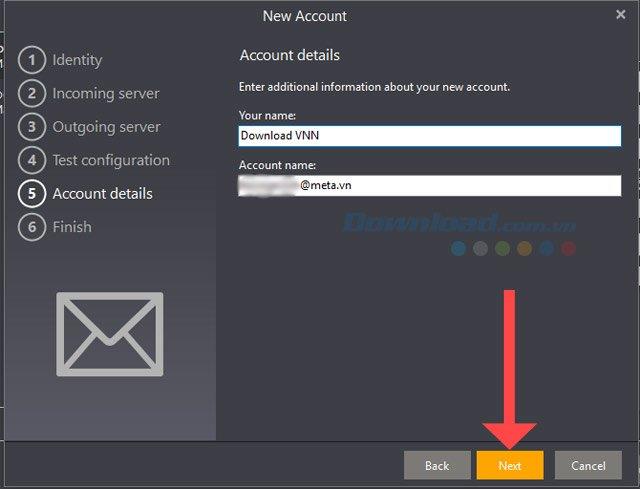
Click Next in the Account details section to continue.
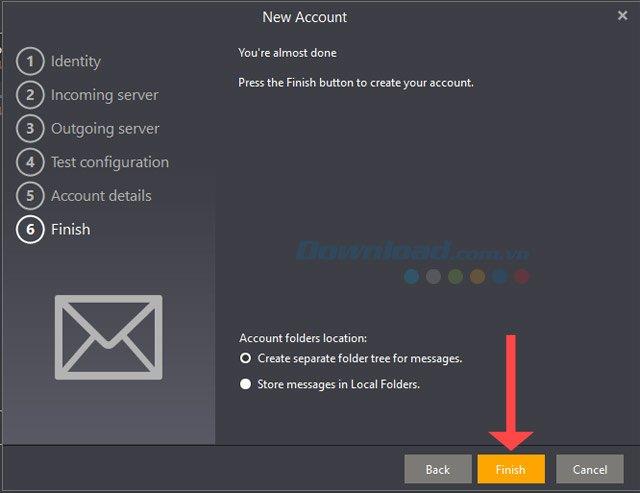
Finally, click Finish to complete the process of declaring company email into eM Client.
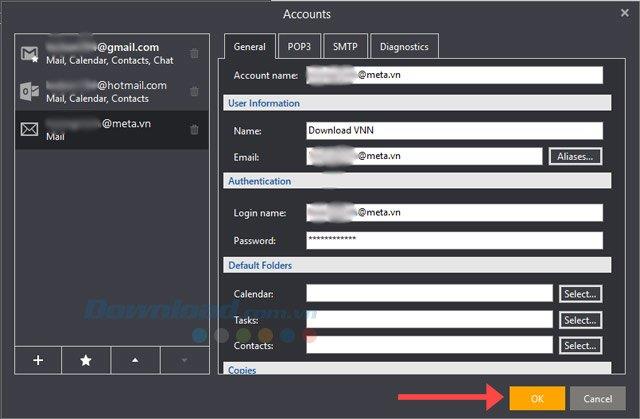
Finally your email list will have your company email address. Click OK to finish.
Then in the main interface of eM Client, you just need to wait for the mail to download to view the information.
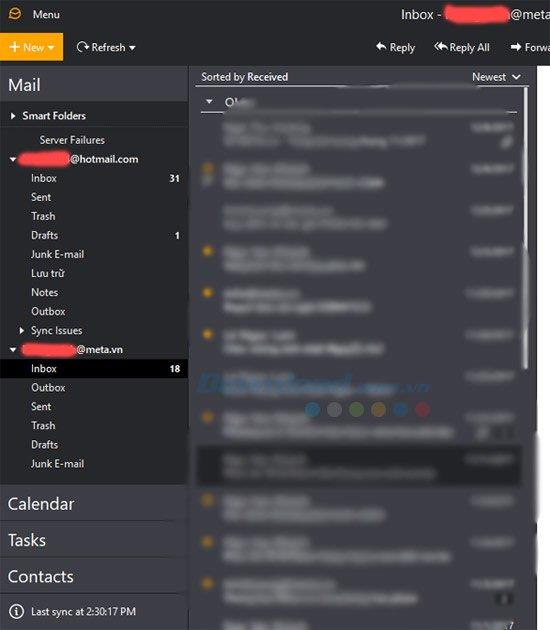
With the declaration of many different emails in the instructions in this article, using email will be much more convenient than having to switch between emails on the webapp or in separate mail software. Just like on a computer, you can also manage your email using email notification applications on your phone. Refer to the article 5 smart email management applications on iPhone.
Step-by-step guide on how to create a green tick for Facebook. Learn how to verify your account and gain credibility with the green verification mark.
Learn how to download torrent files directly using the Firefox web browser with the Torrent Tornado add-on. Simple steps for effective torrent downloading.
Learn how to view someone else’s TikTok followers, both on public and private accounts. Discover effective methods to access follower counts and improve your TikTok strategy.
Learn how to login to Facebook using your email, phone number, or even QR Code authentication without entering a password.
Learn how to stop echo during your Parsec streaming sessions with effective solutions. Echo is a common issue that disrupts communication in games, and we provide proven methods to eliminate it.
Discover how to change your avatar and cover photo on Zalo to express your personality. Follow our easy guide and optimize your Zalo profile image.
Learn how to manage your relationships on Zalo by marking close friends, similar to Instagram. This feature allows easy access to frequently contacted individuals.
Learn how to send screenshots via Viber quickly and without saving them. This guide provides step-by-step instructions to enhance your messaging experience.
Learn how to easily restore deleted messages on Zalo with our step-by-step instructions. Quickly recover your important chats on this popular messaging app.
Discover how to easily add background music to your personal Zalo page with our comprehensive guide on using Zalo for Android and iOS devices.
If you’ve ever found yourself at the end of a Minecraft raid, searching for the last raider to eliminate, you’re not alone. Many players have faced this challenge.
Learn how to uninstall Coc Coc browser completely from your computer, ensuring all data is removed. Follow these simple steps for an effective uninstallation.
Discover how to effectively use the Toshiba AW-A800SV washing machine control panel with our detailed guide!
Discover how to effectively use emergency features on Samsung Galaxy Watch and other smartwatches, including SOS alerts, fall detection, and health records.
Discover how to effectively <strong>share QR code on Zalo</strong>. QR codes enhance connectivity, enabling easy friend requests and more on Zalo.


