How to Make Windows 11 Look Like Windows 10
If you miss the familiar look and feel of Windows 10, you can restore the Start menu, taskbar, and other familiar elements with a few simple tweaks.
For most people, the C drive is the core of the PC, where the operating system is installed and all the important system files are kept. It is also the drive that is most likely to fill up due to endless Windows updates, forgotten downloads, and the fact that by default, everything is saved to the C drive.
Below, Quantrimang will guide you how to clean up drive C, restore some space and then make this drive work well and quickly again.
Table of Contents of the Article
Below, we'll show you a few tricks that can automatically delete various temporary files, but those methods (like Storage Sense and Disk Clean-up) won't completely delete temporary files, and chances are that most of the temporary files that are plaguing your hard drive will remain in the Temp folder for a while longer.
Note :
Make sure you're not running anything while manually deleting temporary files . If you delete temporary files related to an application that's currently running, that application may crash and you may lose anything you were working on at the time.
To find your main temporary files folder, the default folder is “C:\Users\Rob\AppData\Local\Temp” (or you can press Win + R , then type %temp% ).
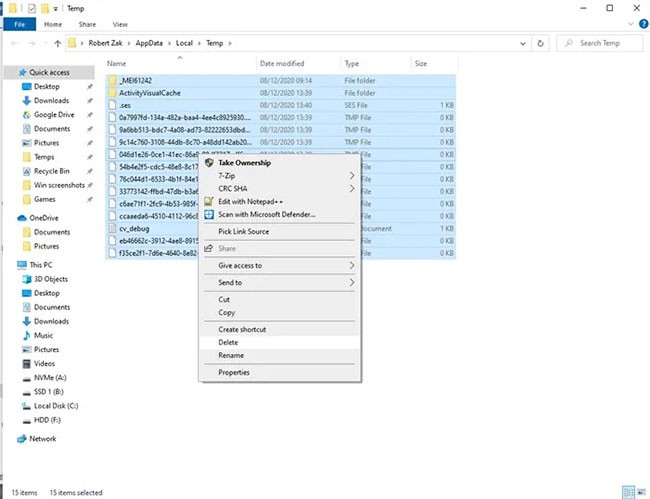
To see how much space your Temp folder is taking up, select everything in it with Ctrl + A , then right-click any file and click Properties. If you want to go ahead and delete it, make sure everything is selected with Ctrl + A , right-click, then click Delete.
Windows 10 has a handy feature called Storage Sense that keeps track of your PC's storage space, then moves to clean things up if you're running low. It does the basics like emptying your Recycle Bin , deleting old files in your Downloads folder , and deleting temporary files on your PC.
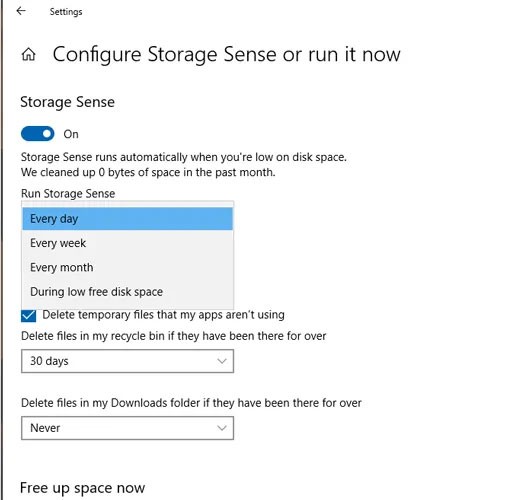
Refer to: How to use Storage sense on Windows 10 to free up disk space for details on how to do it.
Using Windows Explorer, you can scan your entire hard drive for files based on their size.
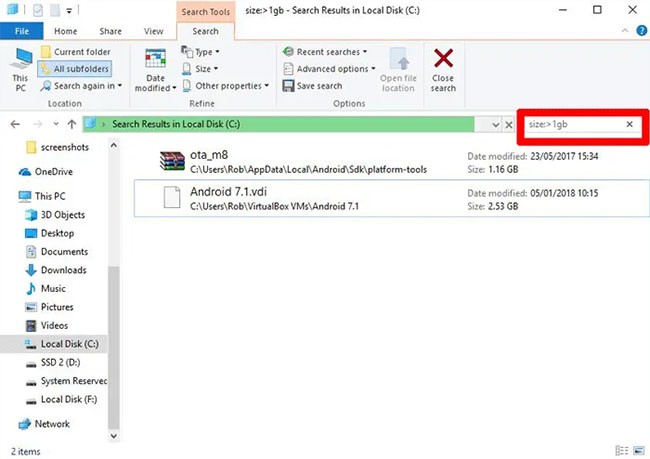
Detailed instructions are in the article: How to find large files on Windows 10 .
In the “Apps & Features” window (you’ll find it by right-clicking on the Start button), you can sort the list by “Size” to see which apps are taking up the most space. You might be surprised by the results, and you might want to delete apps if you see fit. Think about whether you really need all those space-hogging apps, and delete them when appropriate.
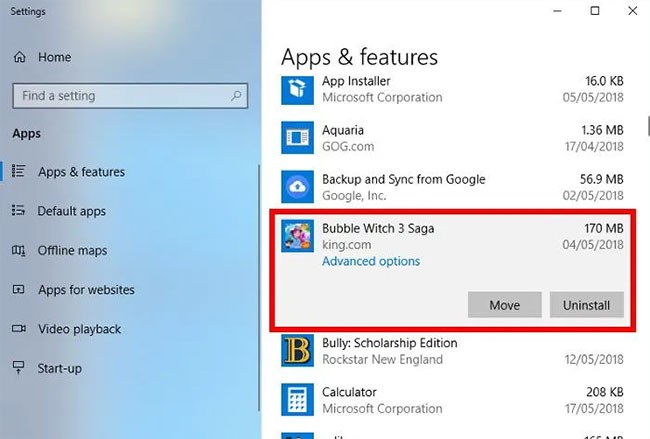
Another thing that might surprise you is that you have games like Bubble Witch 3 Saga and Minecraft, which you never wanted in the first place! However, simply uninstalling them from the “Apps & Features” list is not enough and you need to remove them using Powershell . To do this, read our guide on how to uninstall pre-installed Windows apps .
You may already know about Windows’ built-in Disk Clean-Up utility but have not used it. This is the first place to look to free up some space. To start using it, launch Windows Explorer, right-click on your C drive, and select “Properties” from the list.
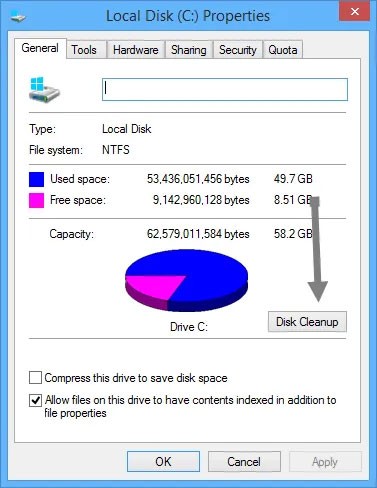
Once the Properties window opens, click on “Disk Cleanup” to open the utility. Here, in the “files to delete” box , select all the checkboxes like System memory error dump files, Recycle Bin, Setup log files , etc.
Once you have selected all the desired checkboxes, click OK to free up the drive space occupied by the above files. The amount of space you free up depends on how much you have neglected your C drive.
Hibernation is a handy feature that lets you easily shut down your computer while saving its current state, so you can resume work when you power it back up. However, hibernation can take up a lot of disk space, since it reserves space on your hard drive equal to the amount of RAM stored. (So, potentially, the more RAM you have, the more disk space you'll use.)
To disable hibernation, open the Windows Control Panel by pressing Win + X and selecting “Control Panel” from the list. Once the Control Panel is open, select Power Options.
2. Click the “Choose what the power buttons do” link on the left. This will take you to the system settings window.
3. Click “Change settings that are currently unavailable” . This action will enable all disabled options.
4. Scroll down and uncheck the “Hibernate” checkbox to disable hibernation in Windows 10.

Temporary Internet files like browser cache and cookies take up a small amount of space on your C drive, so deleting those temporary files will free up some space. See: How to clear cache and cookies on Chrome, Firefox and Coc Coc for more details.
Windows tends to keep old (and mostly redundant) system files around. In most cases, you can delete these files, especially if you've installed a new version of Windows. To do this:
1. Open Windows Explorer, right-click on drive C and select Properties.
2. Click “Disk CleanUp” , then in the new window click “Clean up system files” to open the advanced disk cleanup window.
3. Select the “Windows upgrade log files” checkbox and if you have anything there, select the “Previous Windows installation(s)” checkbox .
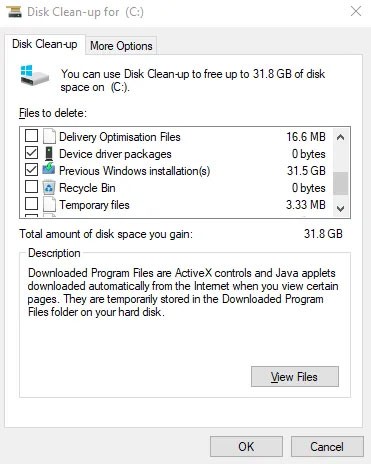
There are other checkboxes here, but most of them don't use up any space and can be left as is. When you're ready, click OK to clean up your hard drive.
The WinSxS folder is located in your PC's C drive in the same location as the Windows folder - for example, C:\Windows\WinSxS. It stores files needed for system recovery. You can easily reduce the size of this folder, but this comes with a caveat.
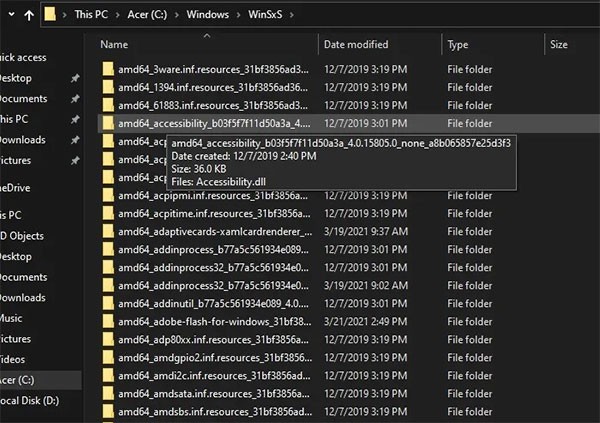
Warning : Do not delete any files directly from the WinSxS folder or the folder itself. This will severely damage the system and make it impossible to reboot or recover.
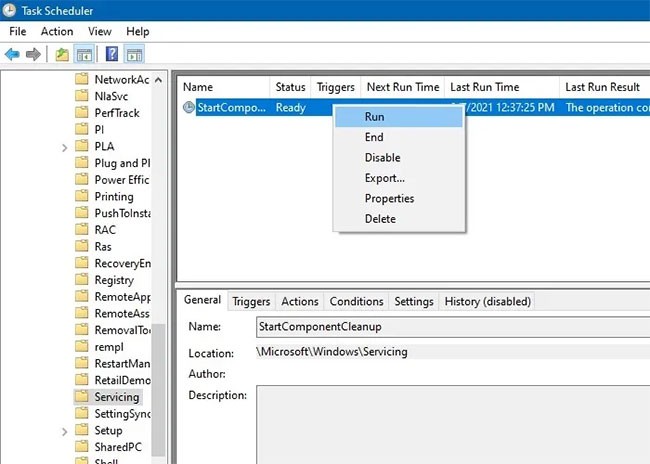
1. It is very important to proceed with caution and handle these files directly from the Task Scheduler .
2. Once Task Scheduler opens , search for Task Scheduler Library > Microsoft > Windows > Servicing > StartComponentCleanup and right-click to select Run.
3. Wait a few minutes for the operation to complete.
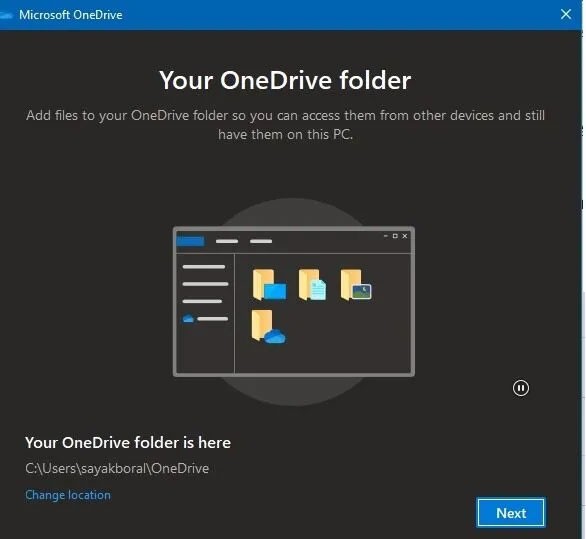
You can set your OneDrive and File Explorer files to be available online only. This will save you a lot of space on your C drive. If you have a fast, reliable Internet connection, you'll benefit from this great space-saving trick.
For OneDrive, select the OneDrive app from the Start menu search box in Windows 11 and the Windows 10 search box. Sign in with the Microsoft account used on your local PC. Go to the OneDrive folder by clicking Next.
Right-click on any OneDrive subfolders and if they are taking up a lot of space, set them to “online only” instead of putting them on the device.
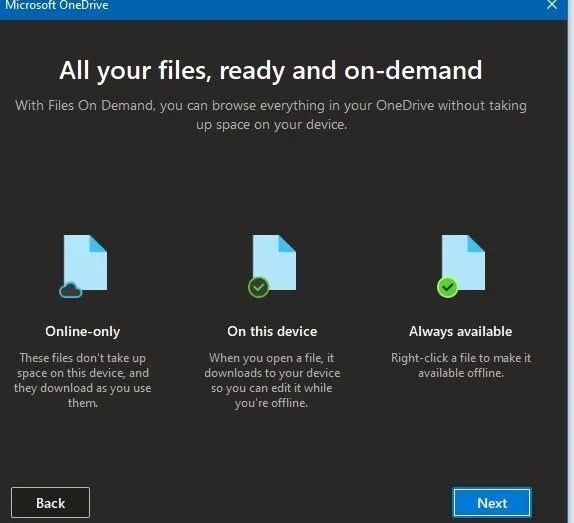
The same methods above can be repeated for any file or folder in the File Explorer window. By making them available online only, you can access the files whenever you want. Of course, if you have some important data that you need to access at all times, you’ll want to leave it on your device.
Maybe you've concluded that your PC is such a mess that you don't want to bother cleaning up Windows 10. In that case, you can use a built-in option to reinstall a fresh copy of Windows.
You may know about the Reset this PC option available in Recovery settings . However, using this feature with certain options will restore your PC to its original state, including pre-installed manufacturer bloatware. To avoid this, you can use another method.
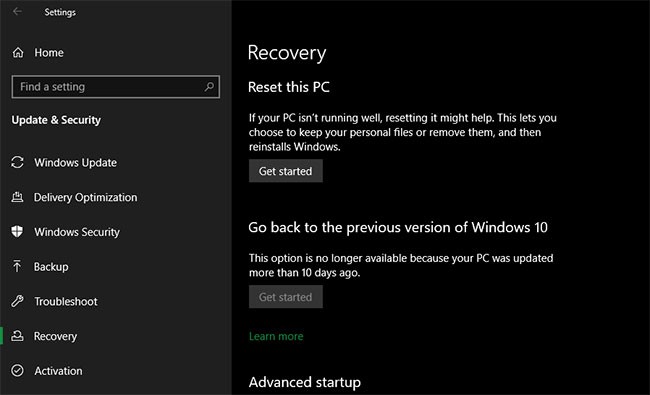
To use this feature, tap the Get started button in the Recovery menu. Select Keep my files , choose whether to download or reinstall locally, the settings, then make sure you select No for Restore preinstalled apps?
This is equivalent to the Fresh Start option found in the Device performance & health section of the Windows Security app in older versions of Windows 10. Windows 10 will be reinstalled and updated to the latest version, and it will also remove all installed apps. Only your personal files and “some Windows settings” will be kept.
While Windows promises to keep them safe, make sure you back up your important files before doing this, just in case anything goes wrong. You should also make a note of any license keys you'll need to reactivate the software after the refresh.
Having to reinstall all your programs manually will take some time, but if your computer is a mess, this method is worth considering.
Yes, the methods to clean up C drive are very similar for Windows 10 and Windows 11. There may be slight changes in the location of some menu options, but the methods to clean up C drive mentioned above are applicable to both Windows 10 and Windows 11.
You should choose the built-in Windows methods to clean up disk space, including the C drive. The article has mentioned many built-in techniques in this guide.
Regular Windows updates are the surest way to verify system integrity. Third-party software does many of the same things as the built-in tools: They can identify temporary files, pending updates, files in the Recycle Bin, and more.
However, if they accidentally delete any important files, such as the WinSxS folder file, it can cause you a lot of trouble. This problem can prevent you from rolling back updates or fixing Windows problems yourself. In general, this article does not recommend using any third-party software to clean up your Windows drive. They do more harm than good. Avoid tools like CCleaner and Wondershare RecoverIt.
With regular use, the C drive will gradually fill up. Every file and folder you create (on any drive) has an impact on the free space on the C drive. If you haven’t updated your computer for a long time, it may be vulnerable to bloatware and difficult to delete files. Of course, we often forget to delete temporary files, unnecessary programs, and space-consuming applications. All of these things play a role in the C drive gradually filling up.
If you miss the familiar look and feel of Windows 10, you can restore the Start menu, taskbar, and other familiar elements with a few simple tweaks.
You can use one of the following 6 methods to open Computer Properties (or System Properties) on Windows 10.
You can use File Explorer Options (also known as Folder Options) to change how files and folders behave, as well as how items are displayed on your computer. This guide will show you different ways to open Folder Options or File Explorer Options in Windows 10.
It's no surprise that Microsoft wants Windows 10 users to upgrade to Windows 11.
It's easy to preview files without opening them in Windows 10 thanks to the Preview Pane feature in File Explorer. You can see thumbnails of most images, videos, audio files, and some text-based documents.
Microsoft is currently having difficulty converting users to new products and services.
For many people, the autocorrect feature on Windows 10 is annoying and unnecessary. So how to remove this feature?
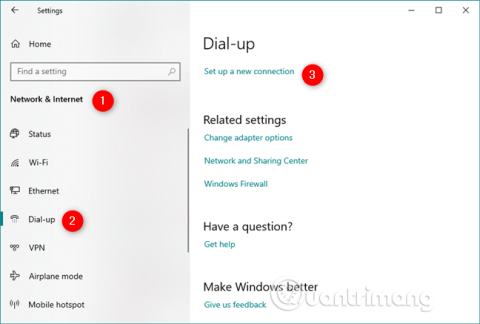
Many Internet service providers provide their customers with a Point-to-Point Protocol over Ethernet (PPPoE) connection. This article will show you how to configure Windows to connect to the Internet via PPPoE.
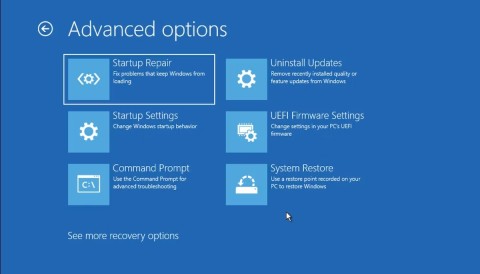
Startup Repair is a Windows recovery tool that can fix some system problems that prevent Windows from starting. Startup Repair scans your PC for problems and then attempts to fix them so your PC can start correctly.
Modern versions of Windows still contain a lot of old code, and Microsoft generally tries to hide outdated parts, like the Control Panel, in favor of more modern components. However, there are some interesting exceptions.
Setting up multiple monitors on Windows is quite simple and only takes a few minutes to do. After setting up multi-monitor mode (multiple screens), you can set up separate wallpapers for each screen. To do this, please refer to the article below from WebTech360.
With less than two weeks to go until 2025, it's time to look back at the list of features that Microsoft has stopped supporting or removed from Windows 10 and 11 in 2024.
Sleep mode on Windows will put the computer into the lowest power consumption mode, extending the battery life of the computer when not using the device.
Recently, Microsoft has been continuously posting articles on the company's official blog urging users to upgrade to Windows 11 as the end of support for Windows 10 is approaching.
Virtual desktops are a handy way to combine multiple workspaces in Windows 10. There are a number of ways to quickly switch between virtual desktops, including some lesser-known keyboard shortcuts. Quantrimang.com will cover them all in the following article.
PowerPoint also has details for you to illustrate your presentation, such as creating speech bubbles in PowerPoint.
There are many ways to create a line break in Excel, depending on the content and requirements for creating a line break in Excel.
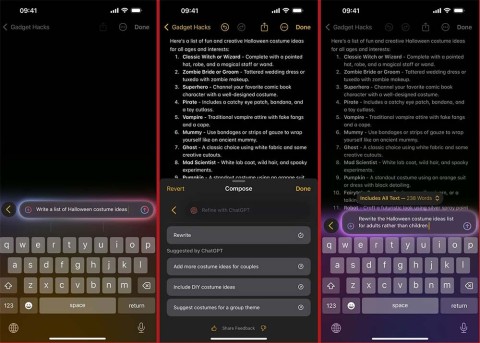
You can use Siri to create text and images using ChatGPT. In particular, ChatGPT is also deeply integrated into Apple Intelligence to provide users with more useful information.
General Motors (GM) seems to be very determined not to let Apple CarPlay appear on its electric vehicles.
You will receive a series of strange beast eggs, immortal jade, and battle talisman tickets through the game code Yeu Thu Van Dao
Anime Last Stand Roblox Codes will give players Emeralds, the essential in-game currency for you to spend on the most necessary things.
Your Smart TV remote is missing again. Maybe it got stuck between cushions, lost in a pile of laundry, or just disappeared. Before you get frustrated, try these simple solutions to control your Smart TV without having to run all over the house.
Your living room is more cluttered than it needs to be. Smart TVs are so advanced these days that a modern TV comes with a whole layer of convenience that you no longer need.
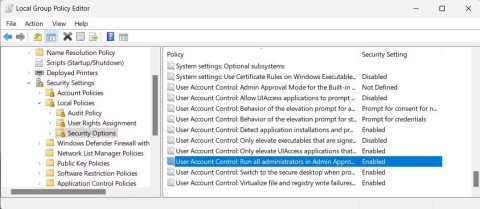
Windows provides a Run as Administrator option that allows users to run applications and programs with administrative privileges. You can also use it to troubleshoot your computer. But what if this feature malfunctions and strips you of your admin rights?
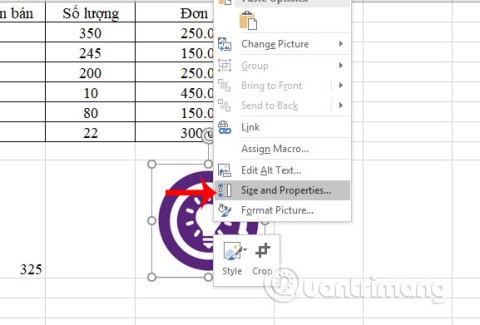
Fixing images in Excel cells helps you easily manage images when inserting images into Excel, the image does not change position or size when processing other content.
In this article, Quantrimang will guide you through some ways to fix the error of Windows computers automatically restarting when pressing the shutdown button.
To really understand whether a VPN is right for you, there’s no better way than to try it out. Install a few clients, connect to the best servers, test your favorite sites, and see how they perform.
In addition to customizing using phrases to trigger actions like changing Siri's name on iOS 18, you have the option to use sound to trigger actions.
Apple Intelligence promised big things, but after exploring its features, many people felt disappointed.
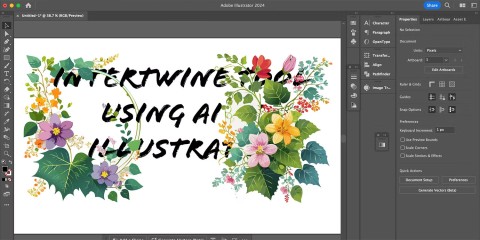
While AI design tools are fun to use, some can feel like they take away from the seriousness of creative design. However, there are a large number of creative AI tools that are actually worth your time.
