Instructions for creating green ticks for Facebook

Step-by-step guide on how to create a green tick for Facebook. Learn how to verify your account and gain credibility with the green verification mark.
You forgot to blur sensitive content in videos posted on YouTube . Don't worry, here's how to edit videos posted on YouTube without losing views .
You can edit videos posted on YouTube
Remove errors in YouTube videos
YouTube doesn't want creators to change too much of posted content, especially if it already has views. That's why uploading a new video will replace the old clip even though the attributes remain the same, which can mislead viewers and YouTube's algorithm.
However, YouTube also understands that it is difficult to avoid small mistakes. Therefore, this famous video social network has allowed users to cut out the desired scenes without resetting the video specifications.
How to cut the beginning or end of a YouTube video
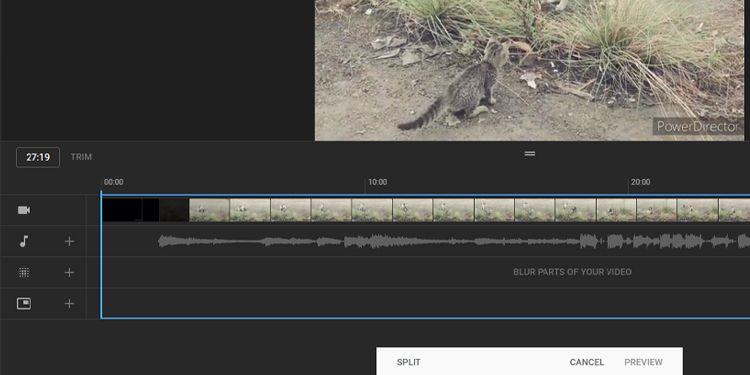
Trim the beginning and end of YouTube videos
First, you must log in to your YouTube Studio account to edit the clip. Then, follow the simple instructions below:
To confirm the changes made, click Save in the upper right corner of the video preview window.
How to cut part of a YouTube video
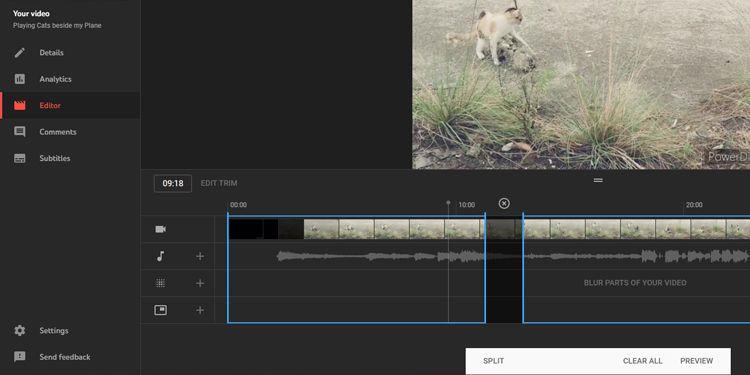
Cut parts of YouTube videos
If you want to remove the middle part of the video, the process is similar. Below are the step-by-step details:
Now, just like before, click Preview to see the final result, then click Save to update the changes on YouTube.
How to undo trimming in YouTube Studio
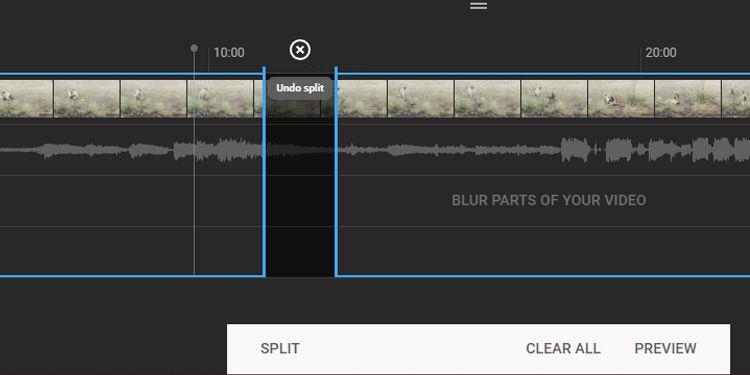
Undo Split
When you want to undo the trimming done at the beginning and end of the video, just drag the blue box to the previous position. However, if you want to delete the cut made in the middle of the video, you need to click the mark xright above the part you want to remove.
If you want to undo all changes made, click Clear All at the bottom of the screen. If you pressed Preview , select Discard Changes instead of Save . You can also click the 3-dot icon next to Save and click Revert to original to cancel all unsaved changes.
Blur parts of YouTube videos
In case someone wants you to delete their image in the video but it is an important scene that you cannot change, blurring the face or that part of the video is a good way. To do this, you need to select the clip, access the editing section in YouTube Studio.
Blur faces automatically in YouTube Studio
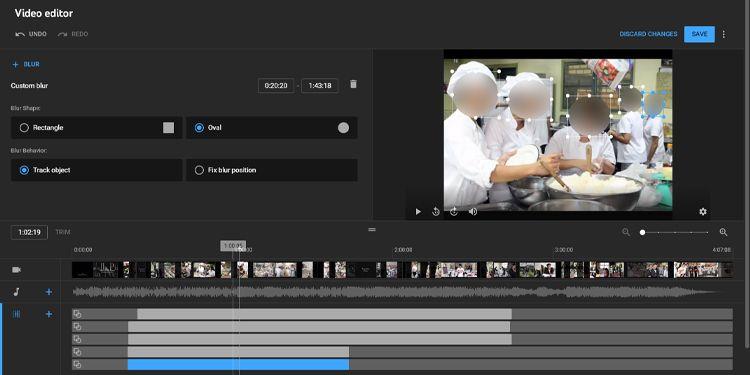
Blur faces in YouTube clips
Click Blur parts of your video in the timeline, then select Face blur . YouTube will then automatically process the clip, finding faces. After this process is complete, you can select the face you want to blur, then click Apply .
You can change the time frame of the blur effect by changing the start and end milestones. You can also manually edit its size to accurately blur the face you want to hide.
Once satisfied with the effect, click Save . However, if you want to remove the blur effect, click the Trash icon next to the timestamp or select Discard changes to cancel the entire effect.
Apply blur effect to YouTube videos
Apply blur effect in YouTube videos
In case YouTube does not recognize the face you want to automatically blur, follow these steps:
When you are satisfied with the result, click Save . If not, click the Trash icon to remove the blur effect.
Above is how to edit videos posted on YouTube without reducing views . Hope the article is useful to you.
Step-by-step guide on how to create a green tick for Facebook. Learn how to verify your account and gain credibility with the green verification mark.
Learn how to download torrent files directly using the Firefox web browser with the Torrent Tornado add-on. Simple steps for effective torrent downloading.
Learn how to view someone else’s TikTok followers, both on public and private accounts. Discover effective methods to access follower counts and improve your TikTok strategy.
Learn how to login to Facebook using your email, phone number, or even QR Code authentication without entering a password.
Learn how to stop echo during your Parsec streaming sessions with effective solutions. Echo is a common issue that disrupts communication in games, and we provide proven methods to eliminate it.
Discover how to change your avatar and cover photo on Zalo to express your personality. Follow our easy guide and optimize your Zalo profile image.
Learn how to manage your relationships on Zalo by marking close friends, similar to Instagram. This feature allows easy access to frequently contacted individuals.
Learn how to send screenshots via Viber quickly and without saving them. This guide provides step-by-step instructions to enhance your messaging experience.
Learn how to easily restore deleted messages on Zalo with our step-by-step instructions. Quickly recover your important chats on this popular messaging app.
Discover how to easily add background music to your personal Zalo page with our comprehensive guide on using Zalo for Android and iOS devices.
If you’ve ever found yourself at the end of a Minecraft raid, searching for the last raider to eliminate, you’re not alone. Many players have faced this challenge.
Learn how to uninstall Coc Coc browser completely from your computer, ensuring all data is removed. Follow these simple steps for an effective uninstallation.
Discover how to effectively use the Toshiba AW-A800SV washing machine control panel with our detailed guide!
Discover how to effectively use emergency features on Samsung Galaxy Watch and other smartwatches, including SOS alerts, fall detection, and health records.
Discover how to effectively <strong>share QR code on Zalo</strong>. QR codes enhance connectivity, enabling easy friend requests and more on Zalo.


