Instructions for creating green ticks for Facebook

Step-by-step guide on how to create a green tick for Facebook. Learn how to verify your account and gain credibility with the green verification mark.
Faceapp is an extremely hot face editing application at the moment. In this article, WebTech360 will guide you how to install and use this application right on your PC using an emulator with extremely simple steps.
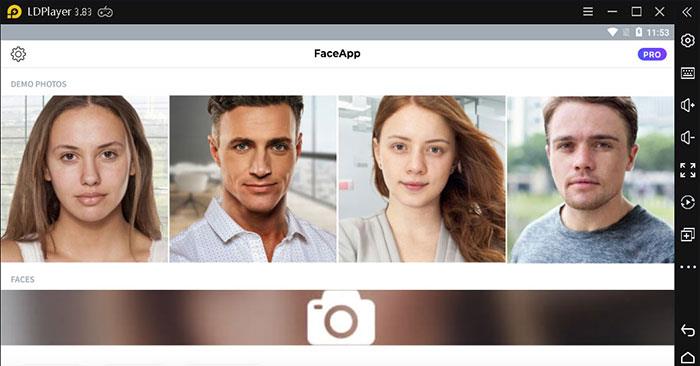
Instructions for installing and using Faceapp using an emulator on PC
First of all, you need to download and install an Android emulator for PC such as Nox Player, Bluestack, LDPlayer... The instructions below use LDPlayer, other emulators also have the same method.
After downloading and installing, open the emulator and select the System Apps section.
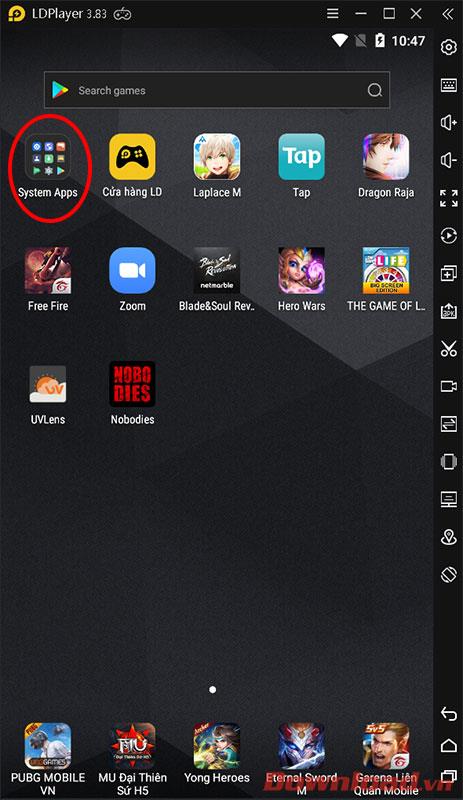
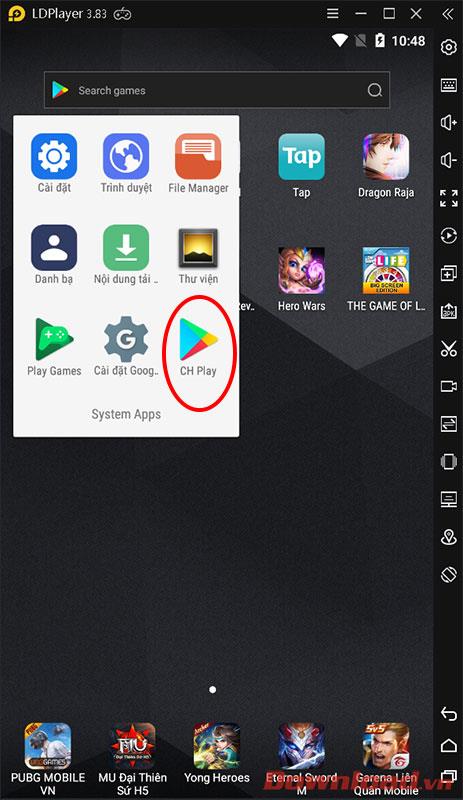
Next select CHPlay .
In the CHPlay store, click on Search for apps and games.
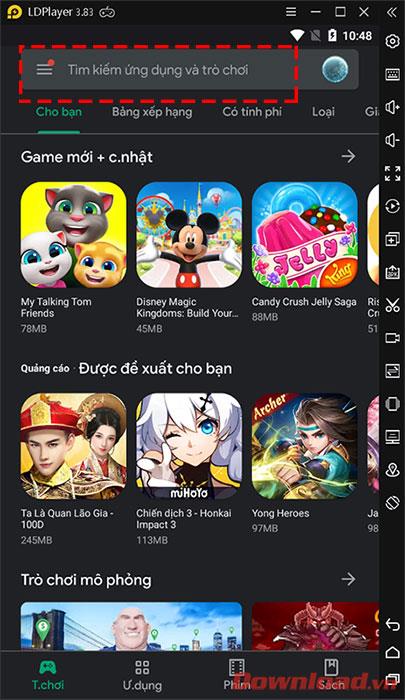
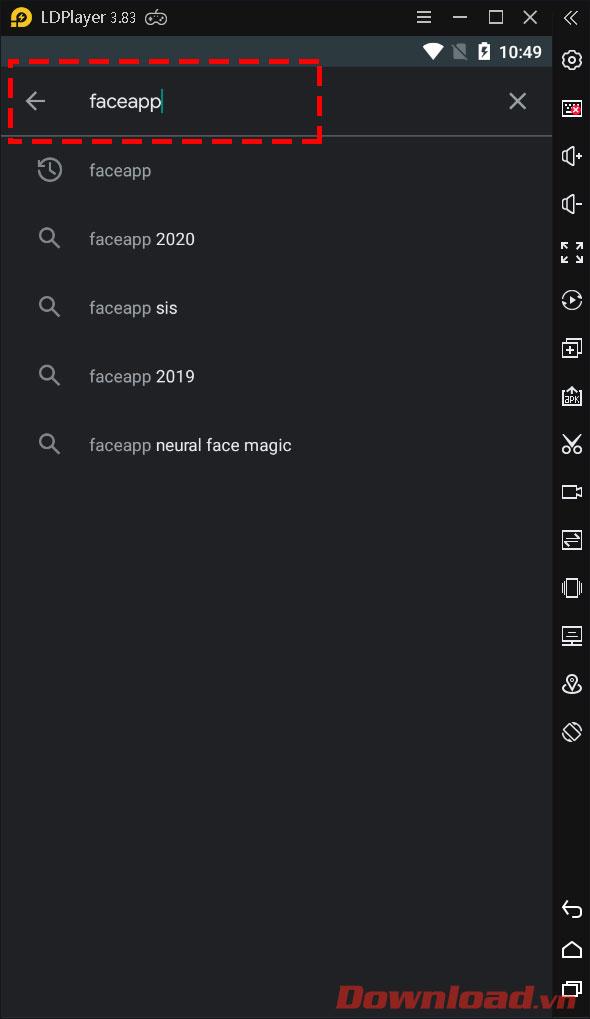
Type in the search box for the term faceapp.
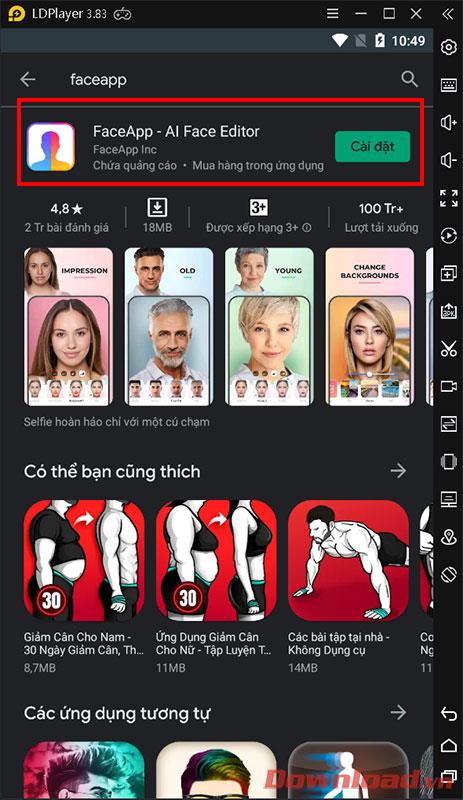
The application will appear, click the Install button.
The access permission panel appears, click Accept .

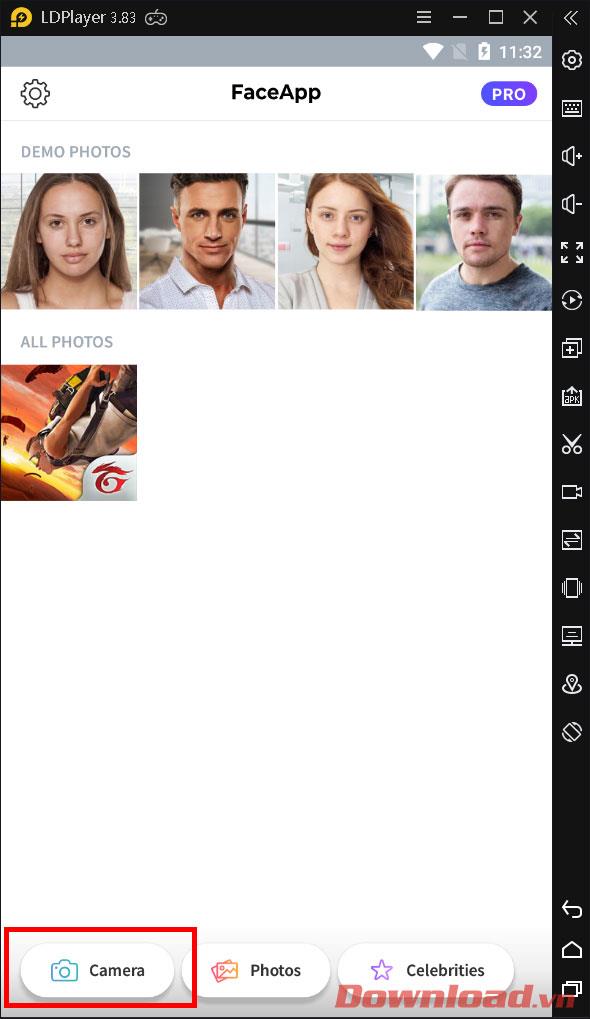
After installation is complete, we open the application. To add a photo to the application and create an effect, you have 2 options: Add a photo using your computer's camera and from the screen or add a photo from the available library.
To add a photo from the Camera or screen, select the Camera button on the main screen.
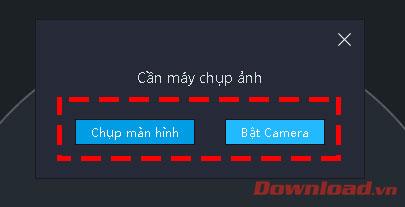
Now a dialog box will appear, you have 2 options:
After you have taken a photo you like, press the photo button at the bottom of the screen.
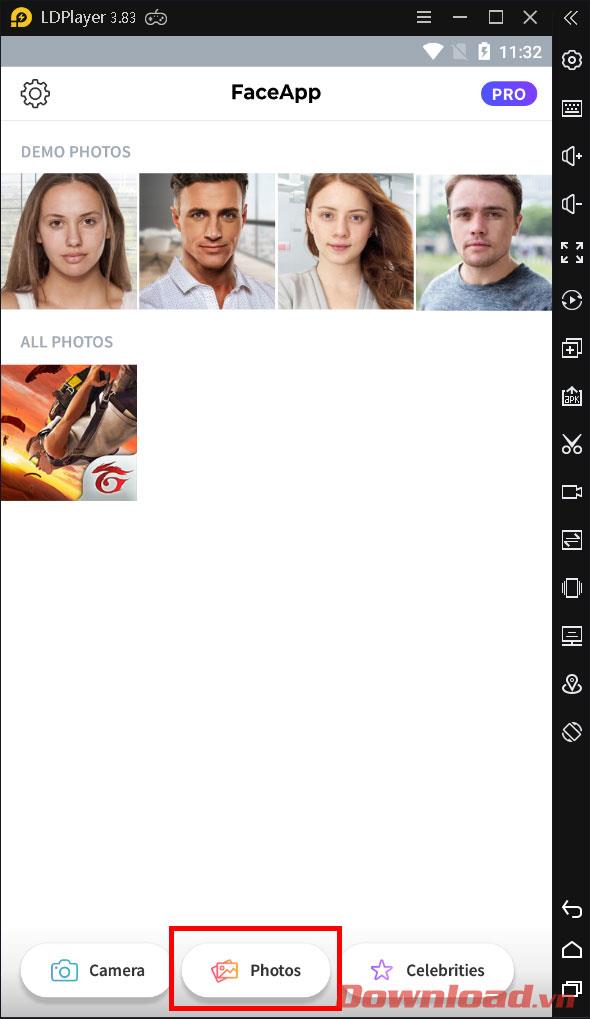
In addition, you can also take photos from the library available on your device by clicking the Photos button and then selecting the photo you want to use.
Wishing you success!
Step-by-step guide on how to create a green tick for Facebook. Learn how to verify your account and gain credibility with the green verification mark.
Learn how to download torrent files directly using the Firefox web browser with the Torrent Tornado add-on. Simple steps for effective torrent downloading.
Learn how to view someone else’s TikTok followers, both on public and private accounts. Discover effective methods to access follower counts and improve your TikTok strategy.
Learn how to login to Facebook using your email, phone number, or even QR Code authentication without entering a password.
Learn how to stop echo during your Parsec streaming sessions with effective solutions. Echo is a common issue that disrupts communication in games, and we provide proven methods to eliminate it.
Discover how to change your avatar and cover photo on Zalo to express your personality. Follow our easy guide and optimize your Zalo profile image.
Learn how to manage your relationships on Zalo by marking close friends, similar to Instagram. This feature allows easy access to frequently contacted individuals.
Learn how to send screenshots via Viber quickly and without saving them. This guide provides step-by-step instructions to enhance your messaging experience.
Learn how to easily restore deleted messages on Zalo with our step-by-step instructions. Quickly recover your important chats on this popular messaging app.
Discover how to easily add background music to your personal Zalo page with our comprehensive guide on using Zalo for Android and iOS devices.
If you’ve ever found yourself at the end of a Minecraft raid, searching for the last raider to eliminate, you’re not alone. Many players have faced this challenge.
Learn how to uninstall Coc Coc browser completely from your computer, ensuring all data is removed. Follow these simple steps for an effective uninstallation.
Discover how to effectively use the Toshiba AW-A800SV washing machine control panel with our detailed guide!
Discover how to effectively use emergency features on Samsung Galaxy Watch and other smartwatches, including SOS alerts, fall detection, and health records.
Discover how to effectively <strong>share QR code on Zalo</strong>. QR codes enhance connectivity, enabling easy friend requests and more on Zalo.


