What is the best AI photo background remover?

People spend too much time manually removing backgrounds, and AI isn't always the magic it claims to be.
TinyPNG and TinyJPG are high quality image compression tools. The article will guide you how to install and use the Photoshop plugin TinyPNG and TinyJPG very simple, easiest.
Adobe Photoshop CC Adobe Photoshop CC for Mac
Installing this plugin on macOS is quite simple. The download page provides you with 2 files. A file contains a plugin, a file contains a license. You need to copy both files to Photoshop plugin folder as shown below.
1. You will receive a link to the download page via email. Download the two files to your computer.
2. Open Finder and go to the Adobe Photoshop installation directory . The default folder is Macintosh HD / Applications / Adobe Photoshop .... Here you will find a folder called Plug-ins .

3. Open the second Finder window and go to the Download folder. Select both TinyPNG-JPG.license and TinyPNG -JPG.plugin , then drag those two files into the Plug-ins folder .

This plugin is now successfully installed on Mac.
Once you've installed this plugin, you can start using it to save compressed JPEG and PNG files with Adobe Photoshop graphics software.
1. Restart Photoshop and open the image file. Check to make sure it's set to RGB, CMYK, lab mode or grayscale.
2. From the file menu, click File> Export> TinyPNG and TinyJPG ….

Do you see the shortcut in the screenshot above? Keep reading if you want to use this plugin like a pro.
3. The Photoshop plugin dialog box displays a compressed PNG image preview window. You can type the file name and optionally resize the image or folder location. Click Save . It's done!

The download page provides the installer for Windows and the license file. You need to run that installation file, then copy the license file into the Photoshop plugin directory as shown below.
1. Once you have purchased this plugin, you will receive a link to a download page. Here, you can download both the installation file and the license.
2. Now launch the installer. This action will copy that plugin into Photoshop CS5, CS6, CC, CC 2014, CC 2015, CC 2017, CC 2018, CC 2019 or CC 2020 folders.

If you are using a virus scanning tool like Avast Business Antivirus or AVG AntiVirus and encounter an installation error, you may need to temporarily disable it.
3. Use Explorer to copy the TinyPNG-JPG.license file from the download folder into the Photoshop plugin directory. The plugin directory is located at: C: \ Program Files \ Adobe \ Adobe Photoshop ... \ Plug-ins .
If you are using a 64-bit version of Windows, you need to duplicate the license file twice. Photoshop always resides in both Program Files & Program Files (x86) files.

Now the Photoshop plugin has been successfully installed on the computer.
Once this plugin is installed, you can use it to save the compressed PNG file into Adobe Photoshop.
1. Restart Photoshop and open the image file. Make sure it is set to RGB, CMYK, lab or grayscale mode.
2. From the file menu, click File> Export> TinyPNG and TinyJPG.…

3. The Photoshop TinyPNG and TinyJPG plugin dialog boxes will display with a preview of the compressed image. You can enter a name in the Filename field, the option to resize the image or the folder location. Click Save to complete the process.

Above is how to install Photoshop TinyPNG & TinyJPG plugin on Mac and Windows. Hope the article is helpful to you.
Below you will find a few tips and tricks which may come in handy when using the plugin.
You can save part of your image by creating selections. Use the Marquee Tool to create the selection and choose File > Export > TinyPNG and TinyJPG. The preview window will now show this selection and will say Exporting selection at the bottom. Hit Save and your selection will be saved.
You can also save part of your image by using slices. Use the Slice Tool to create a slice. The currently selected slice will be indicated by a yellow border. Optionally give your slice a custom name by right-clicking and selecting Edit Slice Options.... The custom slice name will be used for the file name instead of the image name. Then choose File > Export > TinyPNG and TinyJPG. The preview window will now show the user slice and will say Exporting slice at the bottom.
In Photoshop you can add a keyboard shortcut to the plugin. To do this select Edit > Keyboard Shortcuts.... Navigate to Application Menus > File > Export > TinyPNG and TinyJPG... and press your favorite key combination. For example you can press ⌘+⇧+P. Photoshop will alert you in case the combination is already taken. 
You do not need to worry about color profiles. The images are converted automatically in sRGB for maximum compatibility across browsers and devices.
You can use Photoshop scripting to control the plugin with JavaScript, VBScript or AppleScript. This is very handy for manipulating images. Using this technique we have created example scripts that compress JPEG and PNG files and an example that exports Layer Comps to optimised images. You can download the scripts and copy them into your Scripts folder in Photoshop. New menu items will appear under File > Automate and under File > Scripts after copying the scripts to Photoshop.
The plugin supports batch automation. First you will need to create a Photoshop action that uses the plugin. When creating the action make sure to leave the suggested file name unchanged. You can then choose File > Automate > Batch.... In the dialog window that now appears you can select the newly created action from the drop-down. Under Source you can select the folder with all the images you want to compress. The Destination needs to be set to None, because the plugin saves the JPEG and PNG files to its own folder. You can change this folder in the actions panel. Double click on it to select a different destination.
MacOS supports tabbing through dialogs, but this is switched off by default. You can switch it on in System Preferences. Navigate to Keyboard and then click on Shortcuts. Select the radio button All controls shown at the bottom. Once switched on you can tab through the preview dialog and use the spacebar to press buttons. Full keyboard access can also be activated with the key combination Ctrl+fn+F7.
The plugin supports RGB, CMYK, lab and grayscale images. There are some image formats the plugin does not support. These are multichannel, duotone and indexed image files. The TinyPNG and TinyJPG menu option will be grayed out for these images. If you wish to export these image formats with the plugin, you can first select Image > Mode > RGB Color and the TinyPNG and TinyJPG menu option will be active again.
Photoshop artboards are supported. First select any artboard or a layer within an artboard in your Layers panel. Then choose File > Export > TinyPNG and TinyJPG to bring up the preview window and save the currently selected artboard.
The plugin compresses images offline, on your own computer. No information about your usage is shared and no internet connection is required.
The Export menu can be greyed out. To fix this you will need to change the color mode of the image by selecting Image > Mode > RGB Color and Image > Mode > 8-Bits/Channel. After making these changes you should be able to export the image with the plugin.
Optimising JPEG images with the plugin can result in slightly bigger output than with the web service and API. The reason this may happen is that in Photoshop only the raw image data is available, whereas the web service and the API also know the previous JPEG compression level.
People spend too much time manually removing backgrounds, and AI isn't always the magic it claims to be.
This tutorial will show you how to easily turn a photo into a pencil sketch using Adobe Photoshop.
Many people used to find resizing images very annoying until they learned about Photoshop's simple channel-based protection method.
Add a quick and easy poster effect to your images using Photoshop to recreate the classic look of posters printed with limited ink colors.
There are many AI photo editors that make Photoshop a second choice and AI features are useful tools for editing photos without having to learn complex Photoshop.
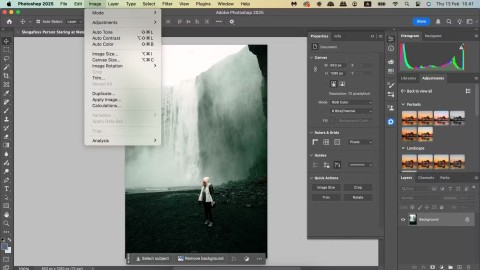
Photoshop 2025 packs new AI tools, smarter selections, and features you didn't know you needed until now.
This tutorial will show you a quick and easy way to add a monochrome color effect to an image using Adobe Photoshop.
This tutorial will show you how to add canvas space and drop shadow to your photo in Photoshop to create a simple yet stylish photo border.
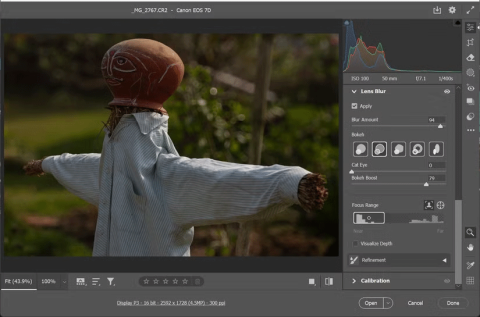
Adobe's Lens Blur tool makes it easy to review your photos, adding depth and focus to your photos.
Hidden away in the app, Photoshop Actions is a beloved feature of the popular photo editing tool, meant to speed up workflows without the need for AI.
Lightroom and Adobe Photoshop are two of the best photo editing tools, but while many professionals use both together, you only need Lightroom if you're an amateur photographer.
This tutorial will show you how to create a cool Picture in Picture effect with Adobe Photoshop by taking a single photo and creating the illusion that a smaller, cropped version of the same photo is inside it.
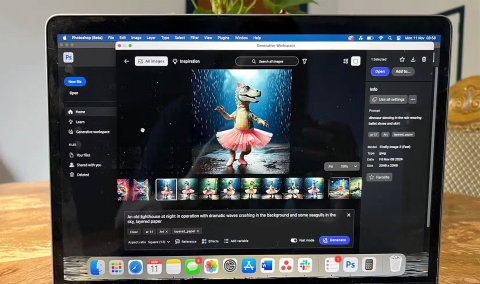
Generative Workspace is one of the top AI features announced at Adobe Max 2024. It will be the new home for your Generative AI images and files.
With Generative Fill, powered by Adobe's Generative AI called Firefly, anyone can add realistic water reflection effects to their photos simply by drawing a selection, typing a few words, and clicking a button.
This tutorial will show you how to copy an image and paste it into a selection in another image using the Paste Into command in Adobe Photoshop.
Discover how to use Windows 11 Quick Assist for seamless remote support. Learn step-by-step setup, troubleshooting, and tips to help friends or family with tech issues instantly.
Struggling with dual monitor lag on Windows 11? Discover proven troubleshooting fixes to eliminate stuttering, delays, and performance issues for seamless multi-monitor setups. Step-by-step guide inside.
Struggling with the frustrating Windows 11 "Startup Settings" blank error? Discover proven, step-by-step fixes to restore your boot options quickly and get your PC running smoothly again. No tech expertise needed!
Discover how to activate Windows 11 Enterprise using KMS effortlessly. This comprehensive guide covers everything from requirements to troubleshooting, ensuring seamless activation for your business needs.
Struggling with the dreaded KMODE EXCEPTION NOT HANDLED error on Windows 11? Discover proven, step-by-step fixes to resolve this blue screen nightmare quickly and get your PC running smoothly again. No tech expertise needed!
Struggling with Windows 11 "Motherboard" Driver Error? Discover proven troubleshooting steps to fix it fast and get your PC running smoothly again. Easy, step-by-step guide for beginners.
Struggling with ping spikes on Windows 11 over Wi-Fi? Discover proven fixes to stabilize your connection, reduce lag, and enjoy smooth gaming or streaming. Step-by-step solutions for instant results.
Accidentally deleted precious photos? Discover proven methods to recover deleted photos in Windows 11 effortlessly. Step-by-step guides, tools, and tips to restore your images safely.
Discover how to use Windows 11 Terminal instead of CMD for a modern, efficient command-line interface. Learn installation, setup, and tips to boost your productivity with tabs, themes, and more.
Discover safe, legitimate ways to activate Windows 11 Pro without a product key. Learn step-by-step methods using built-in tools and official Microsoft options to get your OS up and running smoothly. No risks, no hassle – just pure productivity.
Struggling with battery drain during hibernate in Windows 11? Discover expert fixes to preserve your laptop
Struggling with input lag in Windows 11 while playing Valorant or CS2? Discover proven, step-by-step fixes to restore smooth gameplay and boost your performance. Say goodbye to delays and hello to precision shots.
Struggling with the frustrating "Out of Memory" error in Microsoft Edge? Discover proven, step-by-step fixes to reclaim your browsing speed and stability. Updated with the latest tips for optimal performance.
Struggling with Google Drive not launching on Windows 11? Discover proven fixes to resolve the issue fast, from restarts to advanced troubleshooting. Get your cloud storage working seamlessly today!
Discover how to disable Game Bar Presence Writer on Windows to optimize gaming performance. Step-by-step guide to reduce lag, boost FPS, and enhance your setup for smoother gameplay. Essential tips for gamers in 2026.
