
iPhone LL / A code is from which country? Made where? Use it well?
Understanding the iPhone LL / A code is essential. Discover what country it comes from, where the iPhone is made, and how to utilize this code effectively!
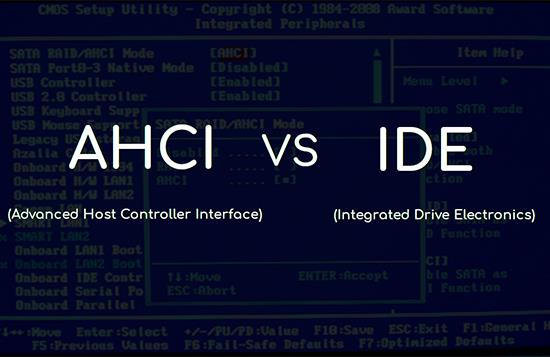
Advanced Host Controller Interface (abbreviated as AHCI) is the standard mode of communication of the device with new software . With Native Command Queuing technology, the speed of exchanging, transmitting and receiving data is up to 3 Gbps .
IDE is the standard mode of the device communicating with old software, the transfer and receiving speed is quite slow, the speed and maximum disk capacity that this mode supports is 504MB .
AHCI mode only supports Windows Vista and above . If your friend is using Windows XP, you should not go to AHCI mode. If you enable AHCI mode on Windows XP operating system, you often get a blue screen error ( depending on the operating system, the blue screen will display different errors).
 Blue screen error on Windows computer (Demonstration)
Also, if your laptop is equipped with an SSD, to increase the speed of the hard drive you should turn on AHCI mode . The data transfer rate of the IDE is quite small while the transfer rate of AHCI mode can be up to 3 Gbps.
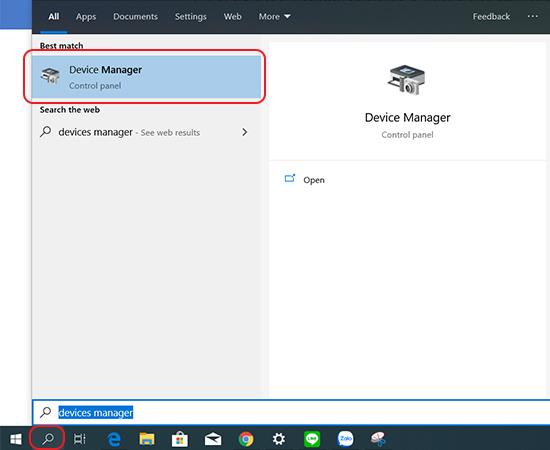
Step 1: In the Taskbar search box , type Device Manager search and click Device Manager .
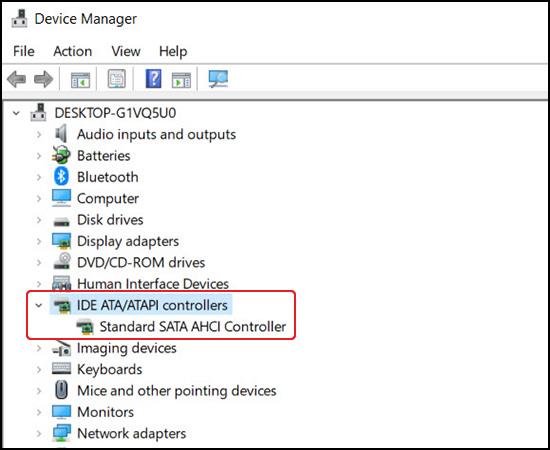
Step 2: At the Device Manager screen, click on the IDE ATA / ATAPI controller series, and check if there is a Standard SATA AHCI Controller . If so , your device is on AHCI mode .
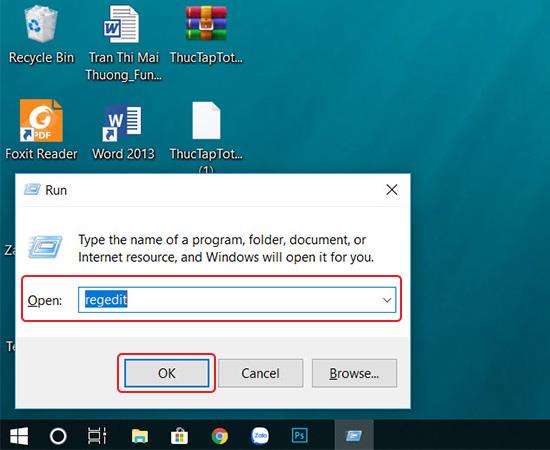
Step 1: Open the Run dialog box with the Windows + R key combination and type regedit search > click OK to open the Registry Editor screen .
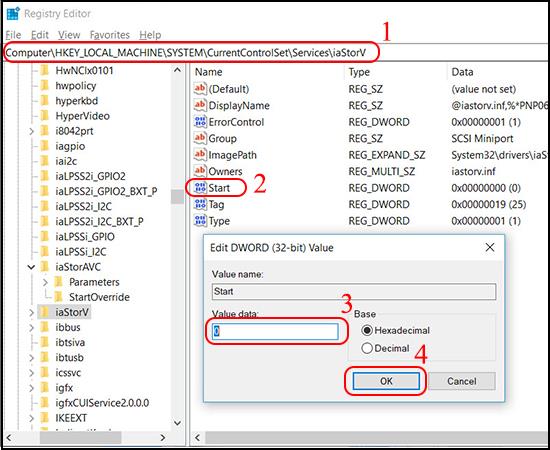
Step 2: The message appears, choose Yes. In the new interface, on the left menu, open the path HKEY_LOCAL_MACHINE \ SYSTEM \ CurrentControlSet \ Services \ iaStorV . Then left-click twice on Start and in the Value data, enter 0 and click OK .
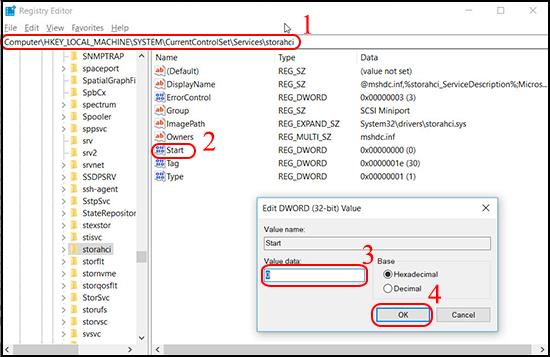
Step 3: Similarly, please open the left menu under the path HKEY_LOCAL_MACHINE \ SYSTEM \ CurrentControlSet \ Services \ storahci . Then left-click twice on Start. And in the Value data you enter 0 and click OK .
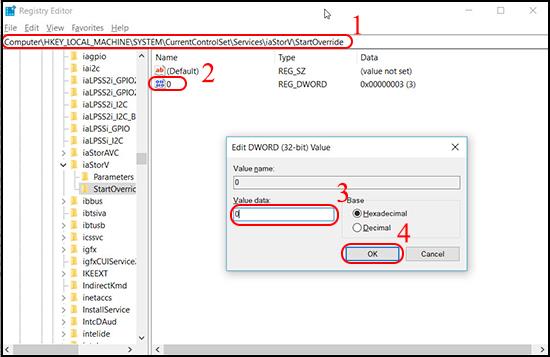
Step 4: Open the left menu under the path HKEY_LOCAL_MACHINE \ SYSTEM \ CurrentControlSet \ Services \ storahci \ StartOverride and left-click twice on 0 . In the new interface, the Value data you enter is 0 and click OK .
When you're done, close Registry Editor .
Note: The BIOS interface of each model will be different, so please pay close attention to the name of each operation to perform the most correctly.
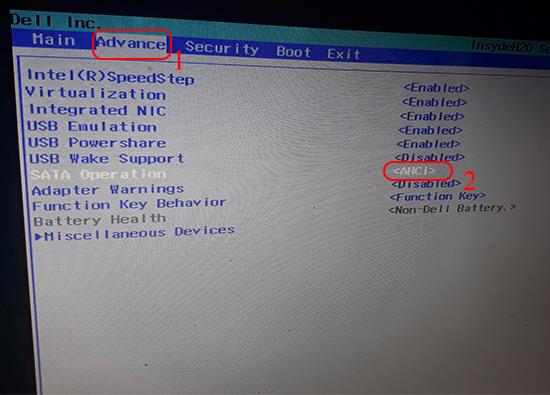
After you have enabled AHCI mode on Windows, restart your computer and enter BIOS to enable AHCI mode . (Depending on the model, there are different ways to enter the BIOS).
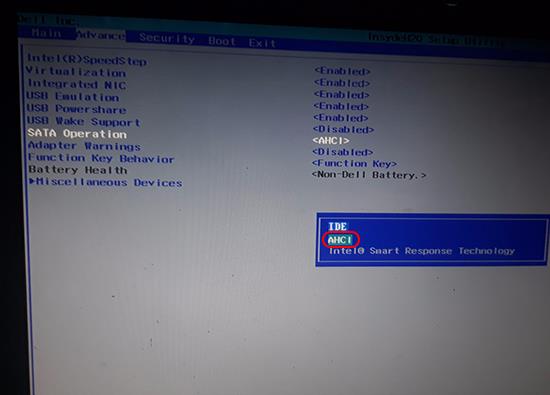
Please check the SATA Operation line at the Advance tab is in any mode , if it is AHCI, you are done converting from IDE to AHCI.
If you are still an IDE, move on to switching from IDE to AHCI mode .
See more:
Understanding the iPhone LL / A code is essential. Discover what country it comes from, where the iPhone is made, and how to utilize this code effectively!
Learn how to exit Kids Home mode on Samsung devices, even when you
Discover effective strategies to deal with being blocked on Zalo by a lover. Explore insights into the emotional impacts of being blocked in a relationship.
Discover the talent behind the movie Saigon In The Rain and analyze its emotional depth. Are young dreams portrayed accurately?
Discover the origin of your iPhone with TA / A code. Understand its quality and warranty policies.
Discover solutions for 16 common errors on Zalo! This guide covers causes and quick fixes to ensure a smooth experience on the app.
Are you busy and don’t want to be disturbed by Zalo message alerts? Follow these simple steps to turn off vibration and message alerts for Zalo on both iPhone and Android devices.
Zalo Media Box provides useful information to Zalo users. Learn what Zalo Media Box is and how to delete or block messages from Zalo Official Account for a better experience!
Discover everything about the iPhone KH / A code, its origin, and whether it is a reliable choice for users. This article offers insights into the iPhone and its market codes.
Acer CineCrystal LED Backlight technology enhances display quality on Acer laptops. Learn about its features, advantages, and disadvantages to make informed decisions.
Discover the Mi Home app essential for managing devices in the Xiaomi ecosystem. Learn about its features, download process, and how to create an account!
EVKey is a popular Vietnamese typing software with many outstanding features. Learn how to download and use EVKey efficiently on Windows and Mac.
Learn about the significance of the J/A code on your iPhone, including its market relevance and the countries involved in its production.
Discover how to check for hidden iCloud on your iPhone and iPad effortlessly. Learn the effective methods to uncover hidden iCloud and secure your device.
Hybrid Watches merge the aesthetics of mechanical watches with the functionalities of smartwatches. Discover their features, advantages, and disadvantages in detail.


