How to pin comments on TikTok
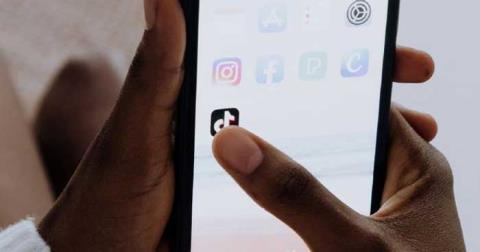
How to pin comments on TikTok, TikTok allows users to pin comments easily. Here's how to pin comments on TikTok videos.
Did you plug an external hard drive into your Windows 10 computer, and you want to remove it safely, so that the data on it doesn’t get corrupted? Do you work with USB flash drives and need to eject them safely? In that case, you are in the right place, as this guide shows five ways to eject external storage devices from Windows 10:
Contents
1. How to eject storage devices using the Safely Remove Hardware and Eject Media icon
The most popular method is also one of the simplest and fastest. The gist is to find the Safely Remove Hardware and Eject Media icon in the system tray. By default, in Windows 10, this icon is hidden and not shown alongside the clock and the network icon. However, you can click the arrow pointing upwards to show hidden icons and then find the icon that looks like a USB stick, highlighted below.
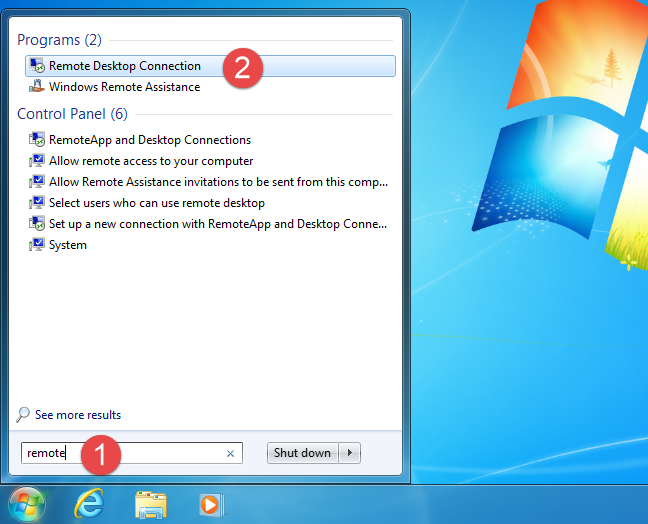
Finding the Safely Remove Hardware and Eject Media icon
You can move the Safely Remove Hardware and Eject Media icon to make it visible in the system tray. Read this guide on how to show or hide system tray icons.

Click on Safely Remove Hardware and Eject Media
After finding the USB icon, click on it to see a list of all the removable storage devices connected to your Windows 10 computer. The list includes USB memory sticks, external hard drives, and other types of USB devices. In the list of removable devices, click on the one that you want to remove. If you can’t tell them apart, look at their drive letter.
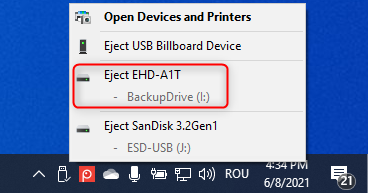
Choose the drive you want to eject
Then, a notification should be shown in the bottom right corner, telling you that it is Safe To Remove Hardware. Now, you can unplug the storage device that you no longer want to use on your computer.
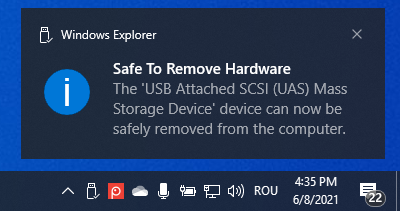
It is safe to remove hardware
If the storage device you want to unplug is actively used by Windows 10 or an app you are running, you receive a prompt saying that “This device is currently in use.” It is not a good idea to unplug the storage device because the data on it might get corrupted.
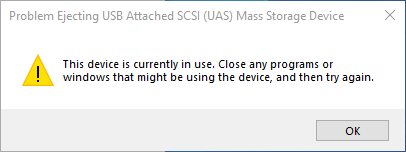
This device is currently in use
If this error message is shown, close all open apps and try again. If you still receive the same error, shut down Windows 10, and unplug the storage device. Then, start your computer again and use it normally.
2. How to eject an external hard drive or USB drive from File Explorer
Another simple method is to open File Explorer, go to This PC, and then to the Devices and drives section, where you see all the partitions and drives from your PC, including external ones.
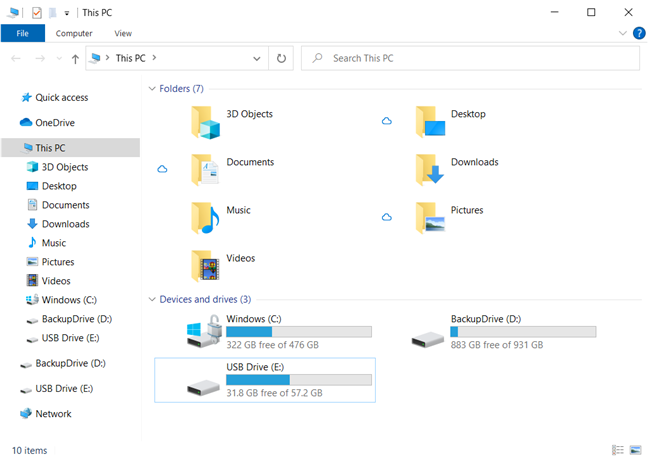
Find the device you want to eject in File Explorer
Right-click or press and hold on the drive that you want to remove and, in the menu that opens, choose Eject.
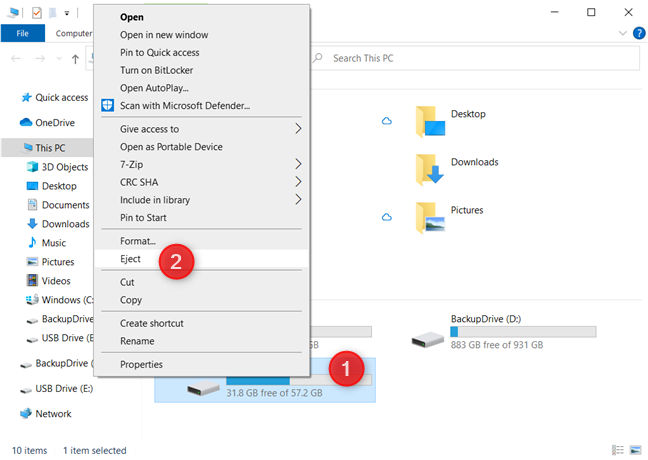
Right-click and choose Eject
If everything went well, you see a notification that it is Safe To Remove Hardware. Unplug the device that you no longer want to use on your Windows 10 PC, and you are done.
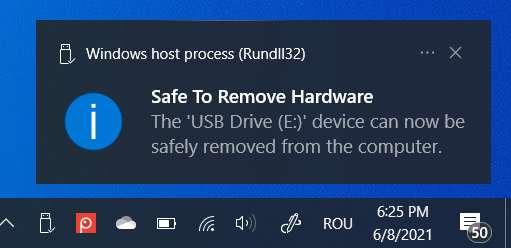
Now it is safe to remove hardware
TIP: If you want to know more about working and managing Windows 10 notifications, read how to use Windows 10's Action Center notifications.
3. How to safely remove external storage devices from Settings
Another method that is less known than the others shared so far is from the Settings app. In Windows 10, open Settings (press Windows + I) and go to Devices.
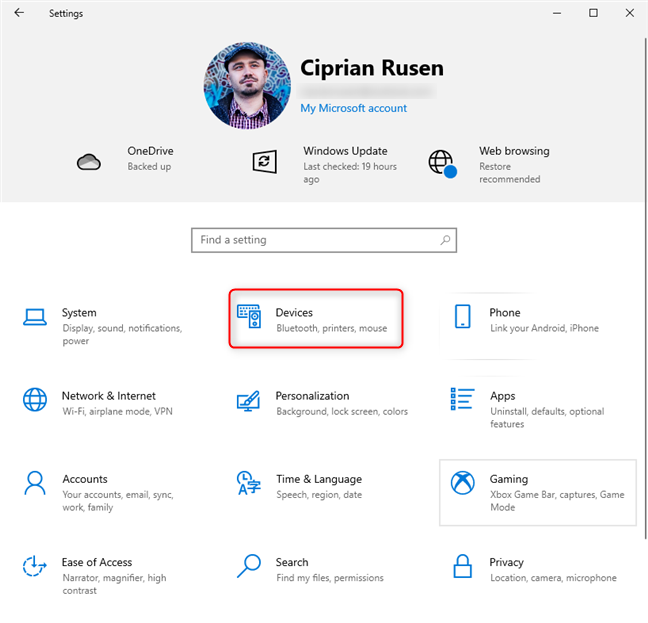
In Windows 10 Settings, go to Devices
In the column on the left, go to “Bluetooth & other devices.” You see a long list of devices on the right side of the window.
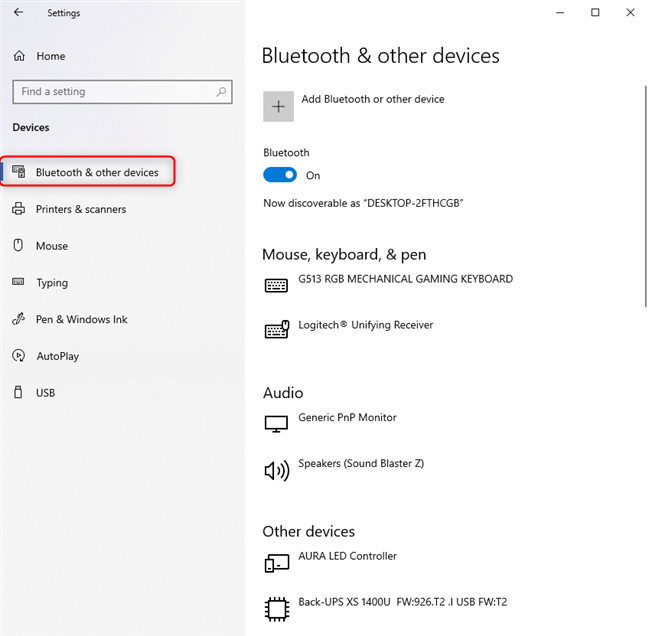
Go to Bluetooth & other devices
Scroll down to the Other devices section, where you should see the external devices connected to your Windows 10 PC. Find the external hard drive or USB stick you want to remove, click or tap on its name, and then on Remove device. A confirmation dialog appears. In it, press Yes.
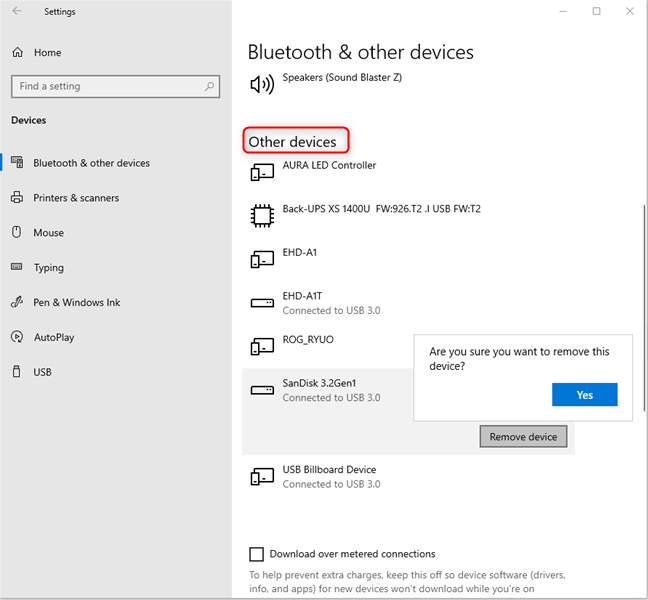
Select the drive you want to eject in Other Devices
The external storage device can now be unplugged.
4. How to eject USB memory sticks from Disk Management
This method applies to USB memory sticks, but not to external hard drives. It starts with opening Disk Management. Then, scroll down the list of disks at the bottom.
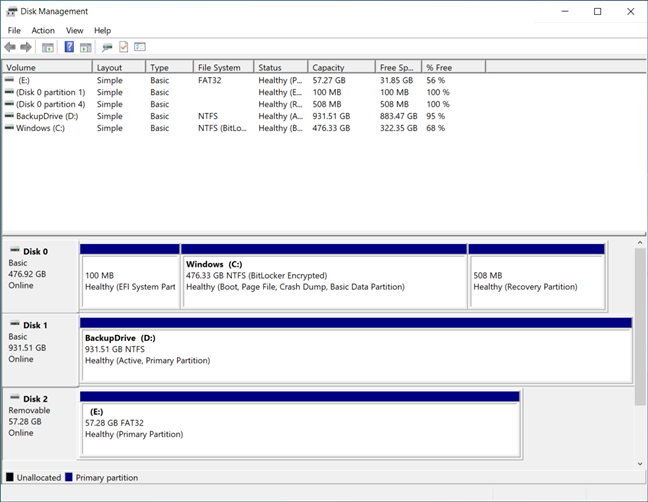
Find the USB flash drive in Disk Management
The disks that can be removed from Disk Management have the label Removable. Find the one you want, right-click on it, and choose Eject.
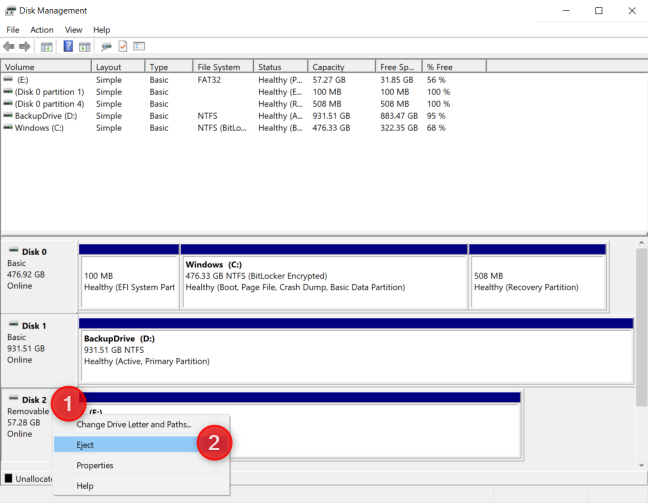
Right-click on the USB flash drive and choose Eject
Now you can safely unplug the USB drive from your computer or device.
5. How to use the Safely Remove Hardware wizard to eject USB storage devices
This section covers an old method that worked very well in Windows 7. It still exists, and it partially works in Windows 10, but Microsoft considers it retired. At some point, it will either stop working or be removed entirely from Windows 10. For now, you can only use it to eject external hard drives, but not USB memory sticks. Here’s how it works:
Open the Run window (Windows + R), and then copy and paste the following: a
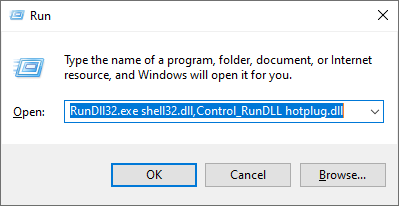
Use the Run window to access the Safely Remove Hardware window
You can also download the shortcut we created for it, extract it to your desktop, and run it from there.
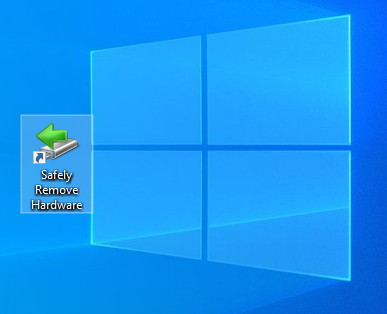
Download our Safely Remove Hardware shortcut
Now, you see the Safely Remove Hardware window, with the list of removable devices that Windows detects. Choose the one you want to eject and press Stop.
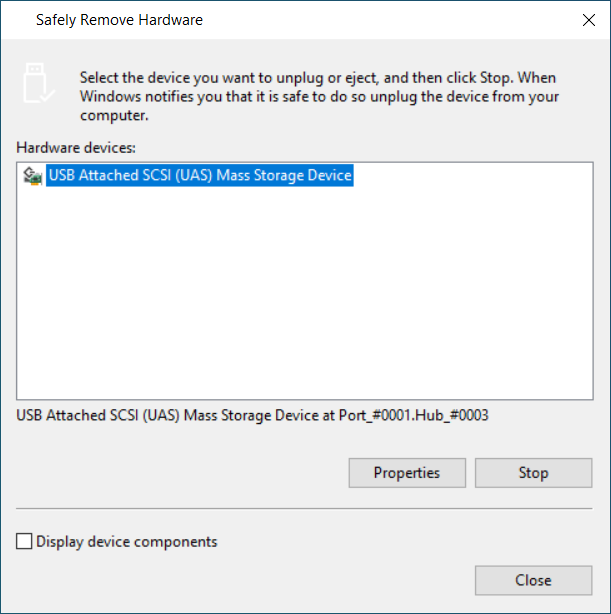
Choose the device you want to eject
You are asked to confirm the device to be “stopped.” Choose the entry with the drive label, and press OK.
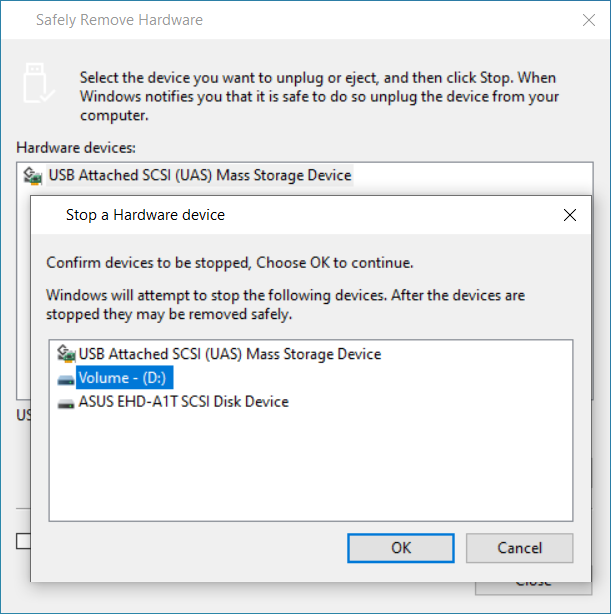
Select the drive label and press OK
Now, you see a notification that it is Safe To Remove Hardware, and you can unplug the device.
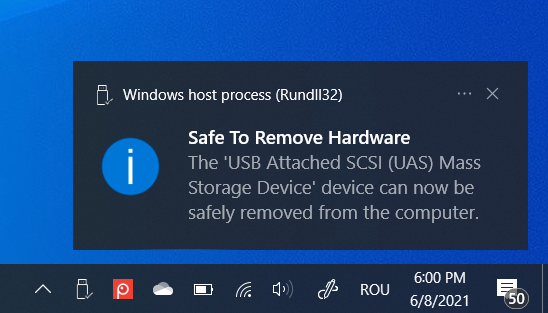
It is safe to remove hardware
If you try the same steps for a USB memory stick, you get an error message like the one below, saying that the device is not removable and cannot be ejected or unplugged. That is untrue, and you will see other methods working just fine.
You can't eject USB memory sticks with this method
Did you successfully eject the storage drive you wanted?
We did our best to create a complete guide for ejecting external hard drives or USB drives from your Windows 10 computer or device. At least one of the methods we described should work for you. However, if Windows 10 insists that the storage device is currently in use, simply shut down your computer and unplug the device you want. That is guaranteed to work. 🙂
How to pin comments on TikTok, TikTok allows users to pin comments easily. Here's how to pin comments on TikTok videos.
Instructions for Organizing a Q&A session on Facebook, Recently, Facebook has launched the feature to create a Q&A session, when you post a question for everyone to answer.
Instructions for installing and recording videos with Likee, Likee is an application that supports extremely beautiful and impressive video recording, and is loved by many young people today. The following,
How to export the list of meeting participants in Zoom, How to take attendance on Zoom is not difficult, it even allows you to export the list of students participating in the class.
How to change font on Xiaomi, Want to create a new image for Xiaomi device? Just follow the instructions below to change the font style and size above
Instructions for creating a mirror image effect on Picsart, Picsart is an application where users only need to perform a few simple steps to transform the photo.
How to add new fonts to Microsoft Word, Can't find the font you want to use for documents in Microsoft Word? Don't worry, you can install new fonts for Word according to these steps
How to turn off the computer screen and still have the computer running, How to turn off the PC screen and still have the computer running on Win 10/11? Very simple. Here's how to turn off the computer screen
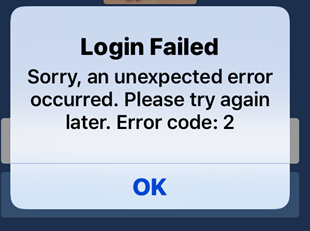
To fix the “An unexpected error occurred” issue when logging in to Facebook, you can try the following steps
Users reported that their Facebook, Messenger and Instagram accounts were suddenly logged out and could not be accessed again, both on the app and web version.
Instructions on how to take photos on Tiktok are extremely simple. Tiktok is a famous application for recording and creating short videos on social networks. However, this application also
How to find and get Instagram links, Instagram is one of the most popular and easy-to-use social networking platforms today. However, because it is designed specifically for mobile,
Instructions for locking the mouse cursor when playing games on BlueStacks, Instructions for turning on/off the mouse cursor lock feature when playing games in the BlueStacks App Player emulator.
Instructions for installing and using Faceapp using an emulator on PC, Simple and easy instructions on how to install and use the Faceapp face editing app using an emulator on PC
Instructions for creating a cover photo group on Facebook, Creating a cover photo group is a feature that helps users set Facebook cover photos with many different images (maximum of 6 photos).
Learn how to effectively use the Stochastic Indicator for technical analysis on Bubinga. Explore advanced techniques to enhance your trading strategies
Instructions for adding angel wings to photos using PicsArt, PicsArt is a photo editing application used by many people today. Today WebTech360 will introduce the article
How to turn off the Just accessed notification on Zalo. This article WebTech360 will guide you to turn off the Just accessed notification under your Zalo chat name.
Instructions for blocking and unblocking accounts on TikTok. Similar to other social networking applications, TikTok also allows users to block someone's account
How to write a long status with a colorful background on Facebook, Today, WebTech360 will introduce some steps to post a long status with a colorful background on Facebook,

