Adobe Photoshop or Photoshop Elements is the right software for you?
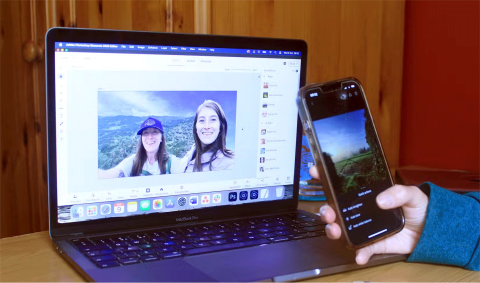
Adobe offers a variety of tools, Photoshop and Photoshop Elements are two options that have very similar features.
When you first open Photoshop, you may be confused for a few seconds and then, you will contact Freelancer - freelance design specialist to learn how to use it. But rest assured, you will not have to do this alone because I am here.
This powerful design software has valuable tools that can change everything but Photoshop is not just for professionals. With my little help, I hope you can learn how to create beautiful and attractive photos.
To start, we have 12 of the most useful tools in Photoshop, and I will explain what they are? Where are they located? How to use them and some of the best tips and tricks.
Note: The version used in the article is Adobe Photoshop CC 2015.
If you are using Adobe Photoshop CS5 , you can refer to this tutorial series: Photoshop CS5 User Guide - Part 1: Toolbox
Index
How to Use Adobe Photoshop? Photoshop Tutorial for Beginners.
You can refer to: Photoshop shortcuts to help you work faster (part 1)
1. The Layer Tool
Define
Layers are one of the best tools in Photoshop. They are like separate sheets of paper that are arranged in a sequence to create a particular image. We can see through transparent areas from one layer to another, move layers to set image content, drag a layer up or down to position an element in the image. Moving a layer is simple. Users can also specify the opacity of a layer to make its content partially or completely transparent.
Using layers, we can perform tasks such as arranging multiple images, adding text to an image, adding shapes, etc. We can also apply a layer style to give a special effect such as a glow or a drop shadow to a layer. We can add or delete a layer at any time while working. Managing layers and working with them is relatively simple.
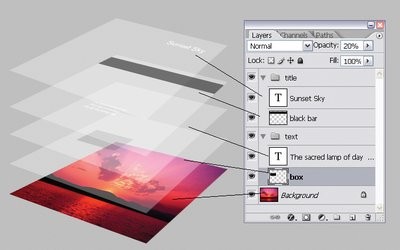
Layers are an essential feature of Photoshop; it is impossible to create anything creative without using layers. Layers are essential to creating a stylish image or any other graphic work. It is not easy to work with every element of an image at the same time without affecting other parts of the image.
By default, the Photoshop Essentials workspace contains the Layers panel, where all layers can be seen and managed. If it is not available, you can display it by navigating to the Window > Layers menu or by pressing the F7 key.
Location
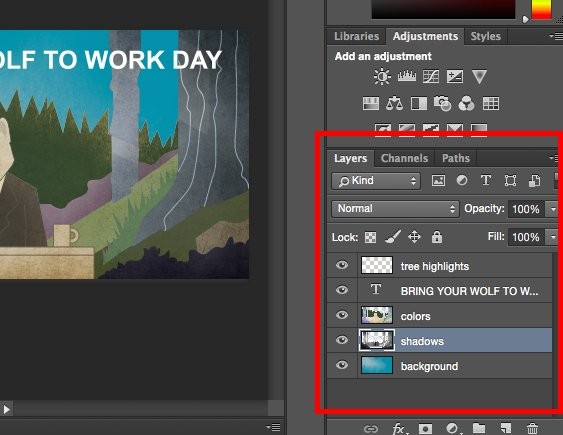
By default it has its own module in the right corner of the Photoshop screen. Click on Layer in the top menu bar.
Tips
Always name each layer to be able to stick to the sequence to avoid confusion, especially useful when working on a project with a large number of layers.
To add or delete layers
Select Layer > New > Layer...
Select a layer
The selected layer will appear in blue. To edit a part of the photo, you need to select that layer.
Pay attention to the eye icon next to each layer. Click the icon to toggle the eye on/off, thus changing the visibility of the layer you are editing.
Duplicate a layer
First, select one or more layers in the Layers panel . Next, drag one or more layers and click Create a New Layer . Alternatively, left-click on the Layer to select Duplicate Layer or Duplicate Group. Enter a name for the layer and click OK.
2. The Color & Swatches Tool
Define
The Color and Swatches tool allows you to use, change, copy, and save color schemes for your content. It is truly a powerhouse that brings images to life and color consistency.
Location
It is the default module in the upper right corner of Photoshop.
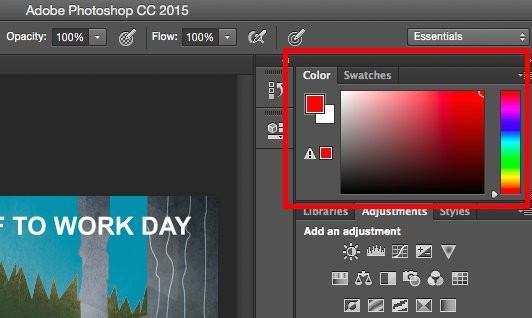
Additionally, the Color tool is located at the bottom of the left toolbar, represented by two overlapping color boxes.
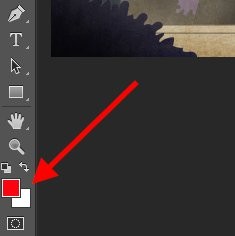
Coloring
Open the Color Picker by double-clicking on the box above the Color module or in the left menu.
From there, you will see a series of color columns with sliders. You can adjust them to create a custom color. Additionally, if you know the hex value of the color, enter it in the # box to automatically find the color. You can choose a color array based on RGB or CMYK values.
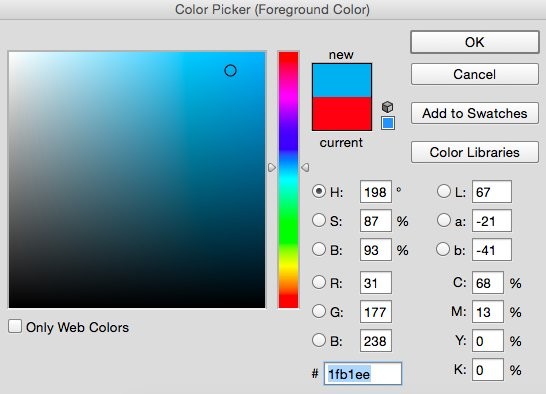
Any color you create can be added to Swatches if you click Add to Swatches.
Tips
Create and save colors as "Swatches" for reuse in future edits.
3. Create Font and Text Tool
Define
The Text tool allows adding custom fonts from data and accessing advanced font settings.
Location
In the bottom left corner of the screen.
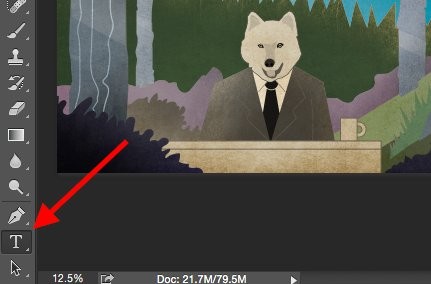
When you click on the Text tool icon , all the font settings and options will be displayed at the top of the screen. These options allow you to change the font, font size and spacing, height, width, color, and style. And make sure you have selected the layer you want to edit the text on.
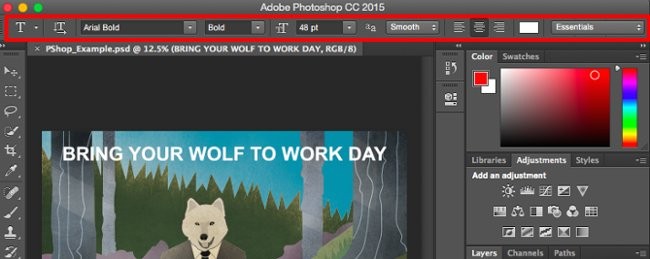
Add text to photo
The Text tool works just like any other Text tool you've ever used. Select the T icon in the left sidebar, drag the Textbox into place, and then get creative.
Whenever you create a text box, Photoshop adds a layer. You can choose the color, size,..., and other customizations to change.
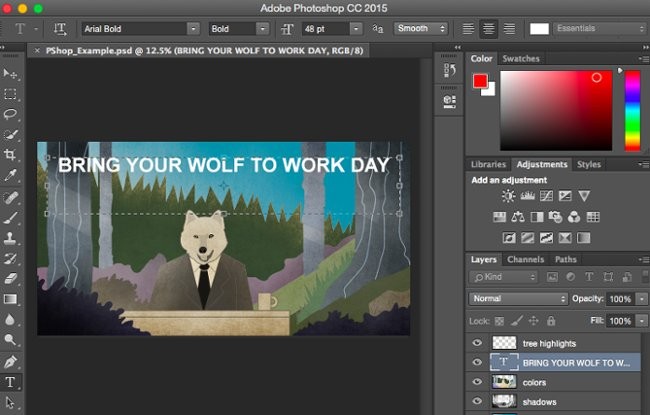
4. Custom Brushes & The Brush Tool
Define
Like Fonts, you can add and edit as you like. The Brush tool has features like changing the size, shape and strokes to get a number of different visual effects.
Brushes are a great way to add eye-catching visual accents to your content. In Photoshop, you’ll start with a selection of Brush tips. You can use them to sharpen and create basic visual effects.
Location
Located on the left toolbar.
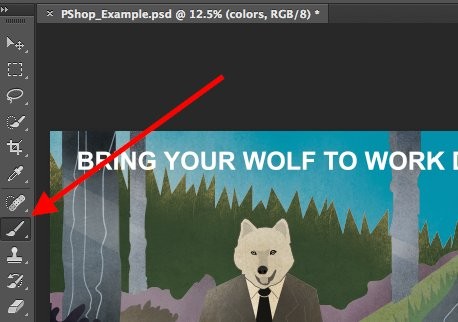
When you select the Brush tool, all the Brush settings and options will appear at the top of the screen. These settings allow you to adjust the brush size, opacity, etc.
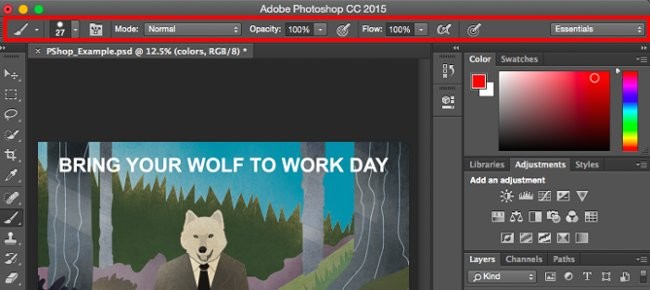
Using the Brush tool
The right tool to create design highlights to the content. I recommend that when using the Brush tool, you should create an additional layer to avoid overlapping other details. The color can be selected from the Swatches library or created by yourself.
Changing your Brush settings can give your design a unique style and even surprise others. Don't be afraid to play around with your brushes.
5. Select Tool
Define
When used properly, this tool allows for detailed selection, graphics creation, copying, cutting, and pasting into images.
Location
On the left toolbar.
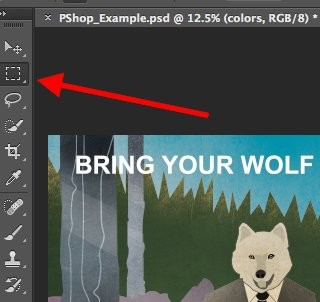
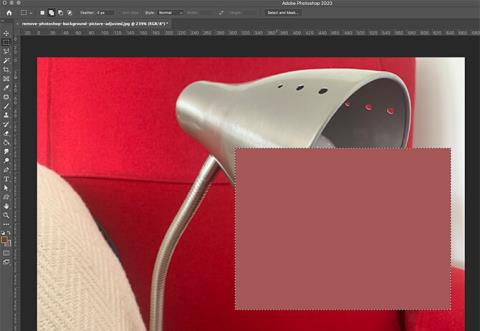
The Select tool is known as one of the most basic tools, but that doesn’t mean it’s not effective. The thing about this tool is that it only works when the layer is selected. So if you want to cut or copy an area on Layer 4, you have to select Layer 4, which means it’s highlighted in the Layers panel. And the selected area is marked by a dashed, flashing line.
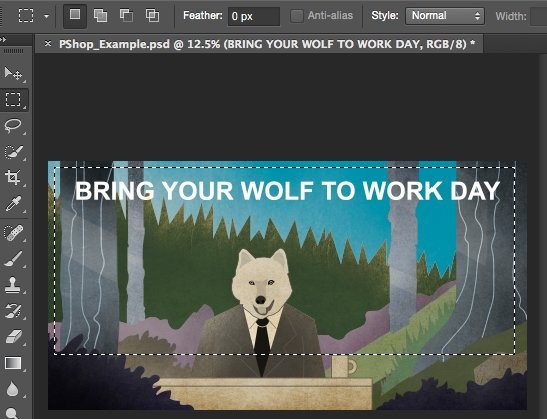
You should pay attention to the layer you are using, then using this tool will become easier.
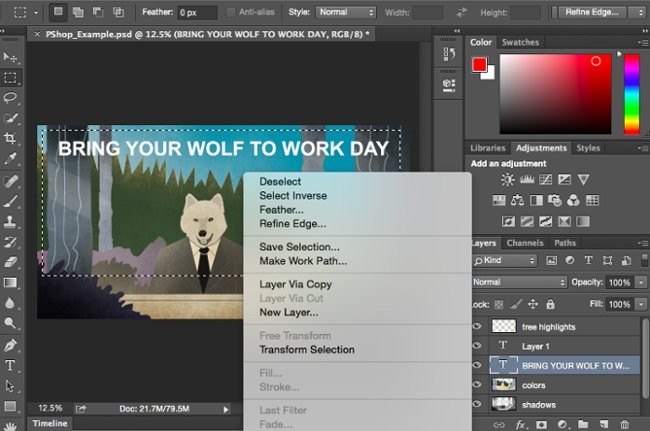
First, select the area. Then, right-click and choose customize from the drop-down menu. For example, you can take out some objects from the current layer and create a separate layer.
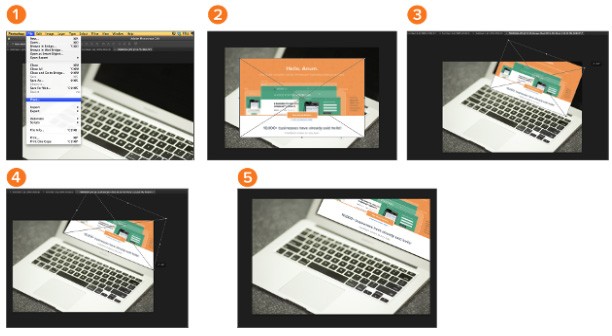
How to select a picture to insert into a graphic
Open the image you want to insert in Photoshop and use the Select tool to determine which area of the image you want to grab. Then, copy it.
Next, open the tab for the project you want to insert and paste it in as a new layer. Turn on the layer of the object you want to select. Additionally, you can move multiple objects when multiple layers are turned on.
Next, right click and you have a few options as follows:
More Pro Tips:
6. Move Tool
Define
When it comes to Photoshop, some of the simplest functions can yield incredible benefits. The Move tool may seem trivial. However, it actually offers a great level of functionality. It has the ability to interact with any object in your document, allowing you to achieve results almost as easily as cutting out real objects and moving them around in the real world.
This is a basic tool that allows you to move parts of an image. The Move tool works on individual layers or on the entire image if you have all layers turned on. This tool is useful when trying to reposition images, text, and other designs.
Almost any object recognizable in the Photoshop interface can be moved using the Move tool, including:
You can even use this tool to drag elements from one Photoshop document to another. It's a simple drag and drop process.
The Move tool is the only Photoshop tool that can be used even when it is not selected in the toolbar. Simply hold down CTRL on PC or COMMAND on Mac and you will instantly activate the Move tool regardless of which tool is currently active. This makes it easy to quickly rearrange your elements.
The Move tool is also designed to interact with 3D objects. You can use it to rotate your 3D object in any direction or reposition it in 2D space relative to other elements in the image.
Location
Top right of the toolbar.
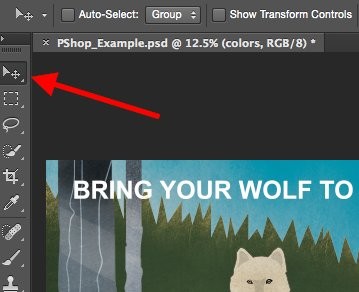
Use the move tool
Click the Move icon from the left menu and drag the object you want. To move all objects on the same layer, turn on that layer and use the Move tool. You can right-click on the image for additional options.
To align, rotate, move and flip
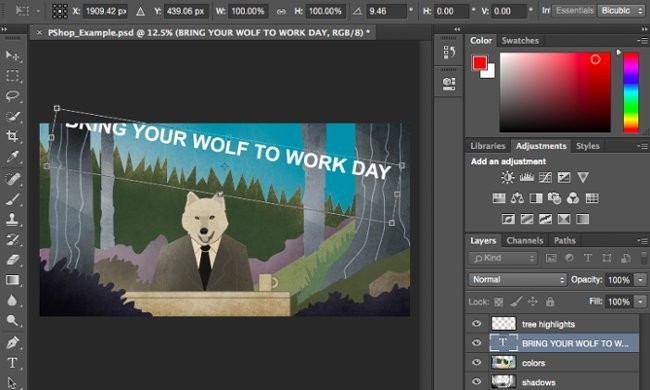
The Free Transform tool allows you to align, rotate, move, and flip any part of a selected layer. Use Ctrl/Command + T to launch Free Transform, and play around with the options in the pop-up bar at the top of the screen. Hold Shift while transforming to maintain the object's proportions.
7. Zoom Tool
Define
The Zoom tool allows you to zoom in on a specific area of the photo and zoom out to see the entire photo.
Location
Top menu bar, select View > Zoom In or Zoom Out.
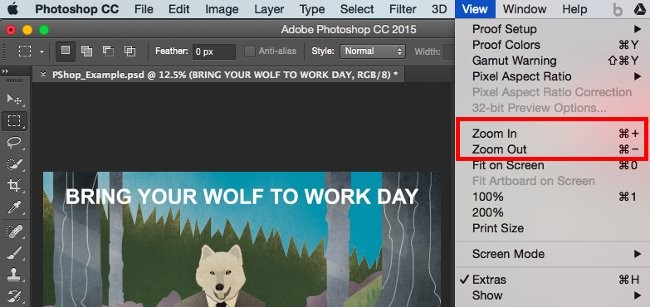
Using the Zoom tool
Select zoom from the View menu. Or use keyboard shortcuts, hold Alt or Command and press + to zoom in, Alt or Command and press - to zoom out.
8. Eraser
Define
The Eraser tool is similar to the Brush tool, you can change the size and hardness of the eraser to achieve various effects like blurring and blending. The Background Eraser uses different colors to help you erase unwanted background areas in your photo.
The eraser is one of the most useful tools in Photoshop. But you have never used an eraser like the one below.
Location
On the left toolbar.
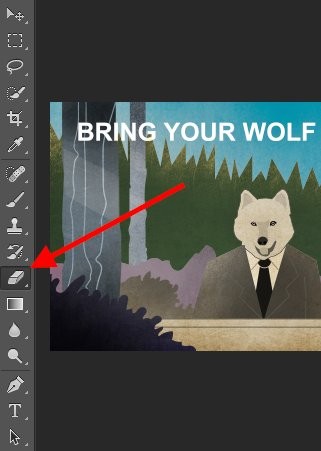
Using Basic Eraser
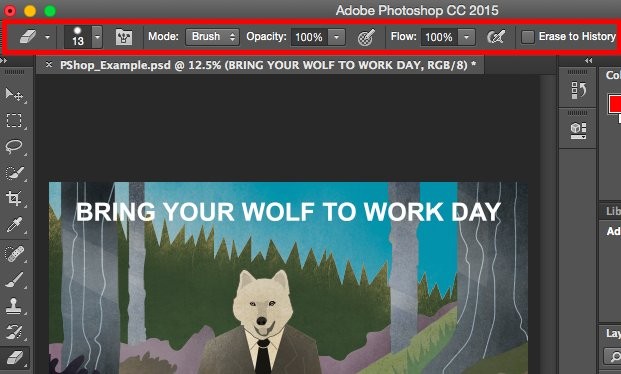
When you click on the eraser icon, all the options will appear at the top of the screen. There are customizations like changing the eraser size, hardness, etc.
Like most other tools in Photoshop, the eraser only works on a specific layer. Before using this tool, make sure you have selected the layer you want to erase.
Using Background Eraser
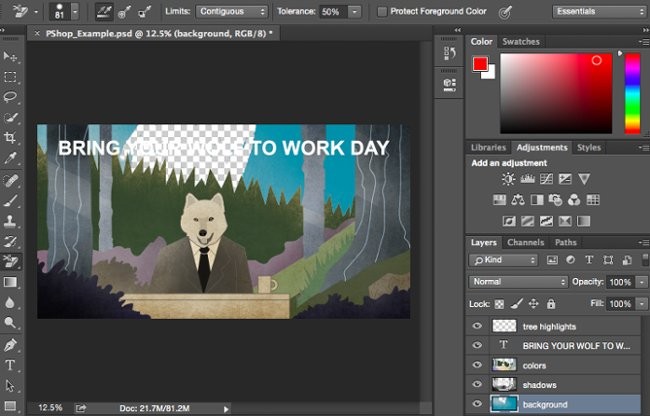
This tool is quite time saving. You can see how easy it is to remove the background color of the image. It is quite useful to hide objects with transparent background.
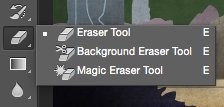
To use the background eraser tool, select and hold the eraser icon until the side menu appears. Select Background Eraser .
Now are you ready to erase something? Adjust the Background Eraser size, and select the color you want to erase from the selected layer. Make sure you select the correct layer.
Tips
Don't be afraid to use the Background Eraser's huge eraser. It will erase specific colors from your image, not colors that aren't selected.
9. Crop Tool
Define
The Crop tool lets you crop images. It basically works like any other crop tool you've used before: Locate and cut out.
I know this is a basic tool but you will need to use it as often as any other tool in Photoshop, especially when you have just finished editing and need to remove excess around the corners.
Location
Like the other tools, it is located on the toolbar on the left.
Using Crop Tool
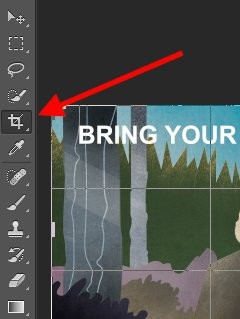
Select the Crop icon on the side toolbar and move the frame to the location you want to remove it. To adjust the crop frame, simply click and drag the corners and edges of the frame.
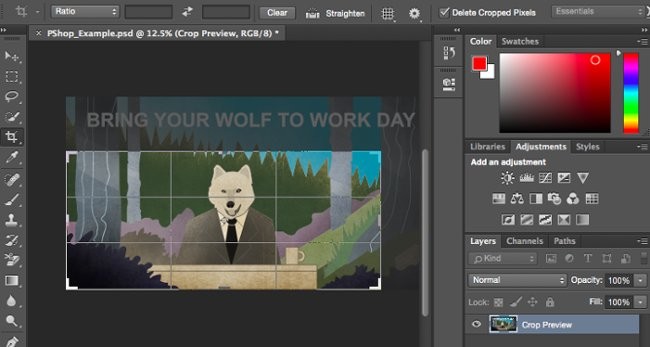
Tip: You can make the design canvas wider so you can move the necessary design elements around, then use the Crop tool to bring them back to a reasonable size.
10. The Fill Tool
Define
The Fill tool, formerly the Paint Bucket tool, fills the entire area you select with color. Great for backgrounds or large fill areas. Can also be used for patterned backgrounds. The Gradient tool in the Fill tool creates a fading effect for the selected color.
Location
On the main menu, select Layer > New Fill Layer . From there, you have the options of "Solid Color", "Gradient", or "Pattern" .
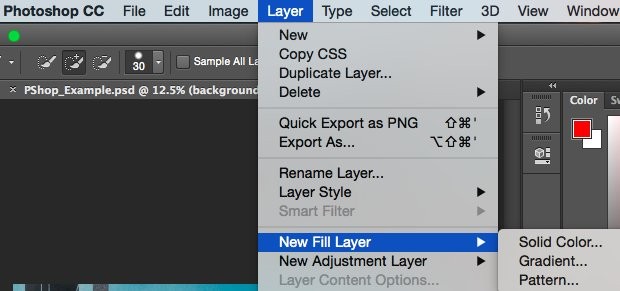
Color Fill
First, select the layer you want to fill with color. Then, from the main menu, select Layer > New Fill Layer > Solid Color … Next, the New Layer window will open, enter a layer name. Don’t worry about choosing a color at this point, this step is simply to name the layer. Once you’ve named it, select OK .
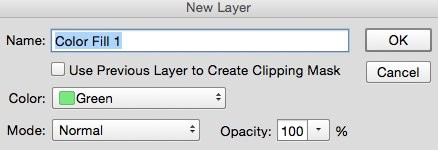
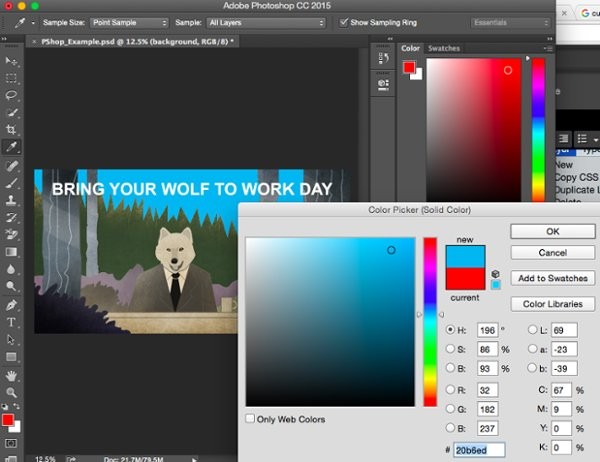
Next, the Color Picker window appears. Here, you can select the color you want to fill. From there, select the background layer to fill with color, the default color selected in the Color Picker is blue.
Texture for photos
You can also design your own patterns if you have the time and passion or download free patterns available on Google search.
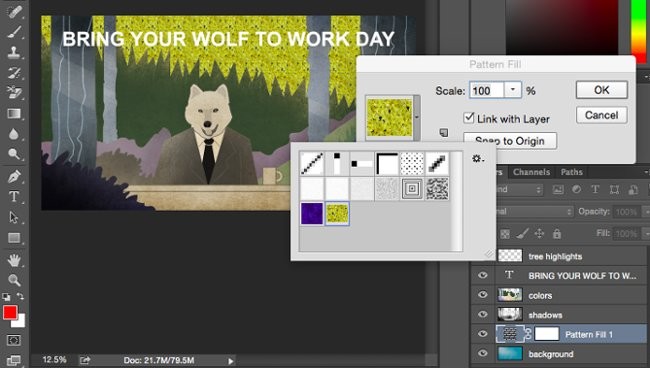
First, select the layer you want to fill with color. Then, from the main menu, select Layer > New Fill Layer > Pattern... Next, the New Layer window will open, enter a layer name. Don't worry about choosing a color at this point, this step is simply to name the layer. Once you've named it, select OK .
Next, the Pattern Fill window appears. Here, you can choose the pattern. From there, select the background layer to fill with color, the selected color will replace the blue background.
Using Gradient Fill
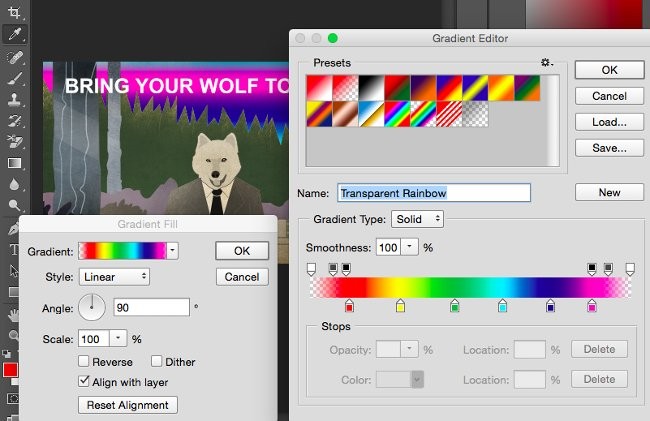
First, select the layer you want to fill with color. Then, from the main menu, select Layer > New Fill Layer > Gradient... Next, the New Layer window will open, enter a layer name. Don't worry about choosing a color at this point, this step is simply to name the layer. Once you've named it, select OK .
Next, the "Gradient Fill" window appears. Try playing with the options in the window. To choose a different gradient, right-click on the default gradient to open the Gradient Editor, as shown below:
11. The Eyedropper
Define
This compact tool allows you to extract or use any color from an image on Photoshop.
Location
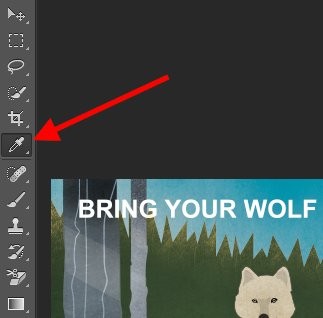
Located on the left toolbar.
Using Eyedropper
Select the icon on the side toolbar. Next, identify the color you want to extract, and click on the copy area.
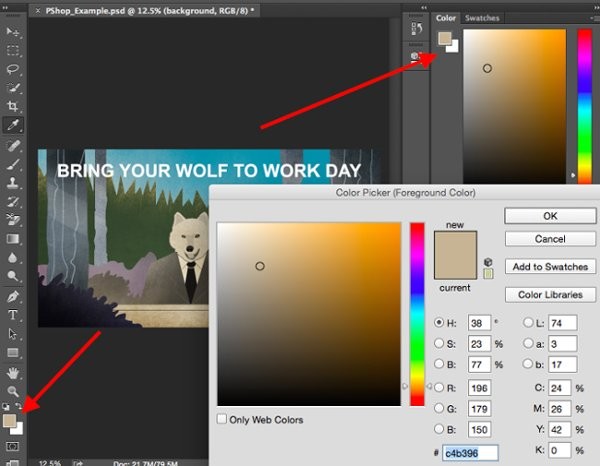
Once you've extracted a color, you'll see it represented both in the color module at the top right of your screen and the side menu bar. You can double-click the color box to open the advanced color.
12. Blending Options
Define
The Blending customization includes a number of interface and graphics editing features. For example, you can use the "Outer Glow" effect to make your text appear to glow. Or, you can use the "Drop Shadow" effect to add shadows to your text. Take some time to explore the layer effects and find your favorites.
Location
From the main toolbar, select Layer > Layer Style > Blending Options... You can double-click any layer to open the customizations for that particular layer.
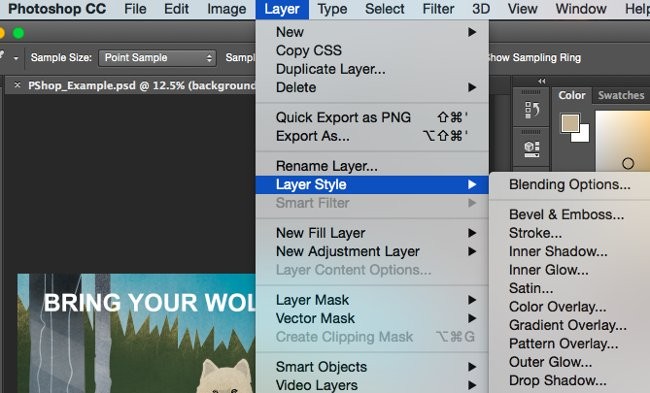
Using Blending Options
First, select the layer you want to use for blending. Next, open the blending options and select the object you want to use. With the available options, you can have a huge number of effects to complete the image. There are many interesting things about each layer, image and text. Look at the image below:
For example, edit the text layer and choose "Bevel & Emboss". Looks nice, right?

* Online courses are one of the best ways to learn Photoshop
Online courses are one of the most effective ways to learn Photoshop, as they are often taught by professionals who are either certified by companies or have spent their entire lives learning the program and want to pass on their knowledge online.
There are many courses, both free and paid, that cover all the program's functions clearly and concisely, aimed at all levels of users. You can find basic courses for beginners, as well as advanced courses for professional users.
The best thing about online courses is that you can get all the information about Photoshop or specialize in a specific technique or tool, for example, from learning how to use brushes to color manipulation and filters. If there is a feature in Photoshop, there is definitely a course that teaches how to use it. Some of the most recommended resources for learning how to use Photoshop are:
I’m not saying you’ll be a Photoshop wizard right away. And that’s not my goal with this tutorial. I just hope I’ve given you the knowledge you need to use Photoshop’s useful features effectively and save you time.
Adobe offers a variety of tools, Photoshop and Photoshop Elements are two options that have very similar features.
Explore the features of Adobe Photoshop Express, a free photo editing tool that allows users to enhance their images easily and effectively. Discover tips for photo editing with Adobe Photoshop Express today!
Instructions for using Photoshop filters for beginners, Each filter in Photoshop has its own algorithm and uses. Below are instructions for using the internal filter
How to change screen mode in Photoshop, You can change the Adobe Photoshop interface according to working style or screen size. And switch screen mode
3 ways to edit sunset in Photoshop, Sunset is always a scene that every photographer wants to capture. However, taking sunset photos is not easy. Wear
Shadows are a common problem when taking photos. How to delete them the easiest way? Join us to find out how to remove the shady shadow image effect offline!
You can insert links into images or text in Adobe Photoshop or Illustrator with the simple steps following the instructions in the following article.
The word "Glyph" comes from the Greek word, "carved", outside the basic alphabet. Glyph can be currency symbols, copyright marks, & ... You are free to create them in Adobe Photoshop CC.
The more you work on your computer, the hotter your CPU (processor) gets, especially when you’re gaming or doing heavy video editing. Your CPU is more susceptible to overheating if it has poor ventilation or if the thermal paste on the chip has worn off. However, there is a process that can help you reduce your processor’s temperature called “undervolting.”
The need to print double-sided paper is now much more popular. However, not all printers can support double-sided printing, or with printers that allow double-sided printing, how to do it?
The Resume feature in Windows 11 lets you open a OneDrive file on your phone and continue working on your computer through your 1 Microsoft account.
Many things in the iPhone Photos app display a slideshow at the top to view all your photos as a movie. Here's how to turn off automatic slideshows in iPhone Photos.
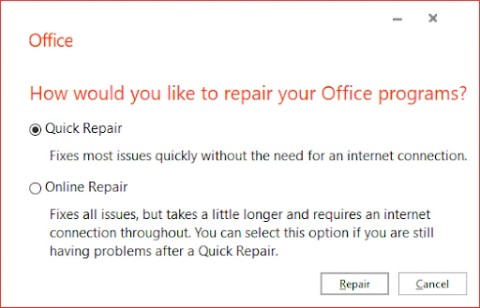
Outlook also has its share of issues. One in particular, Outlook error 0x800CCC0E, can be frustrating and difficult to fix. Outlook error 0x800CCC0E is a common problem for Outlook users.
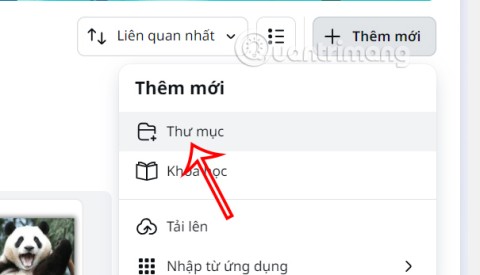
Creating folders in Canva helps us organize uploaded designs and files much more neatly and scientifically.
Now we can save songs from Instagram Reels to Spotify very simply without having to do too many manual operations, like finding songs on Spotify anymore.
When you create a list on the Reminders app, you can share it with others so they can read it together, such as sharing among family members.
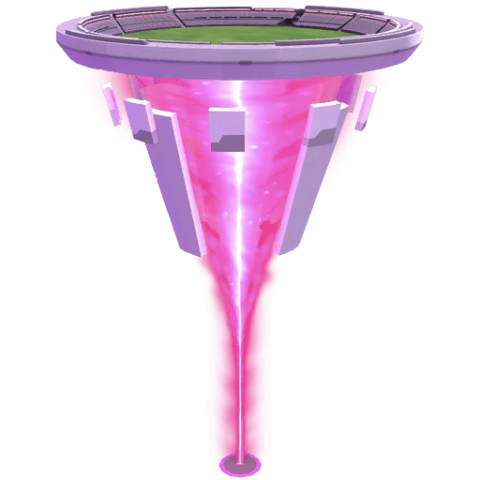
The exciting new Dynamax feature is here in Pokémon GO. Here's what you need to know about how to Dynamax and Max in Pokémon Go.
Weibo social network also has the same setting options as other social networking applications such as changing Weibo account password or changing account name to a new name you like.
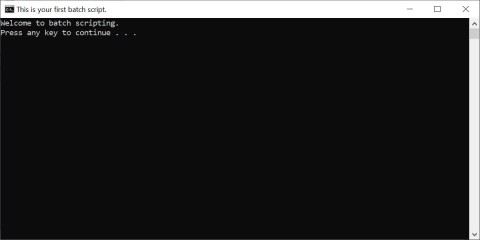
Batch files are a way for computer users to get work done. They can automate everyday tasks, shorten the time it takes to do something, and turn a complex process into something anyone can operate.
With the instructions in the article you can download and install Minecraft for free on iPhone/iPad
There are many different ways to change the default PDF reader on Windows 10, helping you get the PDF reader on your computer as you like through PDF reading software or even reading PDF files using a browser.
The Shortcuts app on iPhone has a shortcut to convert videos to GIFs with very simple operations.
Numerology reveals exactly what's in your name. From destiny to soul path, here's how to calculate your numerology chart based on your name.

