Create digital paintings with Krita

Krita is a free and open source painting software popular among the world's top artists. Join us to learn about the process of popular digital painting on Krita.
Krita is not only a great digital painting software, but also helps you paint beautiful works. This article will show you some painting techniques when using Krita.
For comfortable painting, it's best to take advantage of Krita 's Layer Stack . It is one of the features that makes digital painting super convenient.
In traditional painting, it's not uncommon to draw a scene in front of a main subject or draw a line before coloring. Drawing pictures on the computer is similar.
In programming, if you ask the computer to draw the red circle, then the smaller yellow circle, you will see the yellow one overlap the red. In return, you will no longer see the yellow circle because it is drawn before red so it will be "behind" it. This is the basic "painting order".
Like traditional art, computers first draw pictures first, so that they can drill down into details, place objects and foreground on it. Layer docker is how you control the order of drawing multiple images. For example, you can draw lines after coloring to make them easier to adjust. In addition, Layer Stack can help you blend colors of different layers through Blending mode, apply filters or masks to create transparent parts.
Place a new layer below the painting layer (drag & drop or use the up / down arrows), then paint on it.

At first, you will not see any change due to the white color is not transparent. Want your work to really stand out? That's why we need to color the picture. Here are some methods of coloring pictures with Krita with different advantages and disadvantages.
Normally, if you want to paint in black and white, you can set the layer blending mode to Multiply. Do this by selecting the layer and going to the drop down menu, clicking Normal , and then selecting Multiply .

However, Multiply is not the perfect solution. For example, if you use some photo editing tools on paintings with blue strokes, you will get the following result:

This is because Krita applies true Multiply, literally "multiplying" colors.
First, it takes the RGB channel values, then divides them to the maximum. This process is called "standardization." Next, it multiplies the normalized values. Then take the result, then multiply it by 255 again to get the final value. Many artists apply this effect when they want to add a little "glow" to their colors.
| Pink | Standard pink | Green Blue | Standard blue | Standardized & multiplied | Result | |
| Red | 222 | 0.8705 | 92 | 0.3607 | 0.3139 | 80 |
| Green | 222 | 0.5647 | 176 | 0.6902 | 0.3897 | 99 |
| Green | 123 | 0.5647 | 215 | 0.8431 | 0.4066 | 103 |
Pros: Easy to implement, can be used even on colored lines by softening lines while preserving the necessary contrast.
Cons : The background is not completely transparent, only adding a bit of fun to the color lines.
The second method is to make it really transparent. In other software, you can do this via the Channel docker, but Krita doesn't allow customizing the channels. Instead, it uses Selection Masks to contain customization options.
1. Duplicate the layer that contains the painting.
2. Convert the copy into a selection mask layer. Click ![]() on the layer, then press Convert ‣ to Selection Mask .
on the layer, then press Convert ‣ to Selection Mask .

3. Invert the selection mask: Select ‣ Invert Selection .
4. Create a new layer and click Edit ‣ Fill with Foreground Color .

Pros : The background layer is really transparent.
Cons : Does not apply to colored works.
This is a simpler solution than the above.
1. Create a filled layer below the layer containing the painting.

2. Convert layer containing transparent layer painting: Click ![]() layer> Convert ‣ to Transparency Mask .
layer> Convert ‣ to Transparency Mask .

3. Invert the transparent mask by going to Filter ‣ Adjust ‣ Invert .

Pros : The background layer is really transparent. You can also freely draw textures on the overlay layer without overlaying the transparency.
Cons : Not applicable on colored lines.
This is the fastest way to clarify lines in a picture. Select the line art layer and apply color to the alpha filter: Filter ‣ Colors ‣ Color to Alpha . The default value is consistent with the line art picture.

Pros: The background is completely transparent. Apply well to painted line art because it specializes in whitening.
Cons : You must lock the transparent layer or separate alpha by right-clicking the menu if you want to color it easily.
There are many different ways to color a layer. For example, you can color everything manually. Despite its high accuracy, this method takes a lot of work. Instead, you can choose another solution.
In most cases, the Fill Tool cannot aliasing (soften edges in line art to make it smoother when zoomed in). Using Krita, you have two options for zooming in and out.
The threshold determines when the Fill tool uses a different color pixel as a border and uses Feather to add a soft border when painting.
Now, if you click on the part where there is no gap in the image with the color you want (remember 1.0 for opacity), depending on the line art, you can fill it quite quickly. However, setting a low threshold may generate small details around the intersection.

However, setting a high threshold may prevent you from recognizing some light colored lines. Meanwhile, you can completely erase that small strange detail easily with a brush.
Pros : Quick performance depending on available settings.
Cons : Not suitable for rich detailed paintings.

As the name implies, this way you will use the selection tool. For example, with the Path Selection Tool, you can select the curve area and with Shift+ ![]() (not
(not ![]() +
+ Shift). You can easily add to the current selection.

You can also edit the selection if the Select ‣ Show Global Selection Mask is enabled . Then select the whole overlay and paint over it. (The example above uses an alternate mode, enabled in the lower left corner of the status bar.)
When done, select the color you want to paint and press Shift+ spacebar.

You can save selections in Selections mask layers by clicking ![]() the layer, then Add Add Local Selection . First, you need to deactivate an option by clicking on the circle before adding a new option. You can use this method to separate different parts of an image, especially useful for professional painters.
the layer, then Add Add Local Selection . First, you need to deactivate an option by clicking on the circle before adding a new option. You can use this method to separate different parts of an image, especially useful for professional painters.

Pros: More accurate color gradation.
Cons: Color preview is not easy.
In Krita, you have a tool to create a rectangle or circle. It is a tool for bezier curves. Select the Path Tool and set the tool options to fill = foreground and outline = none. Make sure you set the opacity to 1.00 (complete blur).
By clicking and holding the mouse button, you can affect the curve drawn with the Path Tool. Use the mouse button to confirm the action, then you're free to draw the next point.

You can also use geometry tools to erase points by pressing Eor erasing button.

Pros : Faster than brushes or Selections, suitable for line art with gaps.
Cons : Not easy to fill the small details. In this case, you should use a brush to color them.
Follow these instructions to use Krita's Colorize Mask feature:

When you're satisfied, click ![]() on that color overlay and go to Convert ‣ Paint Layer . This will turn the adjustment layer mask into a layer. You can then fix the latest error by applying 1/2 transparency to the lines and filling the hole with a pixel brush.
on that color overlay and go to Convert ‣ Paint Layer . This will turn the adjustment layer mask into a layer. You can then fix the latest error by applying 1/2 transparency to the lines and filling the hole with a pixel brush.

Once done, split the layer to Layer ‣ Split ‣ Split Layer. Here, Krita offers a number of options, but just do as the picture looks good.

Finally, click OK . Each color applies on a different layer, named according to the palette in the menu and locked alpha. Thanks to that, you can draw immediately.

Advantages : Handling with line art works does not remove the teeth. Quickly complete basic painting jobs. Can automatically fill in gaps.
Cons : Not self-aliasing. You have to choose between getting the details right or automatically filling in the gaps.
Above is a guide to coloring pictures with Krita . Hope the article is helpful to you.
Krita is a free and open source painting software popular among the world's top artists. Join us to learn about the process of popular digital painting on Krita.
Krita is an excellent photo editing software, not inferior to Photoshop. This article will show you how to create clipping masks and inherit alpha channels in Krita.
When troubleshooting network issues, you will need to look for your computer's WiFi drivers. If you determine that an invalid driver is causing your network issues, you can reinstall the WiFi driver to fix the problem.
Microsoft first started pushing the idea of an AI-powered Windows in 2024 under the name of the New Era of Work - but what is Windows 11 AI? It's a complex mix of innovations and includes AI-powered PCs, built-in Copilot, and Windows AI Studio.
Windows 11 computers will be transformed into macOS interface to become more novel.
Not long ago, Microsoft stopped providing support for Windows 10 version 21H2, which means version 22H2 becomes the only supported Windows 10 release at the moment.
Sometimes you may get the error message “No Audio Output Device Is Installed” when hovering over the sound icon. This error occurs when Windows does not detect your connected audio devices.
How to completely disable Windows Defender on Windows 10? There are several ways to disable Windows Defender on Windows 10, please see the detailed instructions below.
Paint 3D is no longer available in the Microsoft Store, but that doesn't mean you won't have another chance to try it out.
In the Windows 11 Photos app, Restyle Image is an AI feature that lets you transform photos into various artistic styles with just a quick click.
By checking the MD5, SHA-1, or SHA-256 checksum of a file, you can verify the integrity of the file and ensure that it has not been corrupted or changed.
Locking your Windows PC is the best way to protect your computer when you're away. Here are 10 ways you can quickly lock your computer when you're in a hurry to leave it alone!
When you move the mouse to the Taskbar, it displays all the functions as default when you have not set it up, but if you move the mouse elsewhere, the Taskbar will automatically hide.
There are still ways to bypass a Microsoft account when setting up Windows 11 with a local account during the Out-of-box Experience (OOBE).
After successfully installing the Google Gemini application, you can use it as usual. Below are instructions for installing the Google Gemini application on your computer.
Setting a computer password will help secure your computer better. In addition to setting a new password for your computer, Quantrimang.com will also guide you on how to change your Windows 10 computer password. Please follow along.
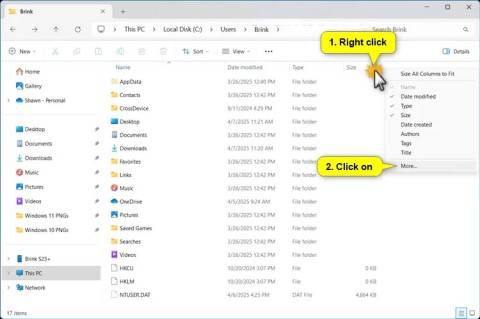
This tutorial will show you how to rearrange columns for a folder (directory) when in details view in File Explorer for a personal account in Windows 11 and Windows 10.

