What is Nearpod?
Nearpod is a completely free teaching tool. The use of Nearpod in the classroom allows increased interaction between teachers and students and between students and students. Using this app, students can write – draw – discuss – answer multiple choice or submit assignments to the teacher and get instant feedback. More interestingly, it allows teachers to use all their available resources from websites, Powerpoint, videos... Teachers can completely embed existing data directly into this website without having to reformat.
To use Nearpro, teachers need to create an account at the website: http://nearpod.com/
User manual
1, Login and register
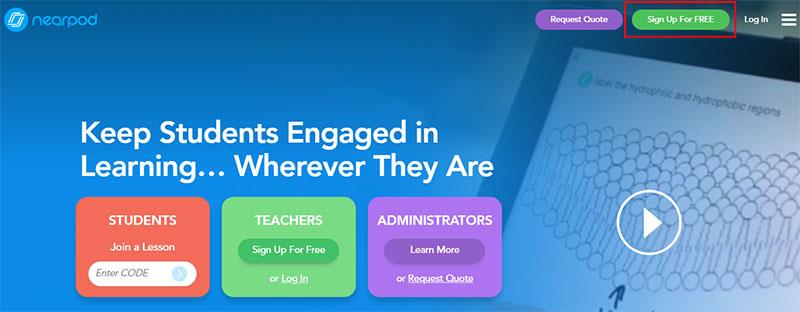
Teachers visit http://nearpod.com
Here, teachers click Sign Up for free to register or Log In to log in. Here I will create a new tutorial for beginners.
At the registration interface, the teacher enters the information that the system requires.
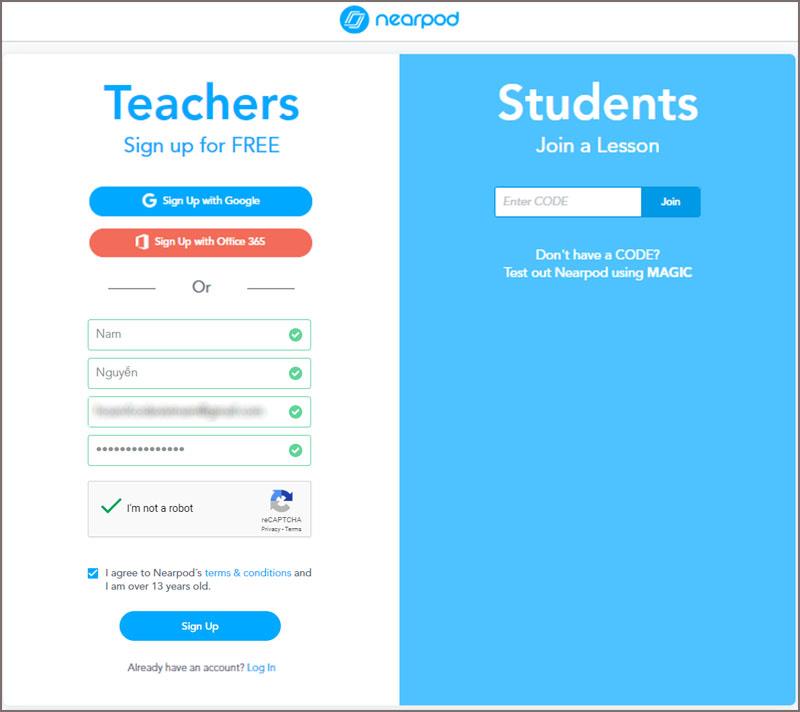
Teachers can also use Gmail or Office 365 accounts to register.
For students, just the code provided by the teacher to enter the class, no need to register
After successful registration, the teacher will see the interface as below.
2. Some functions of Nearpod
- My library: Teacher's library
- Report: Report
- Teacher resources, Q&A and news from Nearpod
- Create a space for discussion and collaboration
- Create tests, assessments
- Create a reminder alarm
- Create a new lesson from Nearpod, Googleslide or create a Folder.
- Explore lesson templates that are available on the Nearpod system and can be reused
- Create a new lesson
3. Create a new lecture
3.1. Create a template lesson
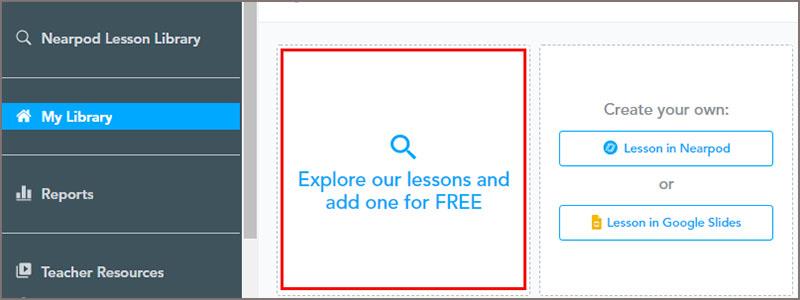
Step 1: Teachers click Explore our lessons and add one for FREE (feature number 8 above marked)
Step 2: Choose the topic of the lesson that the teacher wants to use
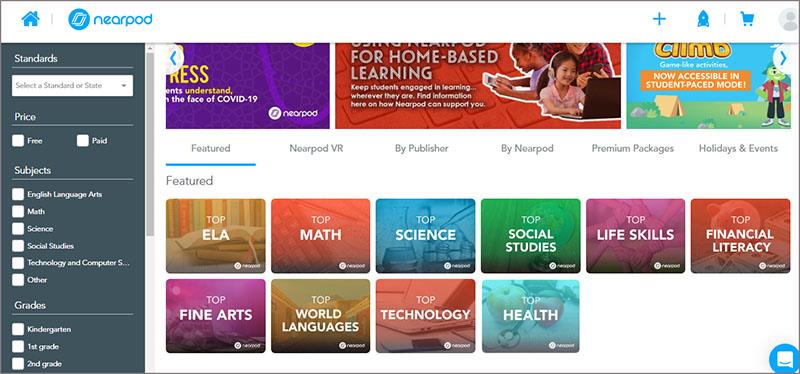
Step 3: The teacher continues to choose the sample lesson to use
Or teachers can choose quickly by clicking on the checkbooks on the left side of the screen (click on the topics and class objects that teachers need to refer to).
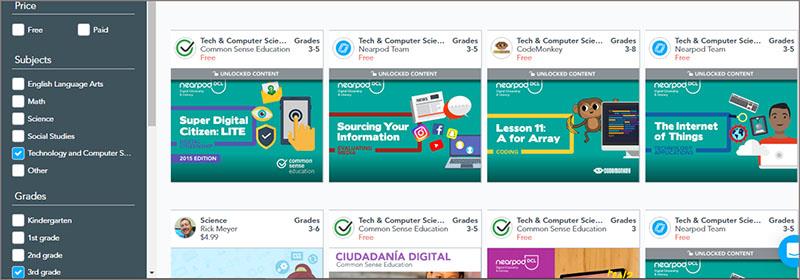
Here teachers will see both paid and free lectures, please choose according to your needs.
Step 4: After selecting, the teacher clicks select. Add to My Library to download your teacher's library
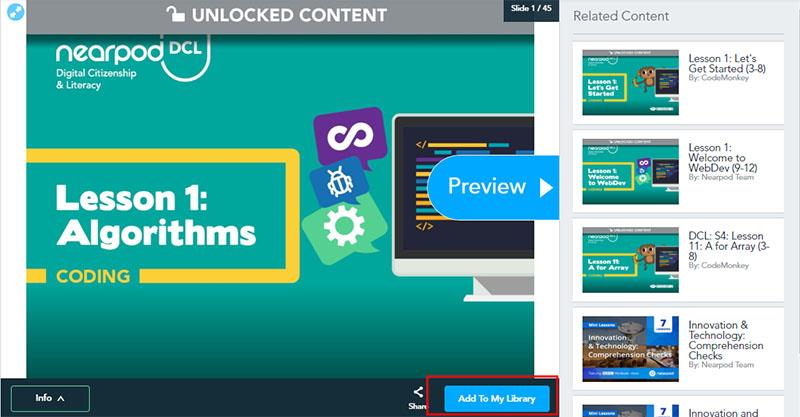
Next, the teacher clicks Show in My Library
Step 5: Teachers click Edit  to edit
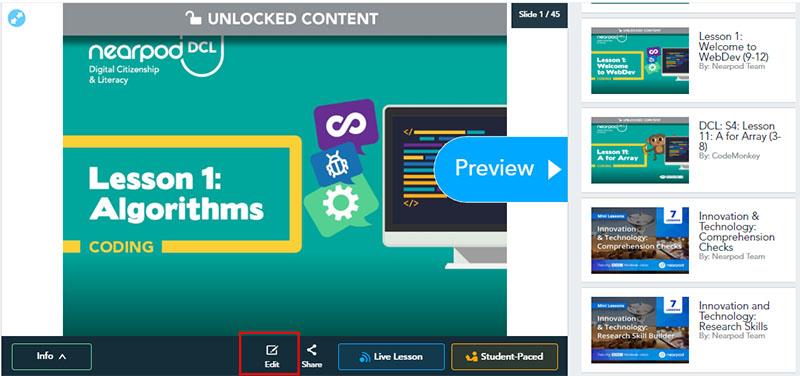
Here teachers can edit directly or create a copy from this template.
Step 6: Save or share
After editing, teachers can preview and then click Save and Exit to save or Share to share

3.2. Create a new lesson
At the teacher's interface, choose Lesson in Nearpod or you can create a slide from Google App (this is something you're familiar with, then I won't guide you anymore).
Step 1: The teacher chooses Lesson in Nearpod
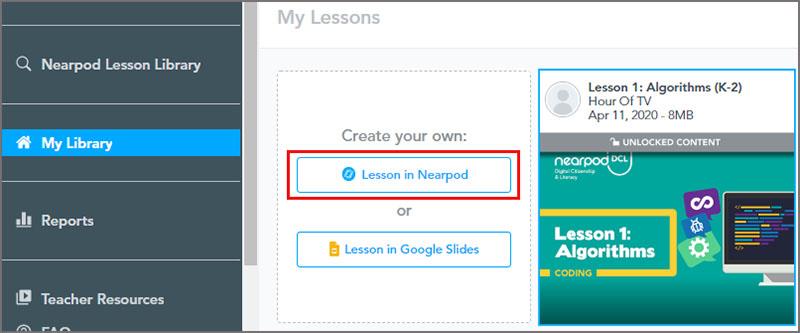
Then select Add Slide to create more Slides or you can upload or drag and drop PDF, PNG or PPT files into the Lesson frame. In this tutorial we choose Add Slide
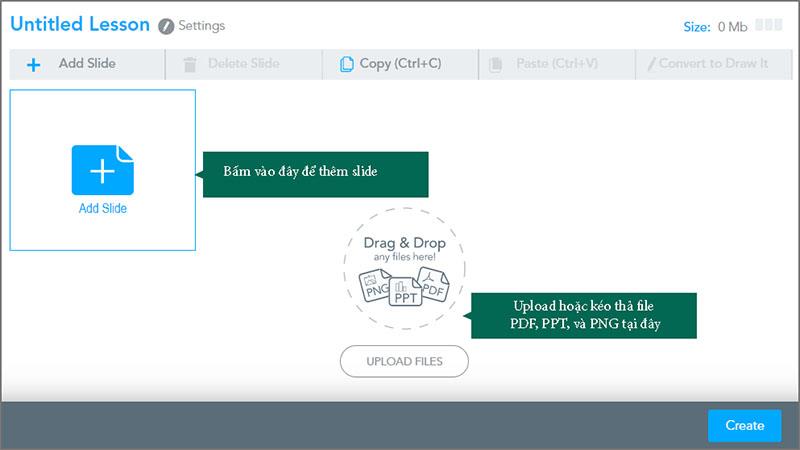
Then the teacher will see 3 options appear.
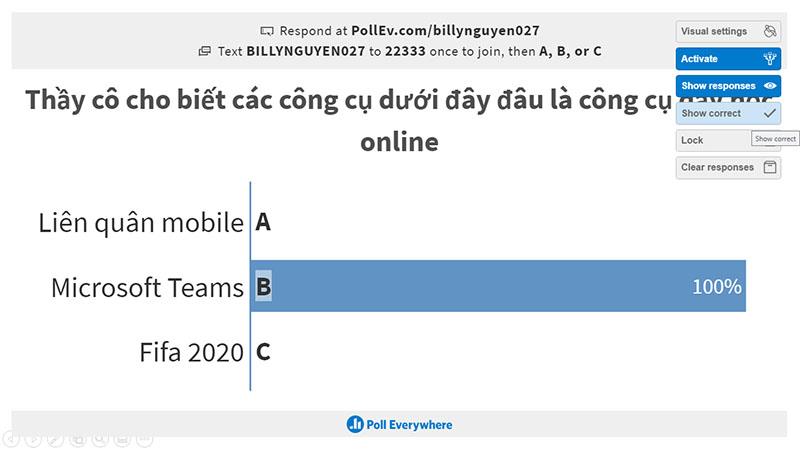
- Add Content: Add content to Slide
- Add Web: Add content from a website link
- Add Activity: Add activities, games directly on Slide
Step 2: Choose a content type
2.1. Select Add Content
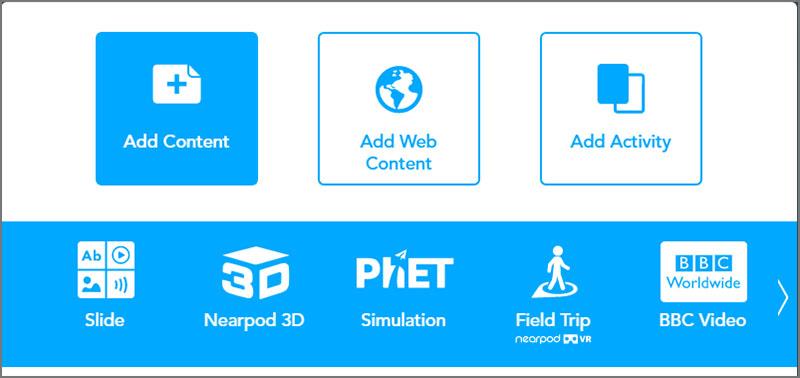
Here teachers can choose from many types of content such as Slide, Nearpod 3D, Simulation from Phet, Field Trip, BBC Video, Sway, Slide, PDF, Vidoe, Audio, Twitter...
2.2. Select Add Web Content
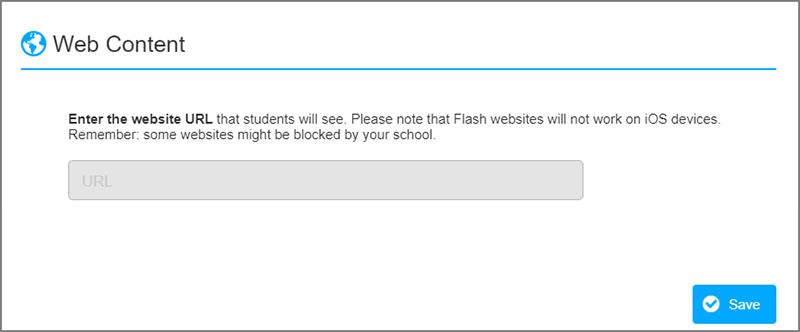
You just need to copy the URL of the website you want and paste it here -> Save
2.3. Select Add Activity
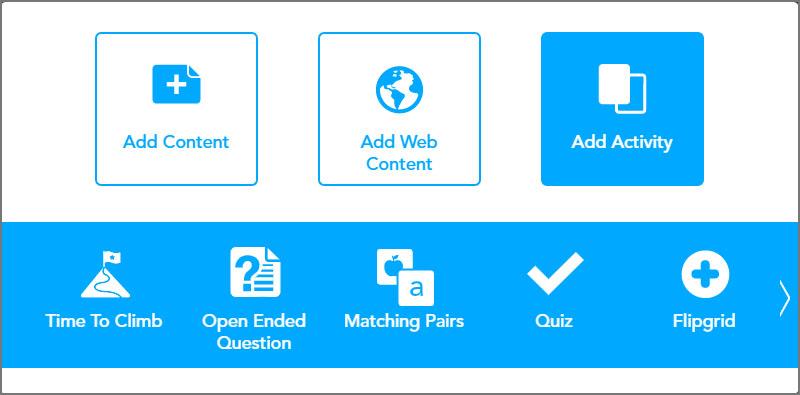
Here teachers can choose (Teachers discover by themselves based on suggestions)
- Time to Climb: Timed multiple choice
- Open Ended Question: Open Ended Question:
- Matching Pairs: Matching, pairing game.
- Quiz: Multiple choice format.
- Flipgrid: Insert link from Flipgrid
- Draw it: draw on the board.
- Collaborate: Discuss, collaborate.
- Poll: Survey poll
- Fill in the blanks: Fill in the blanks
- Test memory: Test memory.
4. Use and show

Click to select Live Lesson for presentation (Teachers can monitor student progress by clicking Student Paced )
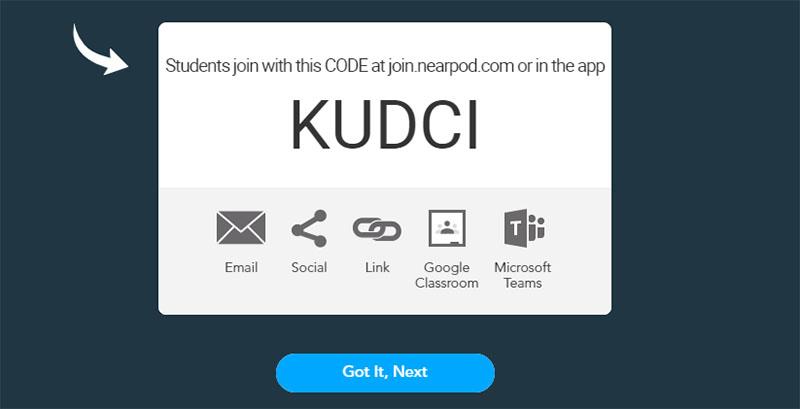
Teachers share this code with students. Students can Join lessons using Nearpod.com or App
Click Got It Next and wait for students to enter the lesson and then start.
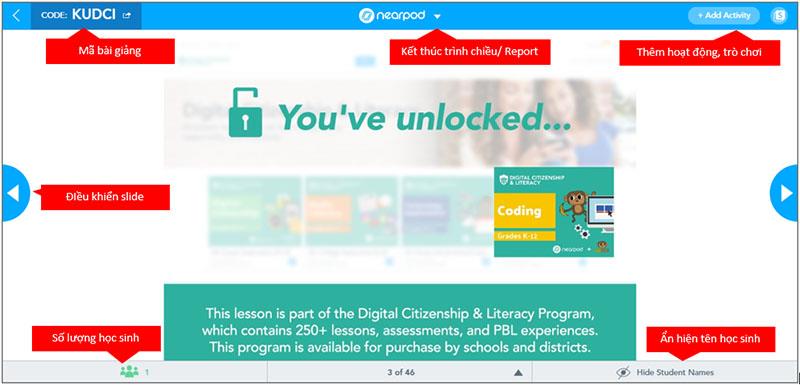
So we have basically completed the necessary operations when using Nearpod. Teachers, let's explore more great features inside this tool to make your lessons lively and professional.
Teachers who want to download the document to use can download it here
Good luck teachers.
Explore more:
>> Creating interactive videos with Microsoft Stream is simple
>> Padlet User Manual
>> Edmodo User Manual


 to edit


