Enable Multilingual Spell Check in Collabora Online CODE

Configure CODE Docker dictionaries and tag document passages correctly so English, French, and other supported languages receive the right spell-checking.
Canon LBP 1210 printer is quite popular on the market today, with fast print speed, short U-shaped paper path, no paper jam like other printers.
However, many people do not know how to install the Canon LBP 1210 printer on a computer to be able to print documents. So invite you to follow the article below of Download.com.vn.
Step 1: Download Canon LBP 1210 Driver to install on the computer. You can download the version for Windows XP and Windows 7. Note: The Windows 7 version can be installed for both Windows Vista and Windows 8.
Step 2: Extract the installer to drive C or D on the computer. Then, plug in the power and then start the printer, checking that the printer is working properly. Next, connect the printer cable to the computer.
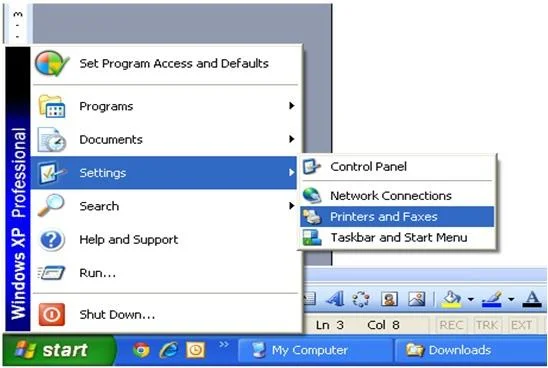
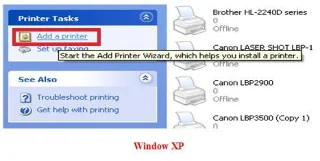
Step 3: On a Windows XP computer, click the Start button > Setting> Printer and Faxes .
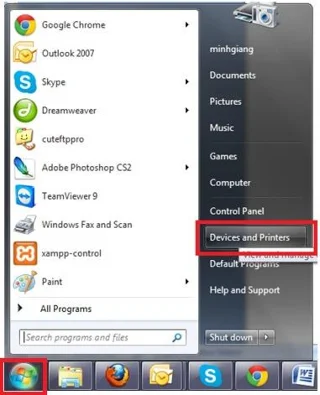
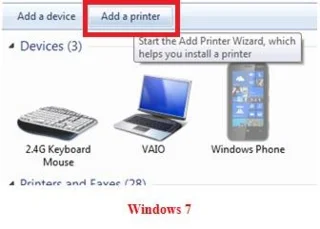
On a Windows 7 computer, click the Start icon in the bottom left corner of the screen, select Devices and Printers.
Step 4: Click Add a printer in the left menu for Windows XP, and above for Windows 7 to add a new printer.
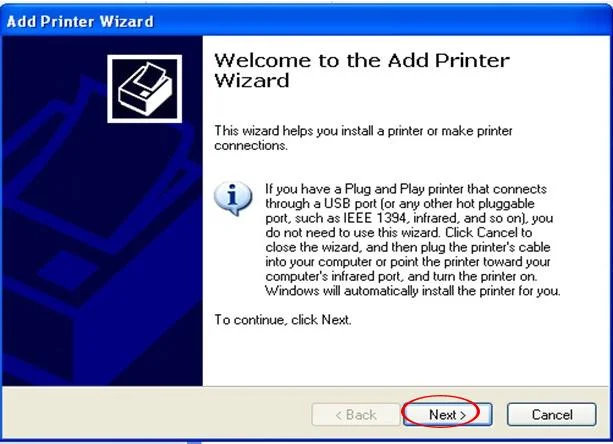
Step 5: Immediately, the Add Printer Wizard window appears , click Next to continue.
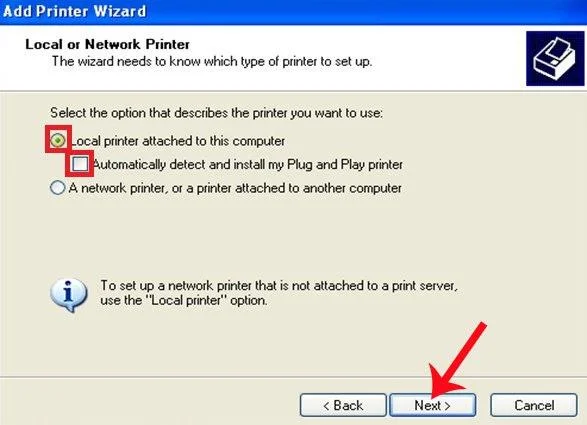
Step 6: Next, check the option Local printer attached to this computer and uncheck the Automatically detect and install my Plug and Play printer option, then click Next.
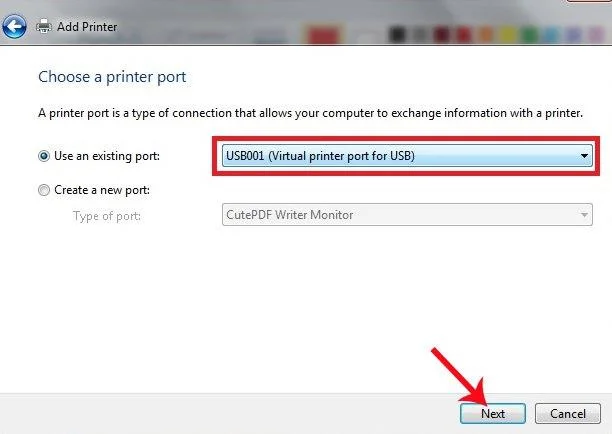
Step 7: In the Choose a printer port interface , select the Use an existing port box and select USB001 (Virtual printer port for USB) , then click Next.
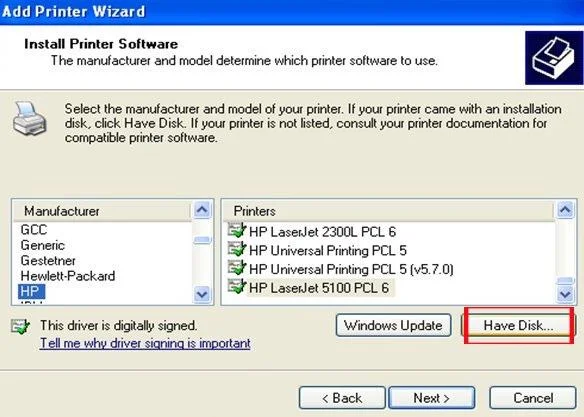
Step 8: Click the Have Disk button below.
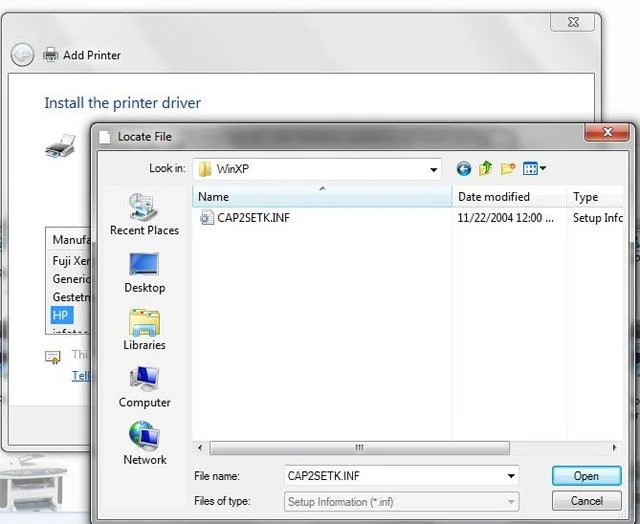
Step 9: For a Windows XP computer, navigate to the Canon LBP 1210 installation folder on the computer, and then select WinXP.
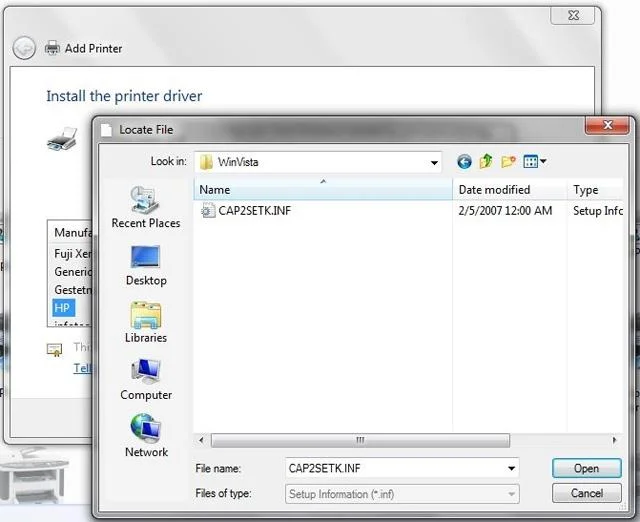
For a Windows 7 computer, navigate to the Canon LBP 1210 installation folder, and then select WinVista.
Step 10: Proceed to test how to see it, in the Name section select Canon LPB121 printer , then click OK to print.
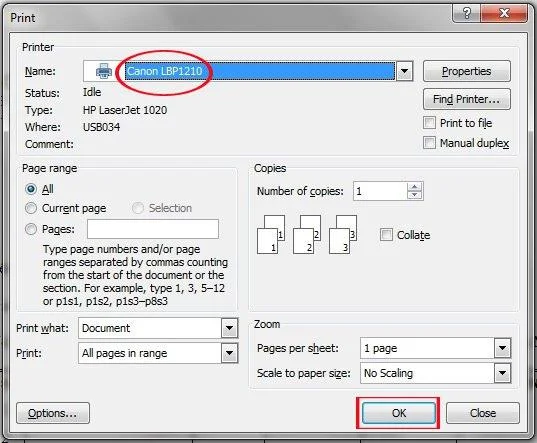
So you have successfully installed the Canon LBP 1210 printer. Print any document you want now, at speeds of up to 21 pages per minute for A4 paper size.
I wish you successful implementation!
Configure CODE Docker dictionaries and tag document passages correctly so English, French, and other supported languages receive the right spell-checking.
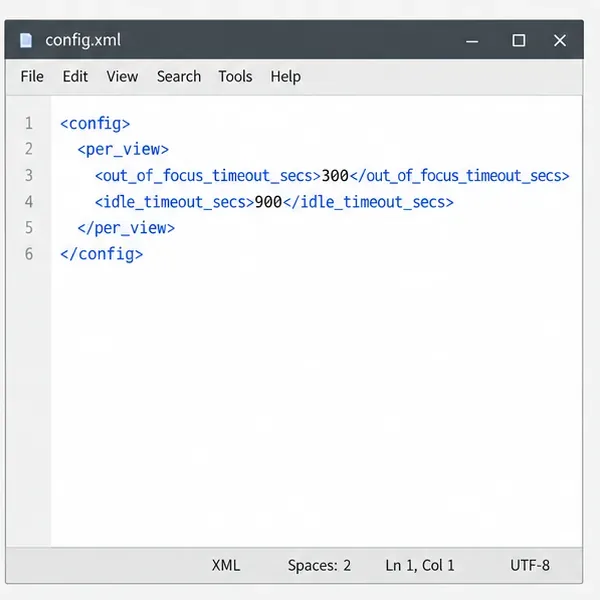
Adjust the per-view inactivity threshold in coolwsd and distinguish it from background-tab dimming, document unloading, autosave, and login expiration.
Stop scheduled CODE update checks, review optional remote services, and use outbound network controls without breaking document editing.
Enable secure document editing in Seafile by configuring Collabora’s discovery URL, HTTPS, and WOPI access for your deployment.
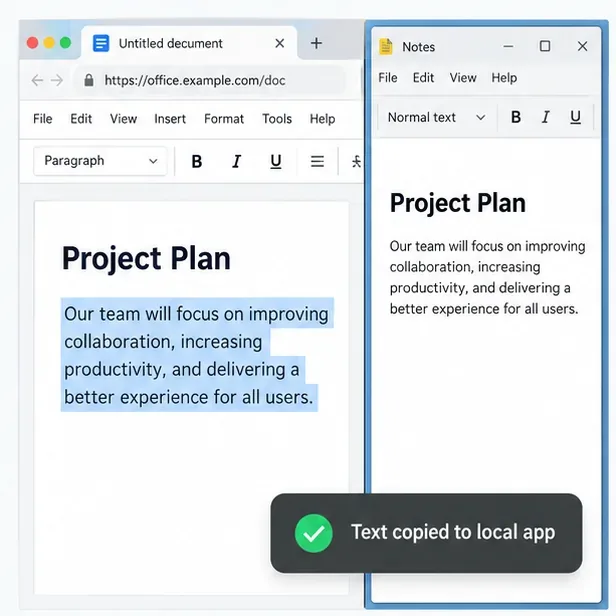
Test the system clipboard, adjust browser permissions, and identify when an embedded Collabora integration needs an iframe policy change.
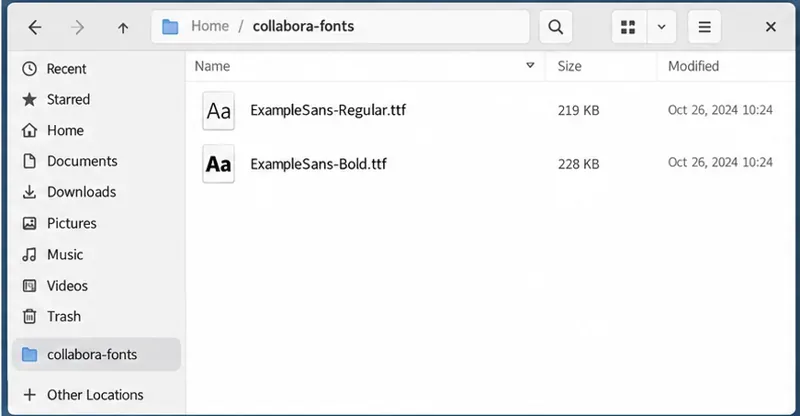
Mount font files into Docker and Collabora’s systemplate so custom typefaces appear in the editor and render correctly in documents.
Back up coolwsd.xml and its deployment sources, restore them safely, and verify CODE before users return to editing.
Allow the exact Nextcloud or other WOPI origin in CODE, then verify the active host allow-list and distinguish it from Nextcloud’s source-IP restriction.
Trace Collabora’s browser, WOPI, and WebSocket connections to find why a document will not open, then apply the fix that matches your Nextcloud setup.
Deploy Collabora CODE replicas with Helm, keep each document on one pod through WOPI affinity, and verify ingress, node placement, and Nextcloud editing.