How to see which apps use a lot of battery on iPhone
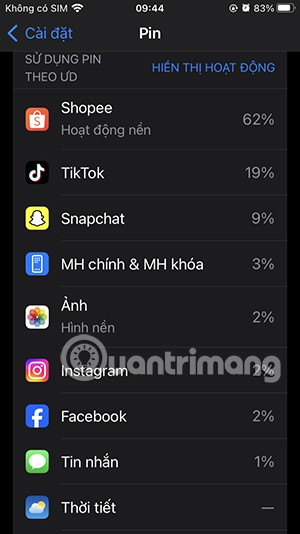
iPhone lists the full battery usage of applications, helping you know which applications use a lot of battery on your iPhone.
To create different Headers and Footers on Word, users need to break the Word document page , separate the pages to create different Headers and Footers so that the parts are not related to each other. We can change the title between each page in Word or even change the different titles between pages in Word page numbering style symmetrically according to the document format. Below are instructions for creating different Headers and Footers on Word.
Create different Headers and Footers on Word 2019 and above
Step 1:
First we need to create page breaks between the sections we want to create different Headers and Footers.
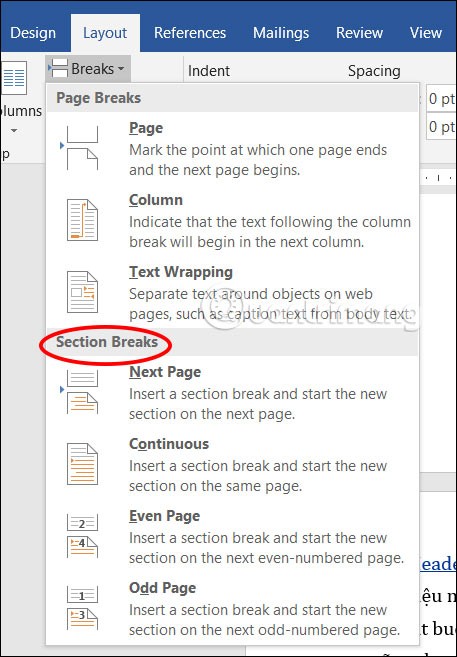
Open a Word document and click at the top of the page where you want to start a new section . Next, click on the Layout tab and select Breaks below. You will now see different page break options under Section Breaks.
You choose Next Page or Continuous to break the page, for example the tutorial chooses Continuous.
Step 2:
Next we need to unlink the header and footer from the two sections that were made separate.
Click the header or footer area in the new section you have broken . Next, click Insert and then select the footer or page style you want to insert as required.
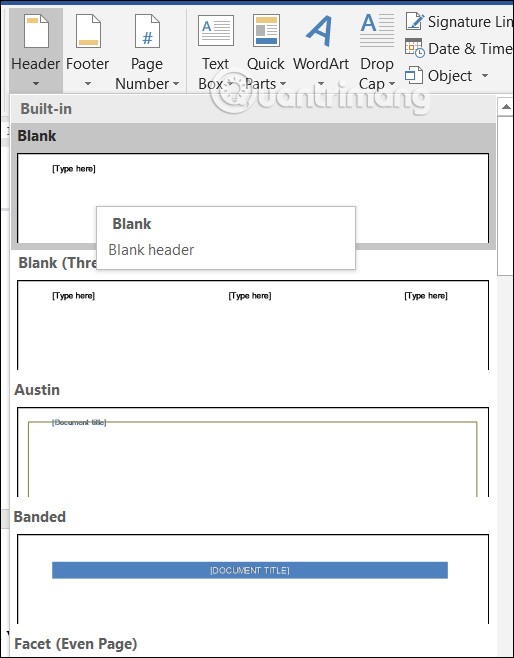
Then click on Link to Previous to turn off the gray .
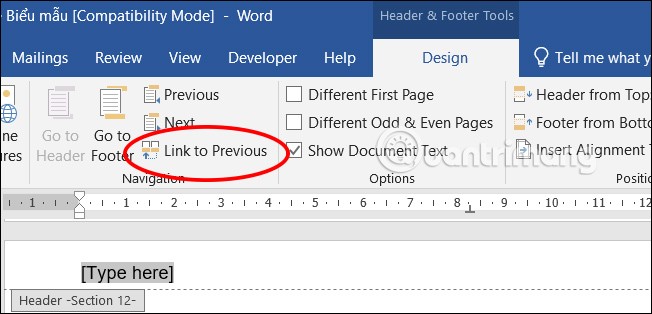
Step 3:
Now you just need to enter the content for the Header or Footer for each section that you have separated.
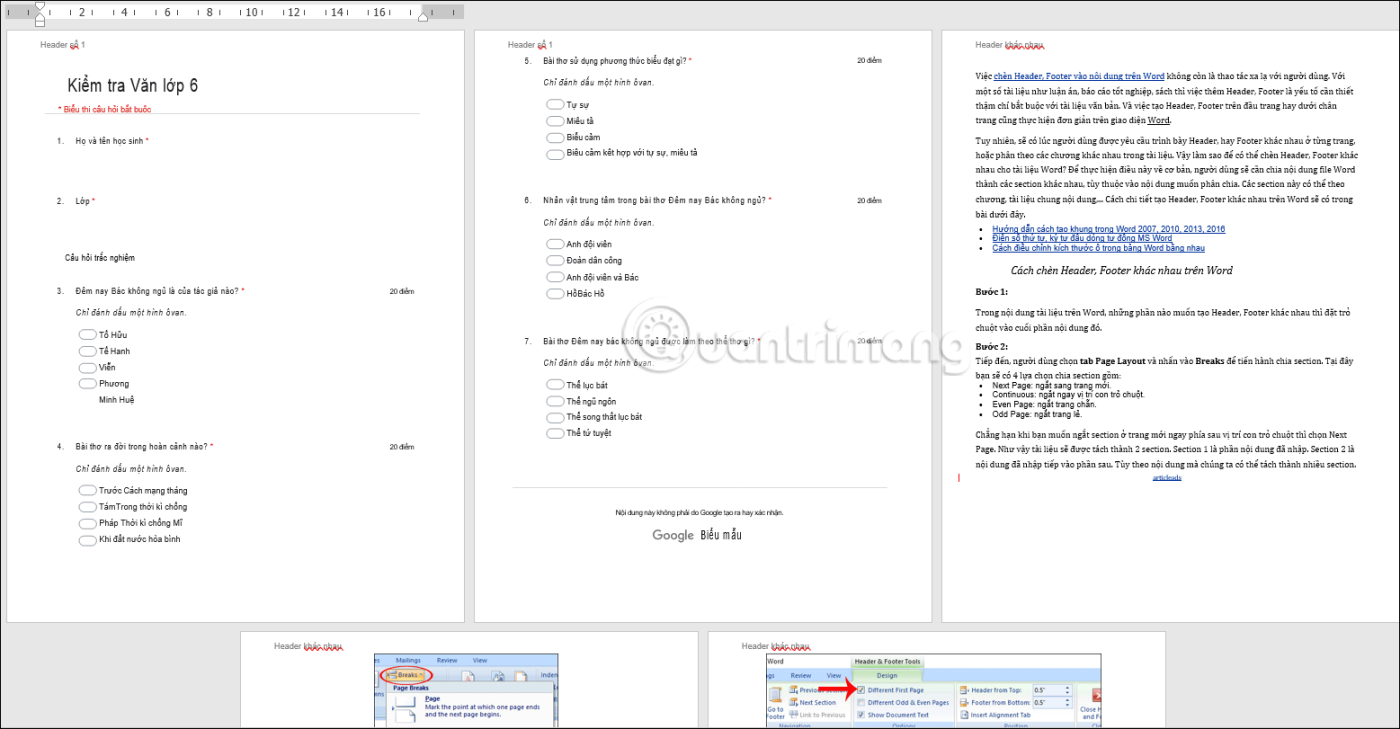
As a result, we will see that the first 2 pages share the same Header, starting from the 3rd page and the following pages of the same section share the same Header.
How to insert different Headers and Footers on Word 2007
Step 1:
In the Word document content, for the parts you want to create different Headers and Footers, place the mouse cursor at the end of that content section.
Step 2:
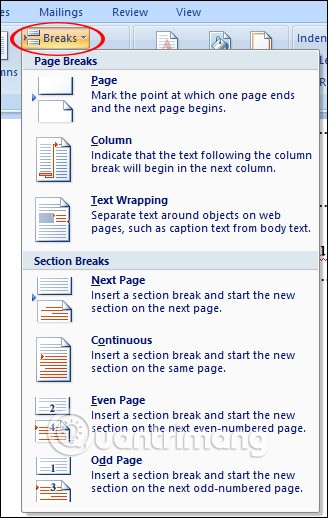
Next, the user selects the Page Layout tab and clicks Breaks to proceed with section division. Here you will have 4 section division options including:
For example, when you want to break a section on a new page right after the mouse cursor, select Next Page. The document will be split into 2 sections. Section 1 is the entered content. Section 2 is the content that is entered into the next section. Depending on the content, we can split it into multiple sections.
Step 3:
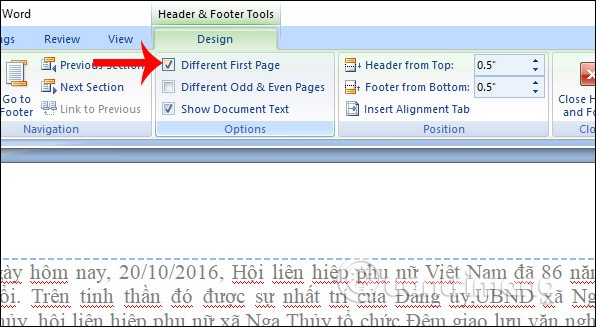
Next, create Header and Footer for each section, we double-click on the Header at the top of any page in section 1. Next, in the Design section of Header & Footer Tools, everyone ticks the Different First Page box in the Options section, then enter the content for the Header of section 1 as desired.
Step 4:
After writing the content for the Header of section 1, click Next to move to the Header of section 2.
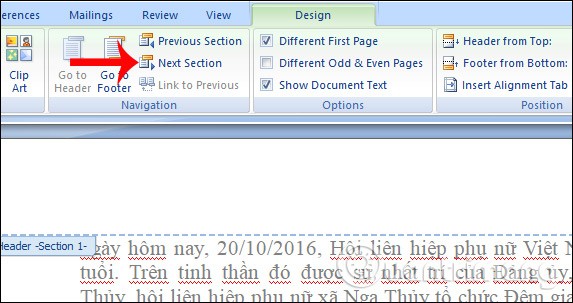
Step 5:
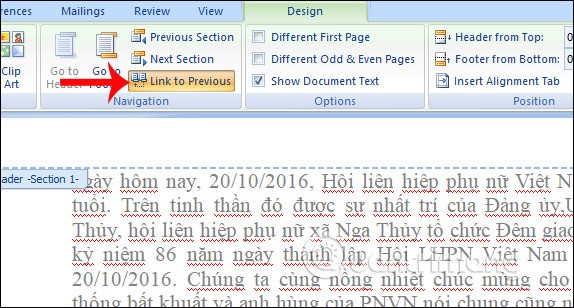
Finally, click Link to Previous so that Header section 2 is not related to Header of section 1, then enter the content for Header 2 of section 2. You just need to double-click anywhere outside the Header to complete.
To create a Footer, users do the same as when creating a Header using the above operations.
Above is how to create different Headers and Footers on Word in a simple and quick way. Instead of using the same Header or Footer, we can change and use Headers or Footers on different pages or chapters. This can help make your document more lively.
Good luck!
iPhone lists the full battery usage of applications, helping you know which applications use a lot of battery on your iPhone.
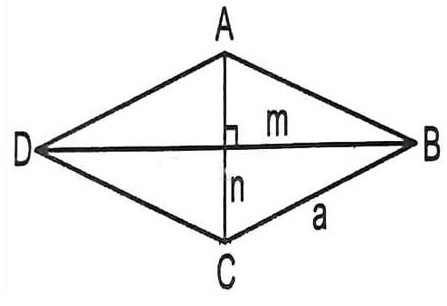
How to calculate the diagonal of a rhombus? Please find the calculation method and examples below to understand the formula for calculating the diagonal of a rhombus.
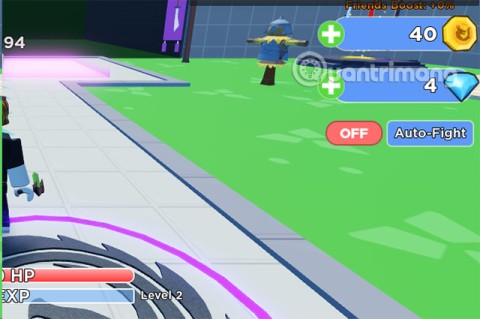
Kill Monsters to Save Princess, one of the longest named games in Roblox or shortened to Save Your Princess.
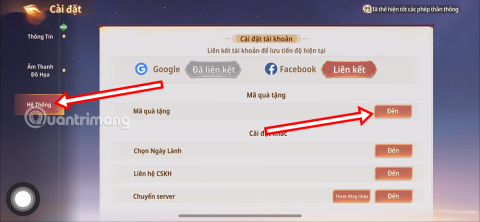
The latest Go Back to the West code will come with attractive items for you to exchange for rewards.
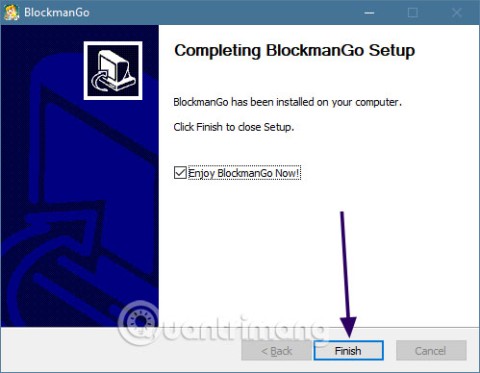
Download Blockman Go on PC to entertain you when your phone capacity is limited and the battery is low while playing.
Your PC ran into a problem and needs to restart and won't start? Here's how to fix it!
Even though the product has only been released for a short time, Nvidia RTX 5080 and RTX 5090 graphics card owners are complaining about a series of problems.
As a long-term support release, Ubuntu 20.04 LTS (Long-Term Support) will be supported with continuous updates for a total of 5 years, meaning it will reach end-of-life around April 2025.
Meow: Sen Oi Dung So gives gamers a series of codes with events for players to participate and receive rewards.
Code Super Snail gives players a series of attractive rewards, we still recommend players to receive rewards from the beginning of the game to make the time when starting the game easier.
Generative Workspace is one of the top AI features announced at Adobe Max 2024. It will be the new home for your Generative AI images and files.
In fact, many people have thought that wifi password is a math problem with a series of formulas that take up several pages of paper and if you are blind in math, then forget it, you will definitely not be able to use wifi.
Insect eggs come in different shapes and colors. You can find brown insect eggs and more.
The winter solstice — the day marking the beginning of winter — occurs on the shortest day and longest night of the year. Here are some interesting facts about the winter solstice that you may not know.
The Coca-Cola logo is iconic on its own. But if you look a little closer, it contains something dear to the heart of the company—a nod to joy.
