All you need is the keyboard you are already using and a device running Windows 10. You don’t need to buy any additional computer keyboards nor do you need special software. Korean keyboard is already included so it’s really easy to setup Korean keyboard language in Windows 10. Install a virtual keyboard on Windows 7/8 Korean
This guide is for Korean keyboard but it works exactly the same for any other language.
If you are inexperienced with typing Korean and have no idea what Korean keyboard layout looks like you may want to get Korean keyboard stickers and apply them to your computer keyboard. Even better would be if you can find time to learn touch typing Korean (typing with all ten fingers without looking). It’s not too complicated and it will increase your speed considerably, which comes in handy when you are practicing Korean vocabulary online or chatting with a Korean friend.
How to add Korean keyboard to Windows 10
1. Easiest way to add Korean keyboard to Windows 10 (and any other keyboard you may need) is to put the new search function to use.
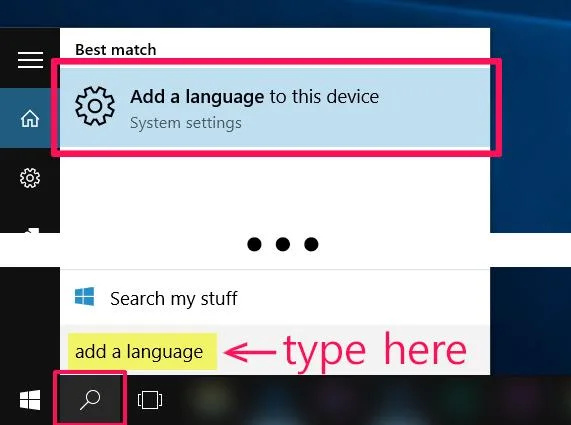
Click on the magnifying glass icon or Search Windows box on the left side of your taskbar. (If you can’t find it, right-click on the taskbar and choose Search -> Show search icon).
Type “add a language” into the search box. Click on the Add a language to this device under System settings marked with a gear icon.
Not working? – If for some reason this doesn’t work for you, or if you are using Windows 10 mobile, scroll down to see how to access keyboard language settings. Otherwise, continue on to 2.
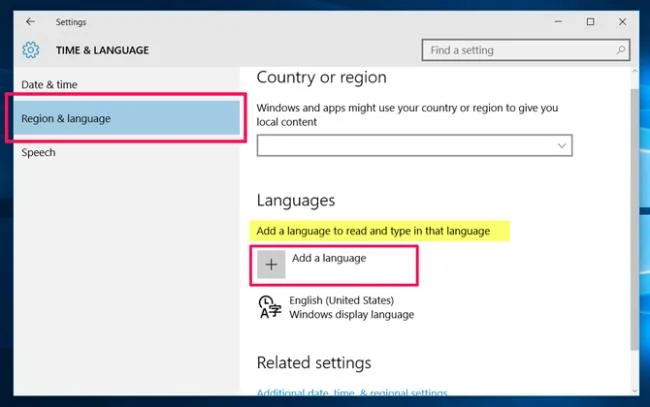
2. Under Region & language tab click the + Add a language.
![]()
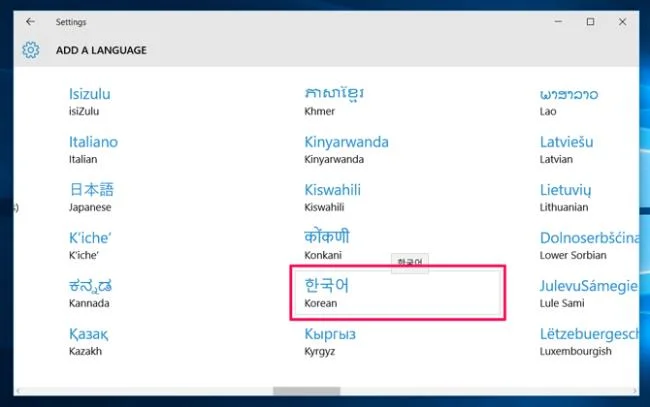
3. In ADD A LANGUAGE settings choose 한국어 Korean or any other language you desire.
![]()
A pop-up should appear with the notification saying “We are adding a new feature to Windows.”. Wait for a bit.
![]()
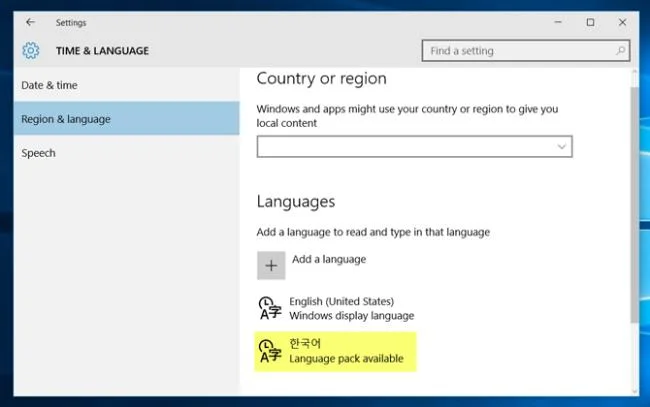
Now Korean (marked as 한국어) will appear among your list of languages.
![]()
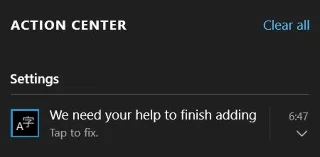
Action center may alert you that you need to take additional actions to finish adding the keyboard.
![]()
This alert prompts you to adjust some settings. Unless you have some specific needs and especially if it’s your first time using Korean keyboard you may just leave everything as it is. Default settings are the most commonly used ones.
If you accidentally click away, or later on want to go back and edit these settings, once again go to Windows search, and there type Manage optional features.
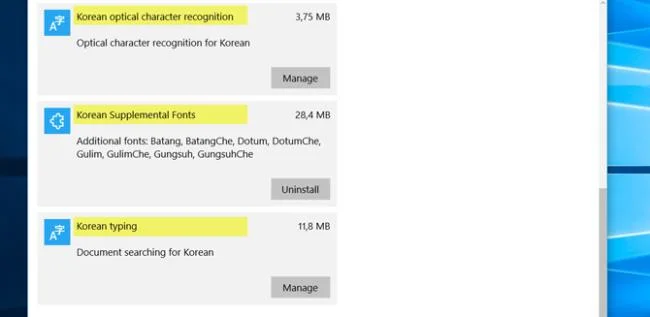
These are the types of options you will have available:
![]()
Installing document searching for Korean is convenient. It enables you to search Korean text within documents you have saved on your device from Windows Explorer. It’s also good to have Korean Supplemental Fonts.
![]()
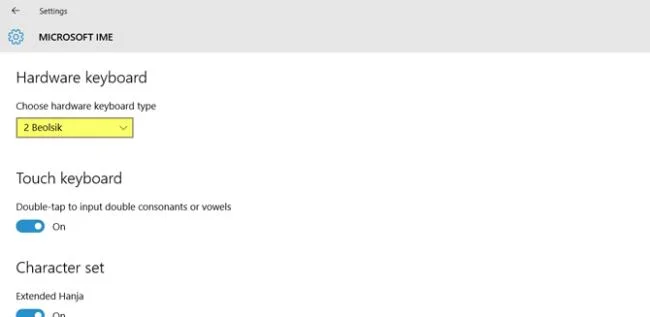
In Microsoft IME options make sure it is set to 2 Beolsik (Dubeolsik, 두벌식; 2-set) While other keyboard layouts may have its advantages, Dubeolsik is the only national standard for Hangul keyboard and has been such for more than 45 years.
How to access keyboard settings on Windows 10
Click on the Windows icon on the taskbar in the lower left corner of the screen. Choose Settings marked with gear icon from the pop-up menu .
![]()
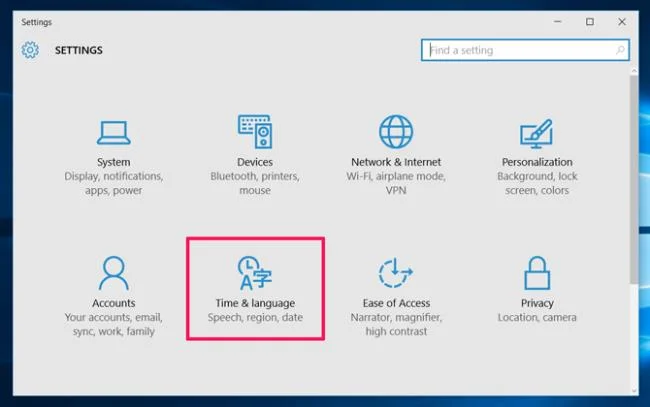
Settings window will appear. Click on the Time & Language.
![]()
You’ve done it! Now go back to step 2 to continue with adding the keyboard.
How to use Korean keyboard on Windows 10
In the Dubeolsik Hangul layout consonants take up the left side of the keyboard and vowels the right. Shift key will give you the double consonants, for example pressing SHIFT + ㄱ yields ㄲ. The right Alt key switches between Hangul and Roman alphabet, and the right Ctrl transforms final syllable you typed into a Hanja character.
If you have any problems or need troubleshooting check Microsoft Windows 10 support. For more detailed explanation how to use Korean Hangul keyboard and an animated gif showing an example how to type Korean word 사랑 go to Type Korean.