Will Apple integrate high blood pressure monitoring feature on Apple Watch by 2025?

Apple Watch is no longer just a smart wearable device and a stylish piece of technology.
Margins in Word have standard sizes according to regulations for Word editors to follow, ensuring that documents are presented according to standard regulations. Especially with types of documents such as textbooks, reference books, manuals, projects, ... that are printed and public, it is very necessary to align margins.
If you are new to Word, you should use the Word margin frame to make it easier to align. After aligning Word to the standard size, the document has a beautiful and professional layout. Below are instructions for aligning Word according to different versions.
Table of Contents
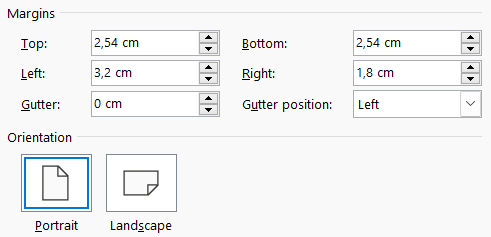
According to regulations, the circular of the Ministry of Home Affairs on the format and technique of presenting administrative documents guides the presentation on A4 paper size (210mmx297mm) or on a pre-printed A5 template, the document is presented along the length of an A4 paper page , with the margins set as:
The interface from Word 2013 to Word 2021 will be different from the interface of Word 2007, so the operation of adjusting margins in a Word page will also be different in some items.
Step 1:
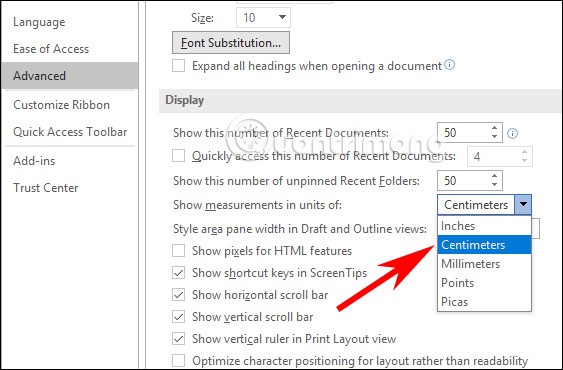
First of all, we need to adjust the margin measurement unit in Word from inches to centimeters. In the Word interface, click on File and select Options .
In the Word setup interface, click on Advanced and then look to the right to find the Display section . Now you will see Show measurements in units of and then change to cm .
Step 2:
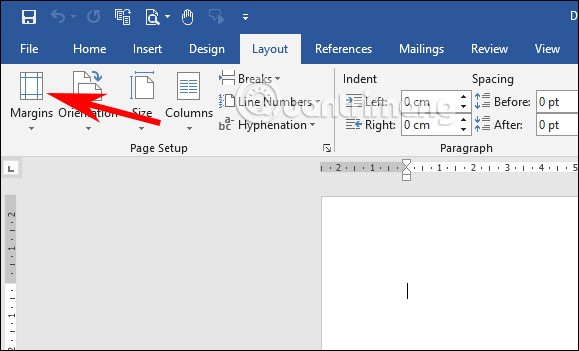
Return to the Word interface, click on the Layout item on the toolbar. Then click on the Margins icon as shown below.
Step 3:
Display the new interface, click on Custom Margins at the bottom of the displayed list to adjust the margins in Word.
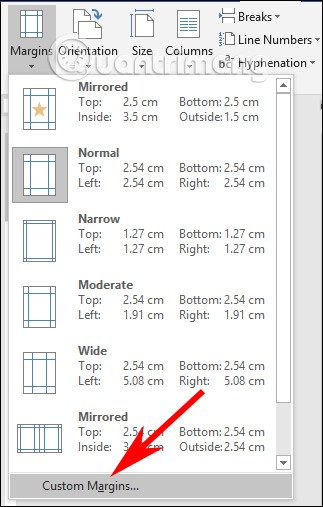
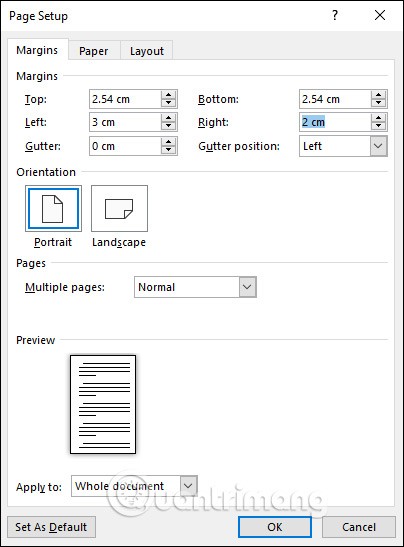
Now display the interface for us to align the margin. You will fill in the standard margin according to the regulations below.
To set this margin size as standard in Word, click Set As Default and then click OK to save and apply the new margin to the current Word document.
Step 4:
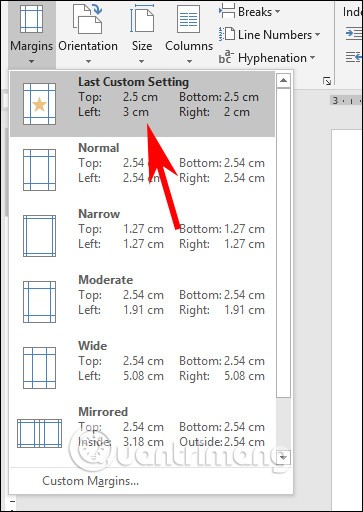
With future Word documents, when you want to change back to the default margin size , click on the Margins item and select Last Custom Settings with the star icon. Immediately after that, the document will automatically change back to the default margin size you selected.
First, you need to change the unit in Word to cm to adjust the margin size. The steps to adjust the unit in Word, you follow the article Instructions on how to change Inch to cm in Word 2007 .
Step 1:
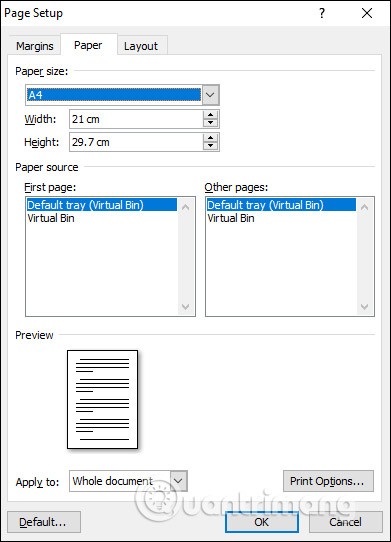
First we will select A4 paper size . Click on the Page Layout or Layout tab and then look down at the Page Setup group , click on the arrow icon to open the setup interface.

Click on Paper , here you choose Paper size as A4 , click OK to save.
Step 2:
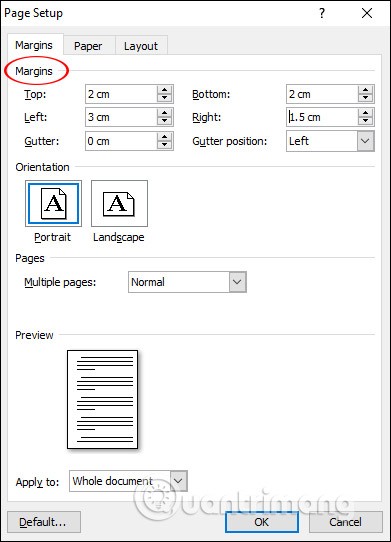
Next, reopen the Page Setup dialog box interface but select the Margins item and adjust the values as follows:
If you want to set this margin size as the standard margin for future documents, click Set As Default.
Finally, we enter the content and format the document. After entering and formatting, click Print > Print Preview to review the text before printing.

Apple Watch is no longer just a smart wearable device and a stylish piece of technology.
Everyone knows there is water in the universe, but you might be surprised to learn that it appeared much earlier than expected, especially near the Big Bang.
3D Universe Web will give you a clearer view of the world outside Earth. The article will collect quality space simulation or space exploration websites from NASA.
PowerPoint also has details for you to illustrate your presentation, such as creating speech bubbles in PowerPoint.
There are many ways to create a line break in Excel, depending on the content and requirements for creating a line break in Excel.
You can use Siri to create text and images using ChatGPT. In particular, ChatGPT is also deeply integrated into Apple Intelligence to provide users with more useful information.
General Motors (GM) seems to be very determined not to let Apple CarPlay appear on its electric vehicles.
You will receive a series of strange beast eggs, immortal jade, and battle talisman tickets through the game code Yeu Thu Van Dao
Anime Last Stand Roblox Codes will give players Emeralds, the essential in-game currency for you to spend on the most necessary things.
Your Smart TV remote is missing again. Maybe it got stuck between cushions, lost in a pile of laundry, or just disappeared. Before you get frustrated, try these simple solutions to control your Smart TV without having to run all over the house.
Your living room is more cluttered than it needs to be. Smart TVs are so advanced these days that a modern TV comes with a whole layer of convenience that you no longer need.
Windows provides a Run as Administrator option that allows users to run applications and programs with administrative privileges. You can also use it to troubleshoot your computer. But what if this feature malfunctions and strips you of your admin rights?
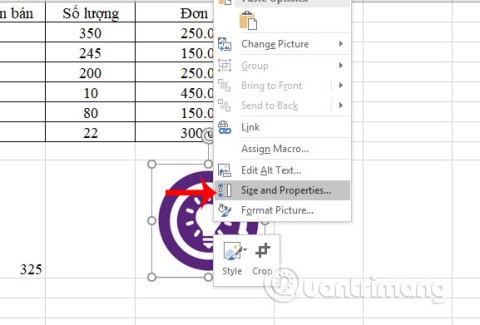
Fixing images in Excel cells helps you easily manage images when inserting images into Excel, the image does not change position or size when processing other content.
In this article, Quantrimang will guide you through some ways to fix the error of Windows computers automatically restarting when pressing the shutdown button.
To really understand whether a VPN is right for you, there’s no better way than to try it out. Install a few clients, connect to the best servers, test your favorite sites, and see how they perform.


