Do you need more color to make your footage more vibrant? Use the color correction tools in DaVinci Resolve now .

DaVinci Resolve is powerful, professional video editing software. Although the free version of DaVinci Resolve has limited tools and resolution, it is still extremely useful for many people. The following article will show you how to import a timeline from another editing system and use the coloring tools in DaVinci Resolve.
Prepare the color layer
When you open DaVinci Resolve, you are greeted with seven processes, represented by icons at the bottom of the window, including:

- Media handles source footage, audio files, or any other elements you need in the timeline.
- Cut is a quick, easy, simplified clip editing process.
- Edit is a standard timeline-based editing system, similar to those in Adobe Premiere Pro and Final Cut Pro.
- Fusion is a node-based compositing tool for VFX and graphics.
- Color color correction and photo fine-tuning.
- Fairlight is an audio mixer.
- Deliver allows you to create complete video files.
For example, in this article we will use Color but need to combine it with Media to find the necessary file source and Edit to adjust their color in the Timeline.
You can set up editing from the start to correct colors in DaVinci Resolve. To do this, you can drag & drop the footage into the Master window in Media or use the File > Import function .
Enter works
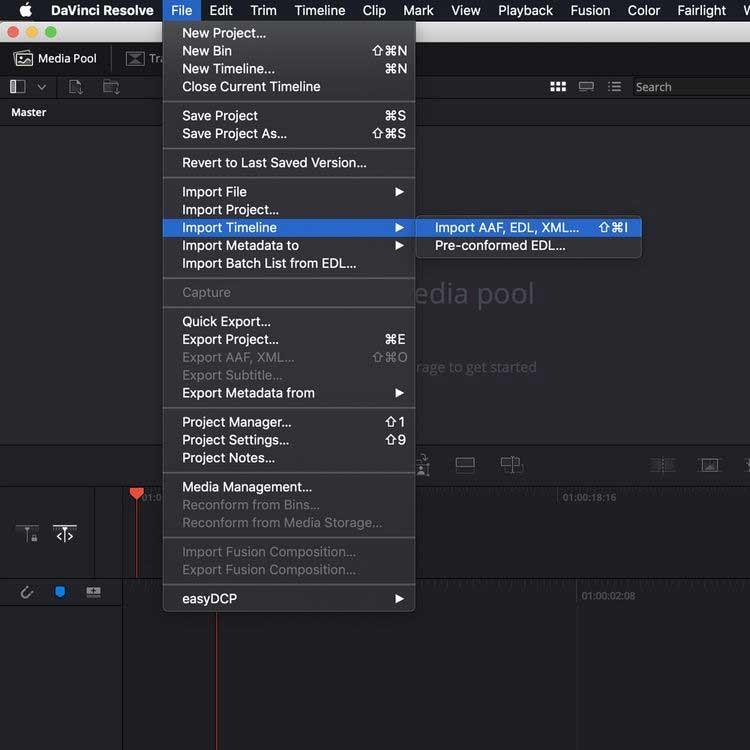
If you plan to use DaVinci Resolve to grade your current work, you can import the timeline from other software as an AAF, EDL, or XML file. In the Media window, go to File > Import Timeline and select the exported timeline file.
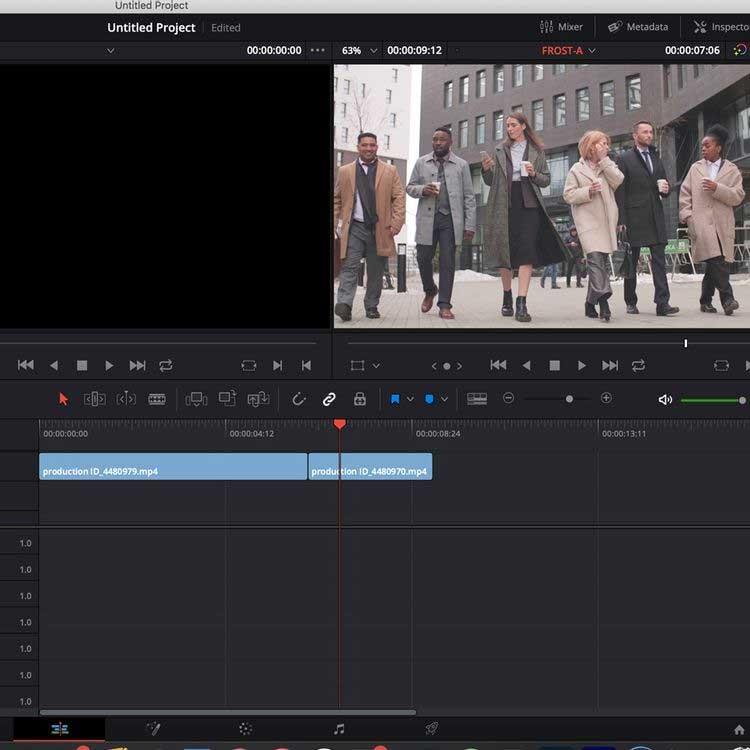
This example imported an XML file from Premiere Pro:

You will now see a window that allows you to adjust project settings. Once you are satisfied with the selection, press the OK button .
If any media is missing, another dialog box will allow you to re-link anything that isn't there.
Then, import the timeline into Resolve . Now it's time for us to use the Color process.
Instructions for using Color in DaVinci Resolve
If you want to practice using DaVinci Resolve but don't have any footage yet, you can check out royalty-free video resources. The article takes an example from the Pexels page.

After importing the footage into the software and in the timeline via the Edit tab , switch to the Color section .
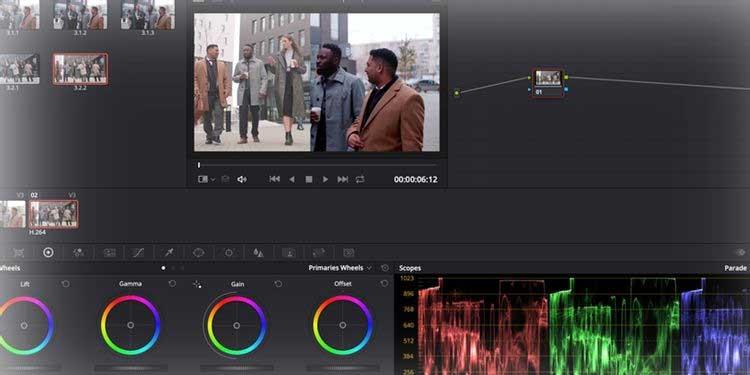
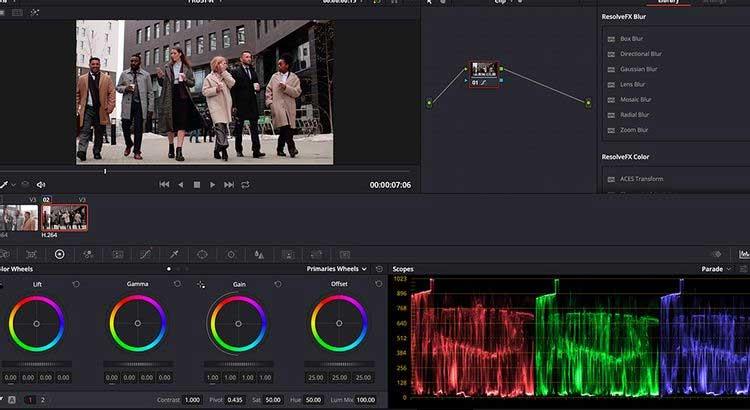
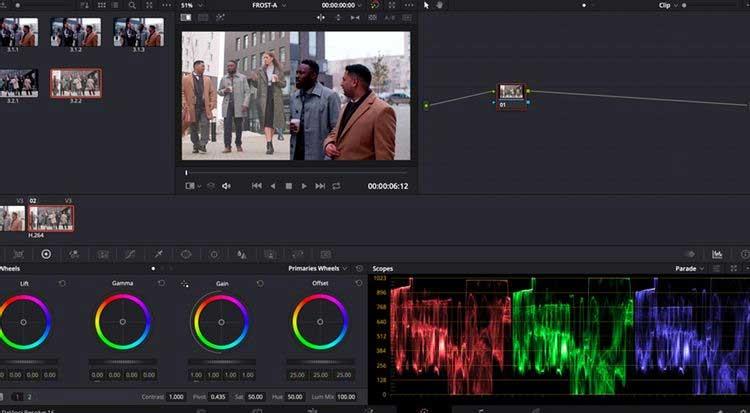
In a standard single-screen layout, DaVinci Resolve divides it into 6 windows: Viewer , Color Timeline , Node system for applying layers and adjustments, Effects window , Scopes & Color Wheels .
Scopes , these graph-like panels located at the bottom right corner of the screen, display different color data within the clip, depending on the user's needs.

The table in the image above shows the level of Red , Green or Blue color data in the selected clip. Using Scopes is extremely important when Shot Matching clips.
Color Wheels are on the lower left side of the window, allowing you to adjust the color and brightness levels in your image.
Lift adjusts the color and brightness in the dark tones of the image, while Gamma adjusts the mid-tones, and Gain adjusts the highlights (lighter parts of the image). Offset increases or decreases everything.
Sliders in each wheel adjust the brightness levels in the photo. Clicking & dragging the color wheel allows you to increase or decrease the levels of color data according to the color spectrum in the wheel.
In this article, the image on the left is the original image, the image on the right has been layered. In the original image, the Lift color wheel slider was pulled down to -0.17 to reduce glare in the dark parts of the image, eliminating the milky effect.

The Scopes panel shows that there is a little more red data at the neutral level, so the slider is pulled away from the red area in the color wheel to compensate for this detail.

You can see the adjustments on the wheel are quite small but still make a big difference. Note how the Gamma wheel is skewed away from red and directed toward blue to reduce this color feed.
They are artistic choices and depend on the effect you want to achieve.
You should familiarize yourself with these settings first. Just try different colors and settings to create a key scene that matches the entire clip.
Use nodes to manage color layering
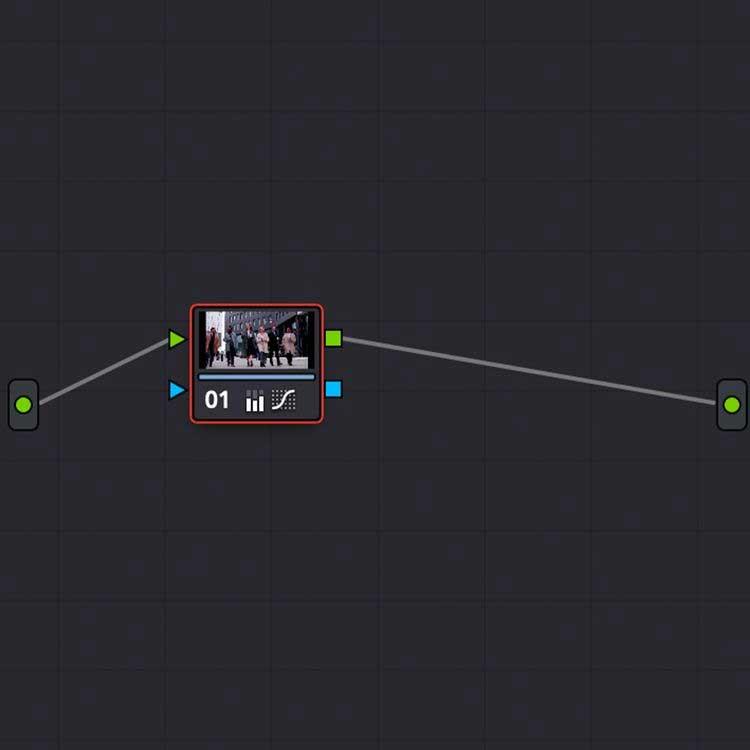
The Node window next to the view task, allows you to manage color layering settings. Here, the entire editing is encapsulated in a single node that you can open/close with Shift + S .

You can add multiple nodes to a clip to adjust color levels, adding additional adjustments modularly. To add a second node, simply use Alt + S in the Node window.
Combine scenes
The scenes in the clip need to be consistent, this is the most important thing. Davinci Resolve offers a variety of clip combining methods, from copying nodes between scenes in the color timeline to using the automatic Shot Match function.
One of the most accurate means of color grading is to combine clips using Scopes and Stills .
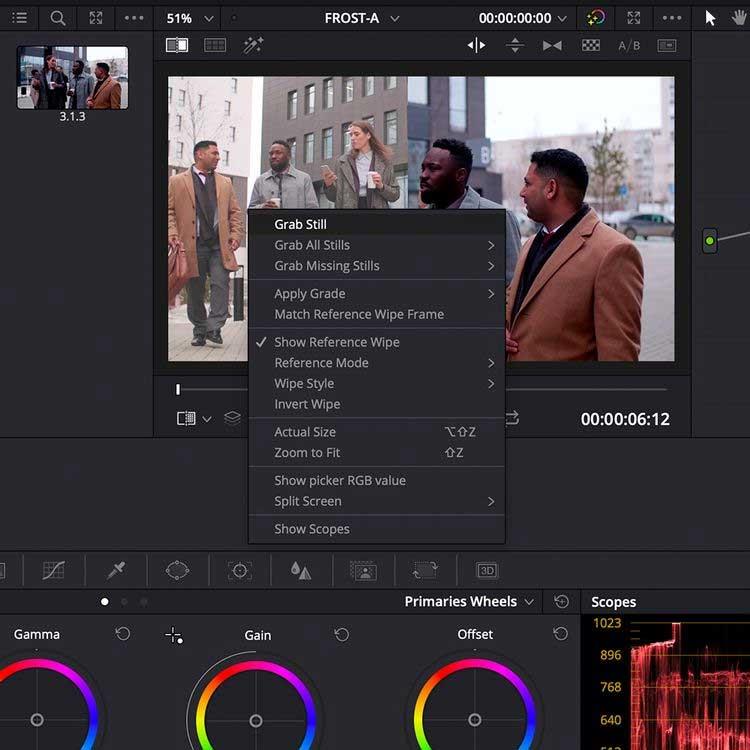
Stills allows you to take screenshots within clips for reference and comparison when layering. Right-click on the viewer, then select Grab Still .

Double-click a still scene in the library to overlay it on the viewer, allowing you to match the image to another clip in the color timeline.
In particular, still image range data is also displayed. Not only can you Shot Match visually, but you can also compare color data in the Scopes window .
As you can see in the image below, the data in the Scopes window matches the split-screen video clip. The range data has more color data in darker tones than the range data on the left.

Using these tools, you can get detailed color correction down to the minute, helping you get the same photos, even if they were shot with different cameras or from different sources around the world.
Once you've color-corrected your clip, you can export the layered footage in the Deliver tab .
Above is how to use the Color tool and its features in Davinci Resolve . If you know anything else about this tool, please share with WebTech360.

